Despite all the variety of finishing materials, offers modern manufacturers, Ceiling tile is still among the best sellers, which largely contributes to its affordability. Repair with its use can be carried out independently, if you know some secrets. One of the fastest and inexpensive ways to fix the ceiling - use a foam or polyurethane tile. How to glue the tiles to the ceiling, see here.
Order of works
To paste over the ceiling tiles, you will need:
Embodiments pattern arrangement

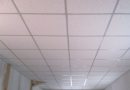
With proper substrate preparation, Ceiling tiles will hold well.
- Before you glue the ceiling tile, necessary to spend certain preparatory work. Surface finish must be flat and smooth. If a significant difference was admitted between the plates builders, the tile will have to create additional rail Styrofoam pieces, otherwise look flat and hung from the ceiling, she just will not. Perfect, if there is no ceiling whitewash, as it greatly simplifies the work. In that case, when there is a thin layer, you can try to do the processing Primers, deep penetration. To do this, evenly distribute it across the surface of the ceiling and wait, when it dries.
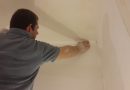
- In that case, when the ceiling several old layers of whitewash, it is necessary to rinse or brush off, otherwise the tile will not keep even the most durable adhesive. For, to rid the ceiling of the old whitewash, it must be well moistened with water. You can use a roller or with a spray bryzgalku. When the surface becomes wet, the whitewash will easily come off a wide spatula. The cleaned surface must also be primed, then you can start to work.
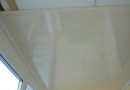
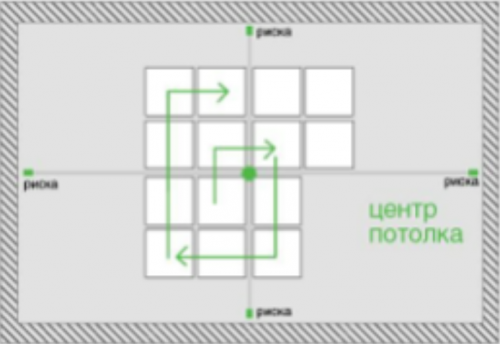
- on instructions, attached to the foam ceiling tiles, written, that it is necessary to glue the center of the room, sketching on the ceiling two perpendicular lines and using the center of the intersection as the location for mounting the first tile. This method allows more evenly distribute the tiles over the entire ceiling area, but is also the most costly, since the tile is a lot of waste.
- A simpler version of the tile distribution is based on the same line, held on the premises of the center of the window to the opposite wall. To tile does not move from the drawn line, You can create additional rib, pasting the first row of tiles close to the rail or bar, the held along the lines drawn by.
- When the preliminary work performed, Take the first tile and put on it the glue in the corners and in the middle. Then press it tightly to the ceiling from one side and the applied line of adhesive areas hold the contact within a few seconds. The best glue, the faster the tiles locks. Do the procedure with the second tile. When operating pay attention to what, that the direction coincides with the tiling pattern and the arrow on its underside.
- Attach these tiles on both sides of the first two guides until, until you finish the first row. Two extreme tiles will have to trim the size of the room, using a writing knife.
- Next row start again from the center line. The mounting area of the chandelier on the tiles will have to make a small cutout, to skip the fixture itself. Continue to work until the end of the room, ceiling tile trim ends mounted on the perimeter of the plastic skirting room. Pokleit tiles on the ceiling is not difficult in principle,, but you need to prilovchilis and everything goes "smoothly".
In addition, watch the video installation foam tiles on the ceiling
Video:
Video:
Video:
Video: