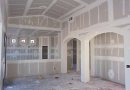
Due to its uniqueness and practicality drywall it has become the most popular means of arrangement of partitions and walls leveling. As a decorative trim does not lose its popularity and paint. And that's why, when it comes to coating of plaster, need to know, how to prepare to paint plasterboard. And there are a number of factors and processes, which must be dismantled.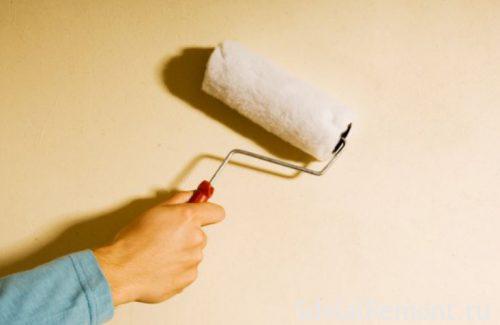
Advantages and disadvantages of materials
The first is to understand, whether it is suitable here for such material, and whether it can be painted. To do this, look at the advantages and disadvantages of drywall:
- The material is quite easy, moreover, easy to install.
- With proper exposure to moisture, it can be bent.
- Easy to process.
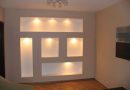
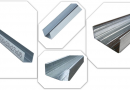
- It allows you to create hollow structures, which are used for the construction of communications.
- The surface is easy to decorating any.
- Material completely harmless and non-flammable.
And now about the shortcomings unwise:
- It does not tolerate exposure to water. In places, where there is a risk of flooding should not be used.
- Subject to the spread of mold, under constant exposure to moisture.
- Must be stored in a dry place.
- You can not hang heavy objects.
- It is not recommended to cover with oil paints.
With this issue sorted out. As can be seen drywall versatile and accepts any decorative coating, the only thing, not recommended the use of oil paints, because on arms would be better to take a water-emulsion composition.
coverage requirements
Now it is necessary to say that, what should be covered and what requirements apply to him, when it comes to painting:
- The base have to be perfectly flat, prevent manifestations of irregularities, that spoil the appearance of the.
- Must be completely absent any cracked or chipped.
- You must be met: primer, putty and sanding.
In some cases, also apply more fiberglass, but it is generally in the regeneration of a high quality coating color.
required tools
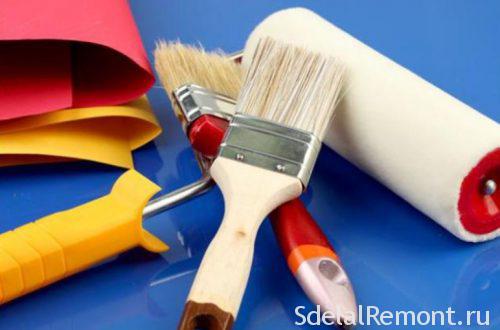
To prepare the drywall to painting you need:
- brush.
- bead.
- Caulking.
- acrylic primer.
- spatulas.
- Tape-serpyanka.
- Sandpaper with grit 80-180.
- Stairs (ladder).
- Lamp.
- respirator.
- sanding board.
milestones
It's time to consider the workflow, in particular the steps of preparation for painting plasterboard. And they can identify only four, namely:
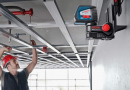
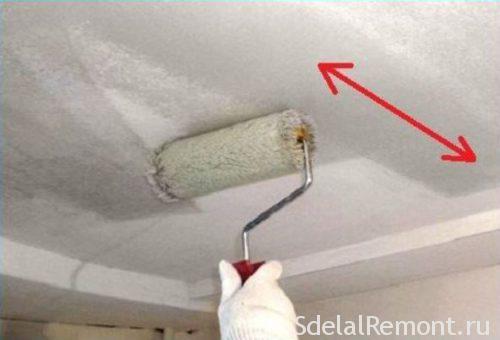
- The first step is to apply drywall acrylic primer. It is applied by brush or roller.
- Now proshpaklyuyte joints drywall sheets themselves. This is a necessary procedure.
- If necessary swipe walls grinding with sandpaper or a special sanding belt. Start the process with a larger skin, gradually moving to a smaller abrasive.
- Next, you need to re-treat the surface of drywall primer. Moreover, the processing should be carried out in two layers.
And now it is necessary to disassemble each of the steps as detailed as possible, for a full understanding of the process.
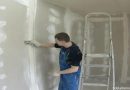
The primer coating
The first step in preparing the drywall to painting becomes a primer. It further helps the paint goes as straight as possible, at the same time significantly reducing its consumption.
In total primer composition is, which further improves the adhesion of the base (adhesion to the surface of other materials). Apply best clean soil without unnecessary additives and solvents. A good option becomes acrylic primer, due to its properties it greatly improves adhesion, moreover protects the surface from moisture.
The process itself is carried out as follows::
- Drywall surface is thoroughly cleaned of debris and dust.
- Then begins the soil application, that is performed by brush and roller.
- Follow the primer evenly, does not apply to brush too much fluid.
- It is desirable to apply several layers in soil.
- For the next step required to wait for the complete drying of the surface.
plaster base
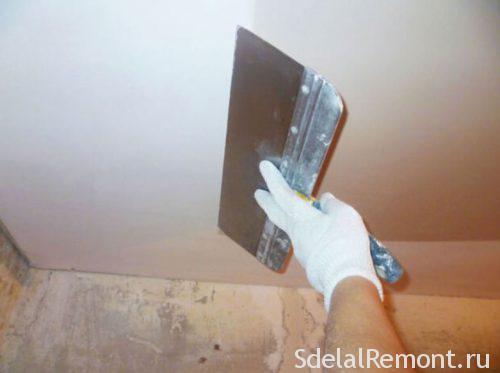
Further preparation of drywall to painting putty surface means. This step allows you to eliminate all cracks and depressions, and conducted sealing seam.
Plaster itself is divided into two types:
- Start.
- Finishing.
In this case, both options are used. originally, putty seams are sealed Uniflot, then coating the finish all.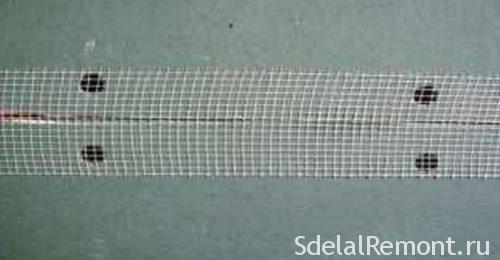
In some cases, require the use of ready-made acrylic putty for surfaces , which allows to perform a perfectly flat surface.
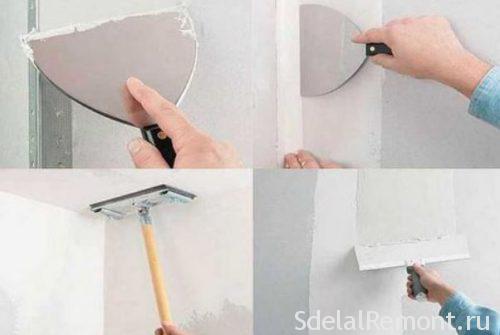
The procedure is useful for the good metal spatula. It is desirable to have different sizes spatulas.
The very process of spackling carried out in several stages:
- The first step is to seal the seams GVL . Apply the first coat of putty using tape, that settling for composition at the seams.
- After its drying, apply the next layer (finishing).
- It is important to carefully carry out all the work and do everything possible accurately, because of caulking is more dependent entire output of.
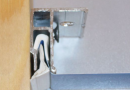
- before, you move on to the next step putty check whether the screws do not protrude into the attachment points. To do this, you can spend a spatula on the surface, it should slide as smoothly as possible.
- If necessary, then tighten the screws.
- After the joints are completely dry, continue plastering work, aligning the solution all the bumps and place mounting plates with screws. For this purpose, already finishing putty, which is applied a layer of one millimeter (some special ready compositions provide for lower layer).
For more information on process putty can be found in a separate article.
Sanding surface
After that, as a filler is formed and dried coating, It comes time to polish the surface. The walls must be made perfectly smooth, which it is very important for coloring.
At work it is important to use a respirator, because it will be a lot of dust, harmful to the lungs.
Directly surface grinding process itself is carried out as follows::
- Take the grinding timber, and begin to remove the excess putty in a circular motion, that will help get the most even coverage.
- It is recommended for the use side lamp, thus will be visible all the bumps, to be addressed.
- In this way, performing a spiral movement continue to work until the surface is smooth.
- Check the evenness is quite simple, at the side towards the lamp, when, when there are irregularities, they provide shade from light. Because it is necessary to continue to work until, until all the shadows will not go away.
- You should not get carried away too grouting, important not to damage the coating sheets of drywall.
- The end result, you have to get a perfectly flat surface.
In this grinding is over, and you can move to the final stage of preparation for painting drywall.
The finish surface primer
After that, as the work of putty and sanding are completed, must be applied to layer primer. The process itself is carried out in the same way, as well as before starting work,, It should take into account only a few features:
- The surface of the paper layer should be well impregnated primer, because the composition is applied in 2-3 layer.
- This step should be done very carefully, to paint well lay on the surface.
- Ceilings should be primed against the light.
- After complete drying of the paint coating can be applied.
In this major work in preparation come to an end, but nonetheless, we want to give you some tips on how, how to paint without glare.
Useful tips and tricks
It is very important to pay attention to the following factors:
- Close to the color zones should okleit corners, baseboards and other areas, you do not want to paint the paper tape. This step will allow the most carefully perform the work.
- Do not use tape, for protection of a relief surface, because the paint can zatech under it and ruin the appearance of the coating.
- Before starting work, you must completely remove all the switches, rosette with the walls, which is planned to be painted.
- Also cover the floor of newspapers or film, so as not to smear it with the.
- those items, which can not be removed from the room (furniture, doors, window) cover film or other protective material.
- Be prepared to provide all the tools, it is desirable to place them on hand, or in the center of the room.
- Perform all work in one go and dilute the paint in a large container, which will last for the entire area. This is done to create the same shade, because if you do it step by step, then there is a big risk, that the shades on the wall will be different.
conclusion
Since coloring of walls and ceiling quite popular, and the preparation to the walls of plasterboard coloring It is also an important process. And now you know all its nuances. We also recommend you to get acquainted with the painting of wall material, And finally see some videos about, as the base to prepare a paintable.