For many years, tile is a leader in the market of finishing materials, especially when it comes to the bathroom or toilet. And many want Tutor finish, without attracting professionals, which can significantly save. But for the work you need to know, how to put the tiles on the floor.
Thanks to new materials, this task becomes easier and easier, and only following the laying technology can independently perform all the work. Let's examine the characteristics of each of the stages of laying.
surface preparation
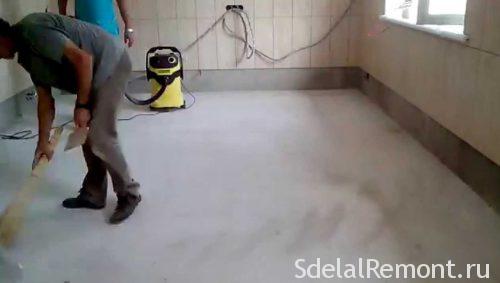
The first step is to prepare the subfloor. Directly on surface quality and will depend on the fate of our tiles. In particular, performance and aesthetic qualities.
Concrete and JB. floors
to prepare the base of several events may differ depending on the material, from which it is made. Usually its role can be a timber, concrete or reinforced concrete.
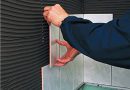
Considering the embodiment with concrete or reinforced concrete base, if there is such a need, the alignment is performed. It satisfies Cement-sand screed.
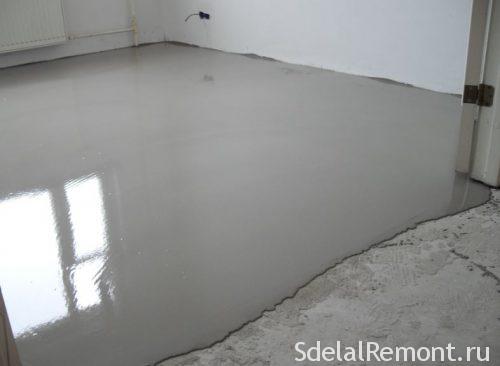
Also an important point becomes more floor waterproofing, since the majority of ceramic flooring unit is held in areas of high humidity. For insulation commonly used special mastic or paint materials (some of them). They have been applied to the primed surface necessarily.
wooden base
With respect to the wooden floor training is carried out differently in some cases,. Variants as screeds, and sheets of OSB flooring.
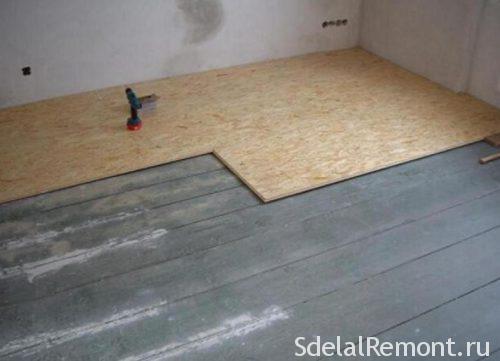
Wherein, examining any of the base preparation variants under floor installation of ceramic tiles is verified first of all strength of the coating. To do this, check the position of the lag, and then subjected to heat floors, sound and waterproofing.
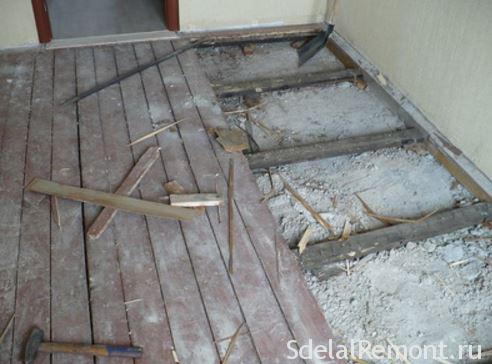
Between themselves lags space is filled with expanded clay, after which the boards are installed.
In total, surface preparation can be performed in several ways:
- The first is the installation of waterproofing, which provides a metal mesh. Then performed a cement-sand screed.
- The second embodiment becomes strengthening using special glue mixture COP.
- And the final blow to the prepared waterproofing cement slabs struzhastyh, plywood or gypsum fiber sheets (materials must necessarily be water-resistant).
Learn more about the new floor leveling technology dry screed.
masonry options
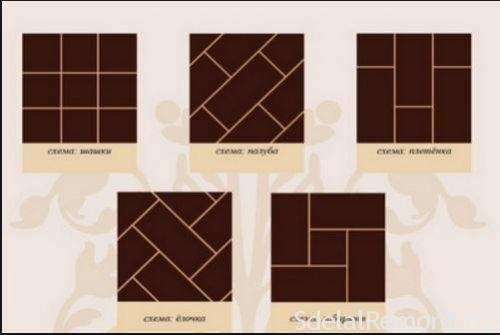
Among the standard options, which are used most frequently observed two types of, In particular:
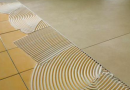
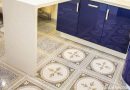
- Laying the tiles in rows. Performed in several variants. Smooth, the interface of the "seam in seam", in Extension.
- Another popular option becomes stacking diagonally.
For more information on ways of tiling can be read in a separate article on the website.
And now proceed directly to the works, or rather, to the processes, which will be executed after the establishment of training and look at ways of laying floors.
Perform the floor layout
The next step, which means the device of floors of ceramic tiles, marking the surface becomes.
To begin, it is best to perform the approximate (the sketch) marks on a sheet of paper, or on a computer. This little preparation will help to calculate the number of tiles needed to carry out works online calculator.
Further, completely eliminate all possible projections, which may interfere with stacking, in particular schools doorways, pogozhki and plinth. Further markings itself is carried on the surface.
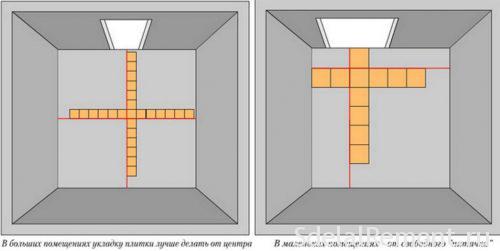
- First necessary to accurately measure the length of the wall, and mark their center points.
- The next step is to use the cord markings. Rub it with chalk, then stretch the walls between centers, from point to point. Omit to the floor, the result is two centerlines, and which will form the basis for marking.
- note, that the choice of the method of laying floors diagonal, you must also perform and diagonal markings.
- All lines, must necessarily intersect at a single point, This would indicate that, everything is correct.
Also note the fact, the tiles on the floor device, originally anticipated, rough layout. ie. all the material is placed on the circuit without glue mixture. Such verification can detect possible discrepancies in the distribution and layout.
If any drawbacks and inaccuracies are no, it is possible to proceed directly to the masonry itself.
The technology of self-laying tile
First thing, before, how to put a tile need to prepare the adhesive mixture. This is done based on the recommendations on the package, for each individual adhesive process (at least with regard to the proportions).
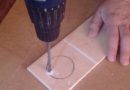
In the case of the dry mixture, pour water into the vessel, then gently fall asleep very composition. Next, begin to stir it until smooth. It is desirable to do this by using a special nozzle-Miksira drill.
Note also that, that the solution itself should get semi. It is very important, because it is too dry mix dries quickly, resulting in surface cracking.
And go directly to the, how to put a floor tile. To analyze this step by step algorithm:
- Initially laying starts from the corner, opposite the door.
- Originally envisaged laying whole tiles, of course, if not inconsistent with the pattern integrity.
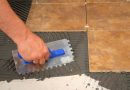
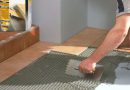
- On the floor surface applied adhesive, wherein, the total area of application should not exceed square meter, otherwise the adhesive can more quickly grab, what is laid tile. It is best to cover the area with a solution of the size of one tile.
- Then the adhesive mixture is carried out leveling with a notched trowel.

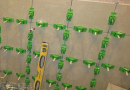
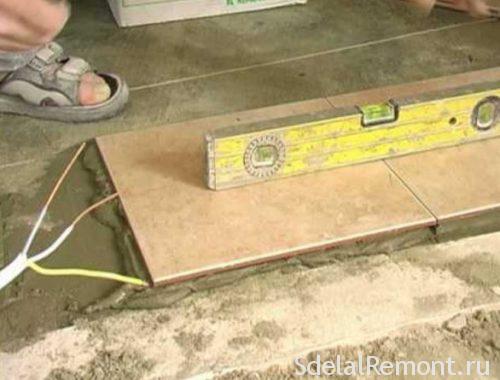
- Further itself starting directly laying. To start a tile falls. It held its alignment and checking the level of location.
- The next step is placed second tile, which is also aligned and adjusted to the level of the first.
- In a second position above the first tile piece, it is necessary to press down until, until released extra layer solution, which must be removed immediately. When placing them on a level, should be added the right amount of glue mixture.
- To put the tiles yourself, you must also provide and dividing crosses, to form seams of equal size.
- Likewise continues laying. In particular, by the algorithm "gluing => styling => Checking => align => removing excess glue mixture ".
- The last performed the circumcision styling elements, since it is with them usually have problems and need to adjust. And you can spend it all during 15-20 minutes, depending on the type of adhesive. Sometimes this figure may be more than.
- She finished packing, at this stage it is necessary only on the following day to remove the crosses, and carry out grouting, which is preferably carried out by 36 hours. Here also it depends on the type of adhesive and its characteristics.
In turn to the question of how to put the tiles need to come pretty neat. by the way, for those, who are looking for a way how to quickly put the tiles on the floor, We recommend that you read means for laying flooring.
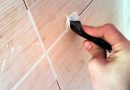
Zatirka
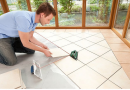
And the last aspect of the question of, how to put a tile becomes grouting, the amount of which can be Online calculator to calculate the.
The process itself involves a Grouting special compound. For the most part he is chosen directly under the tile itself. More details can be found in the article "How to choose a grout for a tile».
Proceed directly to the algorithm of actions:
- First necessary to prepare the solution himself. Is diluted with water, he, ratio of four shares of water to one part of the composition.
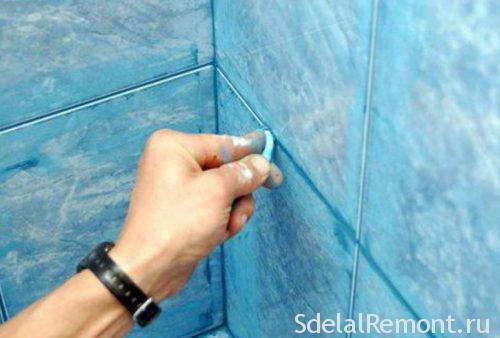
- Further, with a rubber spatula is held grout. Very important, it is necessary to use the rubber tool, for avoiding damage to the surface.
- Filling is carried out gradually, top down, thus overwritten all seams on the surface.
- After drying, it is necessary to remove all traces of grout on the tile, what is being done with a sponge.
- Also, after 40-50 minutes after the cleaning, the surface should be wiped with flannel cloth.
- The last step is the treatment of joints protective structures, which will protect them from moisture penetration, fungus formation, etc..
note, that the composition of some of the grout, quite expensive, protective compounds already exist in the mixture itself, and therefore no further processing is required.
conclusion
On this question of, how to put a ceramic tile can be considered closed. work completed, fully exploit the floor can already later 12 hours after grouting, but the best, leave room for a day or two, for the full assurance, that the adhesive dries evenly.
And finally,, more clearly how, how to put a floor tile described in the following videos, recommended for viewing.