Not everyone can be trusted skilled such heavy work, like laying tile on an apron. At the same time it would be better to do it yourself, that will be safer (of course, not storm into account the hiring of highly qualified specialists, that the cost of services will be several times higher, than the price of materials). And here the main point is to study the works of technology.

In this way, fulfilling all following the instructions of our experts, You might even be surprised, how easy it. Read more, how to arrange a beautiful kitchen apron.
Dimensions and calculation of material
first, what to do, when affected by tiling on apron, This is defined with dimensions. Subsequently the, proceeding from them to correctly calculate the required amount of materials. In this case, for the landmark, you can take the default settings, which have been used for decades:
- Working zone typically operate in size 50-70 centimeters up on the level countertop. Wherein, in some cases, work begins not on the countertop, but directly from the floor, what affect personal preferences, as well as the location of the bollards.
- When laying the tiles must be provided at least overlap the countertop coating 2-3 cm.
- Considering the upper portion, It should be noted, that the stacking is carried out up to the hood (which installation is provided at the height of 65-70 centimeters from the plate.
- Usually styling is carried over the entire length of the wall, but in some cases it is possible to take into account only the working area, wash, and a plate.
Own calculations are necessary, because without them it is impossible to predict how much material is needed. In this way, to conduct them must be defined with one apron, which will be laid.
Among all kinds of, perhaps, select the most common:
- Base, or standard.
- With imitation masonry.
- Diagonal.
The simplest becomes the base. In addition, it is more economical, as it reduces the amount of material.
Important! Do not forget about, that no one is immune from mistakes, and sometimes there is material damage. It is therefore necessary to provide for a minimum reserve in 10 percent.
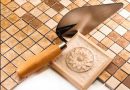
Tools and materials
We must now consider what tools and materials are needed, to put a tile apron in the kitchen with his hands.
- This is primarily the punch, which will be used for the dismantling of the old coating.
- The next tool will screwdriver, in combination with a special nozzle - construction mixer.
- Next it is also worth noting tank, in particular, a bucket for water and glue mixture.
- To work with the tiles need a set of spatulas. For a set of adhesive - narrow. For application and leveling - gear, rubber - and for the application of grout.
- As known, Tiles must be laid perfectly flat, and therefore useful plummet and building level (preferably several, small and large).
- Also useful and Tile, or, as an alternative - Bulgarian.
- styling, check fit and recuperate tiles will need a rubber mallet or hammer.
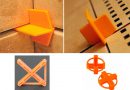
- For the formation of sutures necessary crosses and stakes.
- Pencil, and the line for marking surfaces.
- Cord.
- And of course the main materials, such as primer, glue, grout and tile.
The list can be completed, of course, subject to availability, additionally possible to apply laser levels, means for stacking and other innovative contemporary helpers. But we are considering laying in a budget option, you can afford each.
Substrate preparation
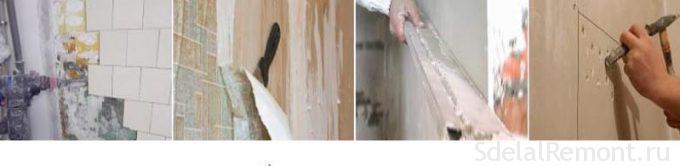
After that, instrument has been prepared, time to start cleansing base, which will be held on tiling in the kitchen apron.
In preparation is mandatory, the following processes:
- Qualitative dismantle the old coating and its treatment. When, when it was previously laid tile, You need a hammer. In another form may need finishing trowel or special solutions. In total, purification is carried out up to the plaster (in its absence to the base wall).
- Further, the presence of plaster it is necessary to check for fit. If there are any loose items, they should be removed, then to cover all the irregularities.
- To move the tiles on the other wall becomes a major factor creating perfectly smooth angle.
- Also, it is recommended to perform a notch in the wall, for better adhesion of the adhesive mixture.
- Next, the surface of undercoat is carried out, at least 2-3 layer.
Also, worth mentioning, that in the presence of the fungus on the wall, mold or other lesions it is certainly worth a treat with anticorrosive.
Self-styling apron
And finally we come to the work itself. Next will be considered technology laying tiles on wallsin, which will help you do the job yourself.
Consider the steps, how to put the tiles on the apron.
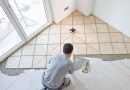
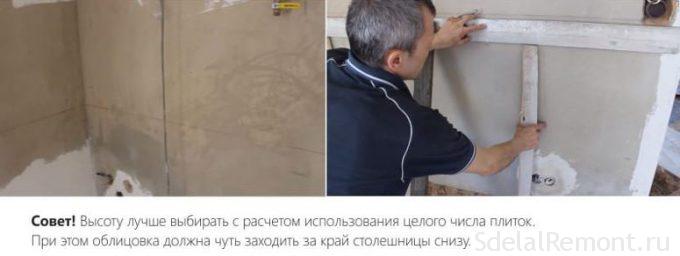
Step 1. marking
Initially a self-marking surface. Depending on additional fittings dimensions determined size apron, its width and height. The majority of the distance from the floor to the lower edge of the same 70-80 centimeters, while its height reaches 55-65 cm.
During the markup is important to determine which side will start stacking. From the center to the edges, or from some of the edges. It is important to understand, that at the beginning of the center, if the size of the room does not fit perfectly under the tile size, the need to equip the edges of the cut pieces. At the same time, if you start from the edge, the cut piece will be only one, and it will be possible to disguise.
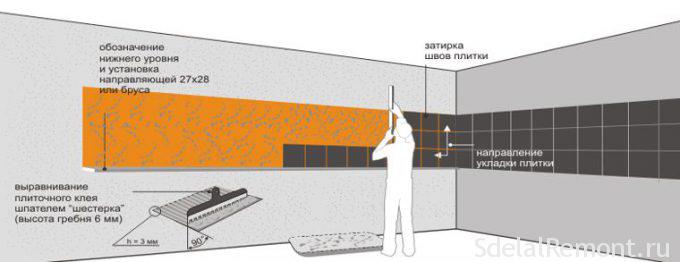
Further, the level of the wooden beam is mounted at the correct height. It will serve as a support for the first row of tiles. In some cases, metal profiles serve as such a bar, or plasterboard.
And the second marking becomes vertical, for which is fixed at the top of the walls plummet, which falls to the bottom. This creates a perfect vertical plane.
Step 2. Preparation of the solution
After that, was performed as markup can proceed to the next step. Preparing a mixture of them is for styling. It is also necessary to pay special attention, because when the wrong composition of preparation, coating quickly deformed and destroyed all.
Usually, Instructions on the preparation is available on the packaging with the product. Kneading is worth no more than 50-50 minutes of, since then the glue starts to dry and no longer fit, because you will lose driving characteristics.
Also, Pay attention to the working time of the adhesive, which should be indicated on the packaging. This figure means, how long it can be used after mixing.
A common question and it becomes, a tile adhesive in the kitchen to choose. And here it may be noted, that there is a big difference, except, that tile will be affected by high temperatures, and may need special composition. But this happens only in the case, when stacking is performed on the stone ovens.
Step 3. Mounting apron
And now you can immediately begin work on laying. For, to properly put the tiles in the kitchen apron, you must use the correct stacking order.
While we pay attention to selected tile size, and note, that the more material, the easier it is to work with him, and in addition, it requires less maintenance. At the same time, the smaller the tiles, the greater the need to provide seams. This will result in more time spent, and in addition will make installation more difficult.
The work itself is performed in the following sequence:
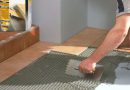
- The first wall is applied to the adhesive mixture (distributed over such area, which will be processed in the next 20-30 minutes). After that, the base is leveled evenly with a notched trowel. Thus, on the wall, you will see an even layer of glue mixture, has on itself grooves.
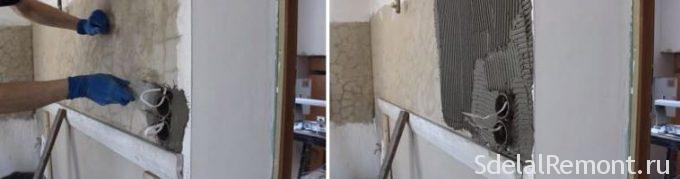
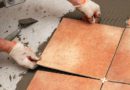
- The next step, also, the adhesive is applied on the tiles, with the direction of the furrows exactly perpendicular to the direction of the wall.
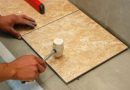
- Further tile is pressed to the substrate and using a hammer or mallet adhesive shrinks, possible against the wall. When you start from the edge, once installed aluminum corner.
- Now you need to check horizontal position of the tiles, what is done with the help of a spirit level and plumb equals.

- If when laying something was done wrong, the tiles can be removed and adjust its position by adding the adhesive or remove the excess.
- After the first tile continues subsequent gluing of the same technology, equaling the first. In this specific crosses are used to create a uniform seams.
- The next series must be installed after, the first is dry, it's desirable, for this, give him a day. Since the number of the most responsible, it is better not to rush time.
Step 4. Cutting and styling
The next step is the implementation of cutting tiles, and then stacking the missing pieces. To ensure proper cut, are measured with a ruler the necessary values, and on the back of the tile is marked with a pencil line, on which to perform cutting.
Thus it is possible to cut out a fragment of any size, and also to provide additional recesses tiles under the communication system.

An important factor is the cutting from the back side, since the cutting face of the tiles may crack in the wrong place, where it is needed. Well it applies to openings.
Also, for drying tiles coating must be checked on the absence of voids, which are expressed thud, at postukyvanyy. In the presence of such, tile in these places must be removed, and paste again.
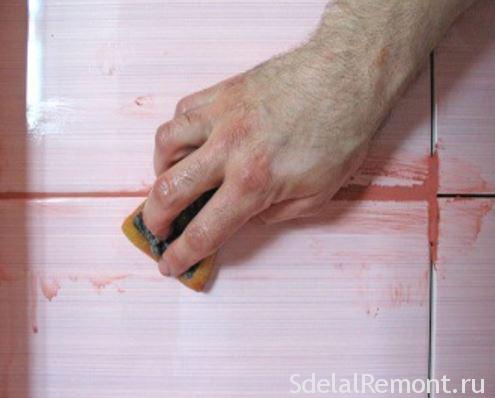
Step 5. Zatirka
And the last stage, when all errors are eliminated stacking, you can with a clear conscience to start grouting.
It is also important to start treatment to wash the entire surface of the tile from dirt and dust, which could settle during cutting.
The very same grout rubbed into the joint with a rubber spatula, then, an hour later leveled and wiped with a damp cloth.
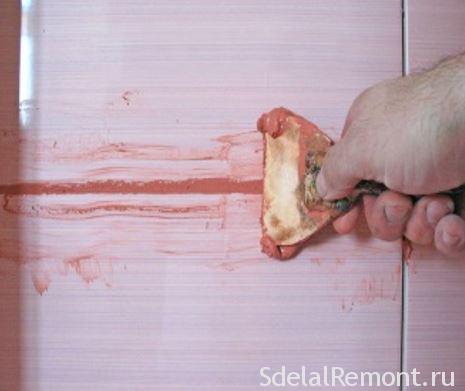
It is important not to forget about the selection of grouting, its shade should blend in with the overall theme load space. For more information on choosing can be found in a separate article on the grout.
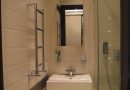
conclusion
And that's all the work completed, After another day you can start active operation cover. As you can see, the work is not so difficult. Just a little insight into the process, and everything goes "smoothly". And in the end, We offer a look at some videos about, How is the tiling on the apron.