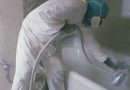
After completing repairs in the bathroom and installation of all plumbing devices, new bath is necessary to close the screen. This work is simple and accessible to almost everyone. To avoid unnecessary expenditure on professional challenge, Read our guidelines for screen manufacture of plasterboard with their hands.
This screen design - team, so, we must begin with the frame. For its production need segments wooden beams, 40×40, fasteners, consisting of screws and metal parts. The bars must be put to the corners of baths and attached with screws to the wall.
Making the screen under the bath of plasterboard.
Take a screen in several stages.
1 stage
You must start with the markup.

2 stage
On the wall mark the line, it should pass from one of the corners of the bath to the floor.

3 stage
On distance 2,5 cm from the line drawn by draw a new line, parallel to the original. The new line should be turned into bathroom. With a plumb line to the corner of the bathroom vystupayuschive, We note on the floor point.

4 stage
From this point on the floor it is necessary to draw a square, inwardly bath. Size of the square 2,5 on 2,5 cm.

5 stage
From the angle facing in the bath, painted on the floor of the square , the direction of the lines on the walls are held on the same line.

6 stage
Now you need to prepare for the frame bars, of prepared for that timber. The bars should be in the following sizes:
- For vertical frame must 4 bar of equal length, equal to the distance from the lower rim to the bathroom floor.
- For short horizontal necessary 2 bar. The length should be equal to the line, painted on the floor parallel to the short side of the bath and minus 80 mm (we need to take into account the double width of the bar).
- For a long horizontal line calculation is similar, but subtract 120 mm, We consider a triple thickness of the bar during the further assembly.
Now we can start the installation itself of the screen under the bath
Putting the frame for the short side of the bath.
Stage 1
take 4 short bar and connect them with metal corners with screws.
Stage 2
In Brusque, which will be necessary to fix the wall, it is necessary to drill two holes.

Stage 3
Now you need to attach the frame to the low side of the wall, while hardware (screws, screws, dowels) must be selected depending on the type of wall(Concrete, brick, block, etc.).
Stage 4
Installation of the long frame is carried out similarly to the previous. Now, with his own hands is necessary to connect the frame to each other with screws and screwdriver.

Helpful hints: To make the design of the screen under the bath of plasterboard greater rigidity is not superfluous to attach it to the bathroom floor.
We produce panels for drywall bath screens

Material, which is required for the manufacture of both screen panels for bath, — plasterboard a moisture resistant properties. Usually, he painted in light green color. Also, we will need a metal latch and padlock hanging loop for attaching the door manhole.
Next, we need to make the marks on the sheet drywall. It is convenient to use directly the large and small panel next screen. Dimensions are small size corresponding (lower) frame, and the second panel is longer than the frame itself to 56 mm, 40 of which - the width of the bar, and more 16 - small thickness drywall panel.
After that, formed as markup, it is necessary to cut off part of the planned building with a sharp knife.

Immediately before installing more panels to the frame itself not forget to make a hole square shape - your inspection hatch. Length, width and location of it will depend on the sizes of ceramic tiles (which will certainly decorate your handmade work). For cutting the hole, you can use an electric jigsaw.
Important: flap should be opposite the discharge pipe and the gangway.
Now we can proceed to the final assembly. To hang on the door hinges and fasten the latch.
gallery of works
Finishing touch: connect the two screen panels of plasterboard under the bath by means of screws. Connect the panel should be strictly at right angles to each other.
And you can now test the screen design for the bathroom of the drywall on the mechanical stability.

To your brand new screen under the bath of plasterboard, made with his own hands he looked original and perfectly combined with design bathroom, you can lining made of ceramic tile. See below for related articles.
Other videos on the topic:
Especially for site Independent repair of apartment from A to Z.