One of the quite popular finishes have recently become textured plaster. And the most interesting thing, that runs textured plaster with your hands just enough. To do this, examine the small technology work, and it is possible to transform the wall covering in a short time by yourself.
Features of the materials used
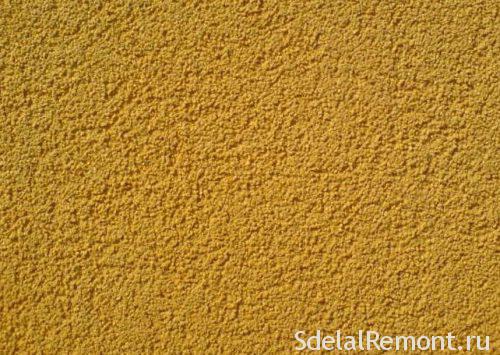
textured plaster, also known is a heterogeneous structural viscous white composition. It consists of special material granules in combination with the binder.
This kind of coverage you can create your own hands a unique surface with a rough texture, moreover additionally provides the ability to control the degree of grit coating.
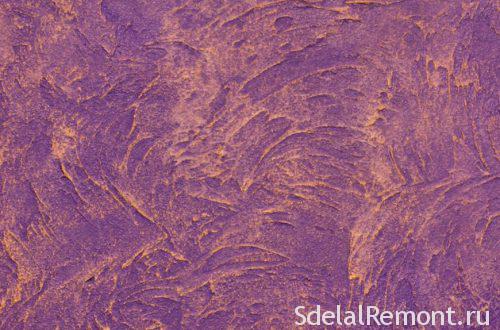
Also worth noting, that coating may be formed of various relief, colors, and even executed as a simulation of natural surfaces (stone, wood or leather).
Only, which can limit the performance of variations, so it's a personal fantasy of, who makes it. There can be unlimited variety of options results, but the technology is always performing, only slightly different tool for giving a textured type.
And you need to pay attention to the characteristics of different formulations, because you need to pick up a special mix for specific operating conditions, namely:
- To perform textured plaster coating is recommended to use the outside with calibrated granules.
- Interior decoration is well satisfied composition of fine granules, or blended variations.
And last, what to look out for, these are the main types of mixtures, which require special treatment for themselves:
- For applying the composition to large granules of filler used grater or trowel. In this plaster is applied not greater thickness, than the thickness of the filler directly.
- Mixed formulations are best applied by roller, or trowel. Thus for coating can be used and spraying technology (It depends on the density).
- Speaking of fine fillers, most of which are based on lime plasters in liquid form, they are applied to the surface using a roller or vacuum.
Types of plaster and its choice
Select textured plaster according to the material, from which the walls of your, as well as the desired design. The material can be applied on practically any surface. but, each type of finishing material has its own characteristics.
Mineral plaster is made of the resin. It is marketed as a dry mixture, which must be diluted with water prior to application on the wall. This type of coating is not flammable and has good vapor permeability.
Silicone plaster is made of silicone resin.

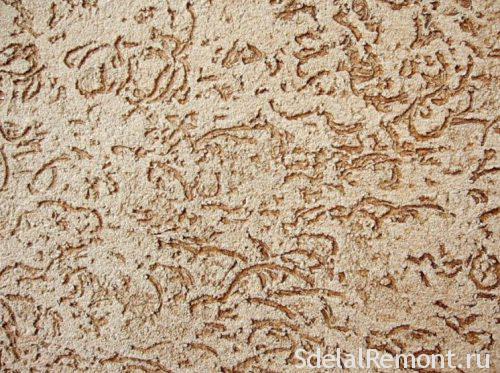
It is sold already ready for use. This finishing material has a water repellent and are recommended for use in all types of mineral bases, as well as existing dispersion coatings. Details of the coating koroed.
silicate plaster, produced entirely on the basis of the "liquid glass", is the most expensive type of coating.
Is sold ready to use. It recommended for use on mineral substrates and silicone coatings. This finishing material can be used in high humidity conditions. The color palette of silicate plasters poorer, than in other species.
Another embodiment of this material is manufactured based on acrylic resins. This plaster is supplied as a water-dispersed mixture of, ready to use. This type of coating requires no additional staining, It dries quickly and is spent sparingly enough.
Read the amount of material, will help Online material flow calculator.
On this particular leave, and it is time to move on to the execution of works.
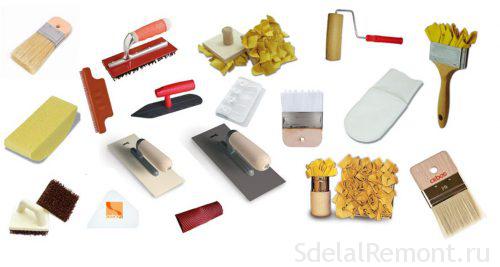
required tools
First, let's consider a tool for work.
To make textured wall you need:
- spatulas of various sizes;
- trowel;
- tuples;
- container under plaster;
- sponge;
- grebenki;
- rollers.
In fact, the tool is not actually a lot, and the work itself is not complicated, as you will soon make.
Technology arrangement textured plaster
In total, all the work is divided into two stages:
- surface preparation.
- Application structure.
In turn, the second can be divided into two smaller, the first will directly applying the composition to the surface, the second one is a coating imparting textures.
Now Let us examine each of them in detail.
Surface preparation and premises
To begin, it is important to understand, that the arrangement of decorative coatings is becoming one of the last stages of repair, and at this time it has already been completed flooring (In most cases), installed windows and doors, and sometimes there is furniture in the rooms.
That is why the preparation must be approached responsibly. It includes the following tasks::
- It is necessary to move all the furniture out of the room, if this is not possible, then you need to cover it with a protective material (polyethylene film, for example).
- Also should worry about the windows and doors, covering them, or having stuck film.
- If the floor has already been completed, it is necessary to lay newspapers.
- In cases, if there are irregularities or deviations on the walls, We need to carry out the alignment (oštukaturivanie). Dry after coating should at least 3-4 weeks.
- After drying primed wall in several layers (each previous layer before applying the new must dry). If necessary, use a reinforcing soil.
- After the primer has dried, shpaklyuyut wall in two layers, each of which is dried at least one day.
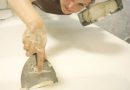
- The next step is carried out sanding, which runs fine sandpaper.
- On the ground, the corners and joints to plaster pasting is carried serpyanku.
- It is also recommended to carry out vykraski, that will help to evaluate the texture and color of the cover of the future, and change components and colorants as necessary.
On this surface preparation is completed. Also worth noting is a caveat:
Can not be used in putties, which may interfere with the absorption of the composition. These fillers are compositions, based plaster, alabaster or oily glue-mixture.
Applying the mix
And now look at, how to make a textured plaster with your hands. In total, there are several methods of its implementation, which we describe below.
To begin, prepare tool, which previously said mixture and itself. Consider, mixture flow average is obtained to two kilograms per square meter. When, when it is necessary to perform work in several layers, then the material will need twice as much. Because consider the variation of the coating and to perform flow calculation, you must first.
Consider the whole process works in a step by step guide:
- To get started is to prepare a mixture. When, if you think you do not leave it in the shade of white, then you must purchase a dye, the proposed composition of the producer. It is also important to take into account the operating conditions at its choice, for example, If textured plaster will perform in the kitchen, bathroom or toilet, the dye must be water-resistant and insensitive to household chemicals.
- Mix the colorant to the composition must be in proportion 1 dye share, to 12 fractions of the mixture (Besides painting can be done at the end of work).
- Thoroughly mix textured plaster.
- Visually divide the wall into small squares, desirably 1-1,5 m, with whom you will work. Immediately try to cover all of the coating can not be, because the plaster to cure and to give it the desired shape it will be impossible.
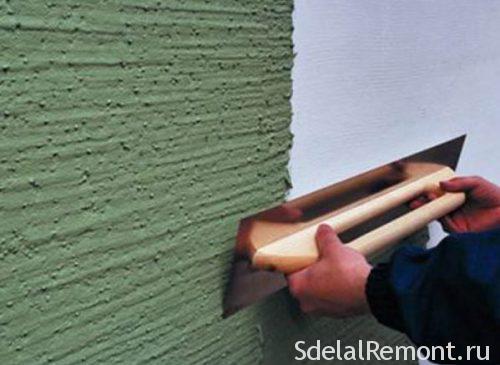
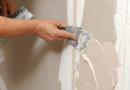
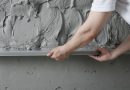
- Small spatula recruit solution, and evenly distribute it along the surface of the trowel.
- Start material applied on the corner of the room with a trowel or spatula. It becomes smooth movements oversight of the wall at an angle 30 degree tool
- The layer thickness should be approximately 3 mm. Leave jagged edge portion. This is to ensure that the boundaries are less visible.
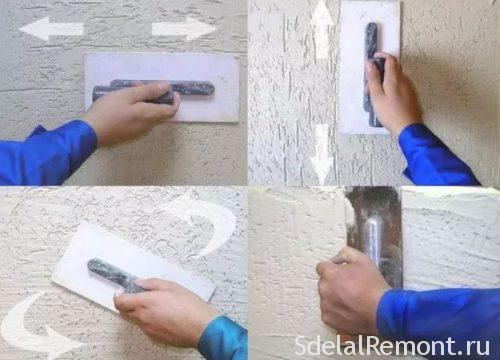
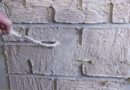
- Thus the composition is applied to itself, thereafter coated necessary to give the desired texture with a spatula, stencil or special rollers and applicators.
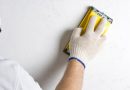
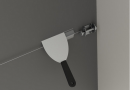
- The easiest way to perform a simple textured pattern pile roller. For this smoothly and with the same amplitude movements necessary to roll over the entire surface.
- All the movements are carried out in the same direction.
- Proceed to the next section. To return to the past through 20-25 Treat minutes slightly sharp edges resulting relief using a metal trowel (You can also do a large spatula).
- Thus perform work at each site.
- If you did not add the dye first, then wait for the complete drying of the material, after which the color surface of the walls with a brush or roller.
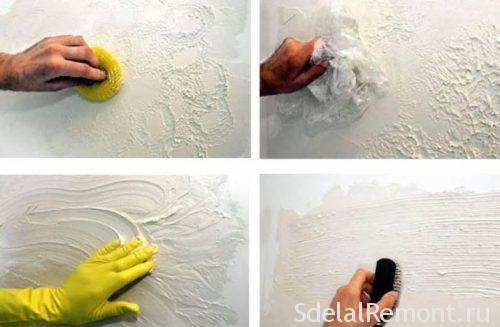
As you can see the method is quite simple, and cope with it every. Also, instead of roll you can use ordinary sponge (and smooth the sharp end portion with a brush or spatula).
This is the easiest way to, but if you type patience, you can instead take the stencil roller tools, brush, textured rollers and anything else to work with plaster, and create a beautiful decoration.
It is worth saying, that strokes can be any shape, and the final result depends on your work and fantasy.
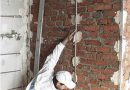
And also note another method of applying a composition, which is not less popular, and was named "sprayed".
- In this case, the work is carried out in several stages, and made a few layers.
- Each layer is sprayed onto the wall brush or broom, that helps to create a fine-grained structure of the coating.
- Prior to application of each layer, previous must be completely dry.
This method is also simple, but it requires more time.
The very day before the plaster dries, then stained, if necessary. important notice, that the color is not permitted even dye distribution, paint strokes necessary to perform rough.
conclusion
Now that you know how to make a textured plaster with your hands, and you can do it now. This coating will be a good decorative solution for many years, and in addition to protect the surface from dirt walls, mold, water and dust.
We also recommend you watch a few videos about, How is textured plaster yourself.

I want to share their experiences.
My husband and I decided to make the repairs yourself, because in the new apartment walls were simply awful and sad. We are creative people and love to experiment, so we decided on the advice of a friend to use a patterned roller. After a long and tedious reflection, where are all the same order of, We stopped at this site and have learned a lot of information