By establishing a separate room for clothes, you decide the question for all, where it was stored. Dressing Drywall - optimal in terms of price and quality option. This article will be useful for those who need a dressing room made of plasterboard which can be done with their own hands. It will guide you through the steps of creating a dressing room, from concept to finish.
The secret order in the one-bedroom apartment is, she two-bedroom :-)
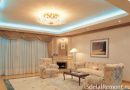
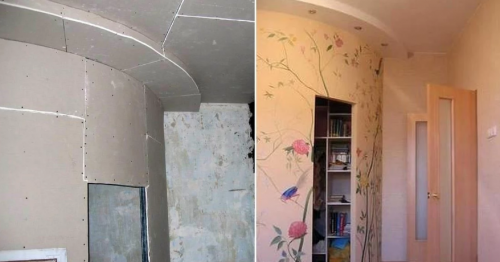
Ideas for the dressing room of plasterboard
At the beginning considered, which generally are solutions, and gives some ideas for inspiration. Then briefly painted the work plan, from design to the rough finish. Next come Forums, detail describing each step of operation. To create a dressing room with his hands Plasterboard you need some skills to work with power tools. If there is - safely get to work.
But first, you have to invent your dressing. The first question is - where it will be. You can arrange a dressing room:
- in bed,
- in the hall,
- in the living room.
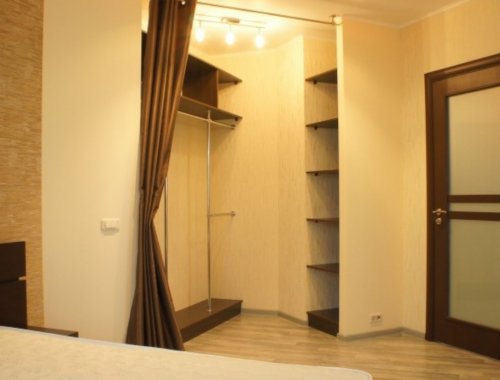
Dressing of plasterboard in the bedroom you can replace not only the wardrobe. It is quite possible to store linens, a vacuum cleaner and ironing board. But this is unlikely to be a comfortable place for shoes, backpack or mountain skis.
maybe, it would be better to separate the dressing room of the hall or corridor. the main thing, the dimensions are at least 1,2 meters wide and 2 - in length. Dressing is different from the cabinet, that it is possible to enter. Inside should be a space for, to make a couple of steps and turn around. Filling - shelves and bars - located on the perimeter.
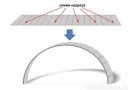
Plasterboard is very easy to use. It allows you to implement almost any designs. Partition for dressing plasterboard may be either rectangular, and positioned at any angle, or even round.
The door can be:
- swing;
- sliding (compartment);
- Door-book, or "garmoška";
- Curtain instead of a door.
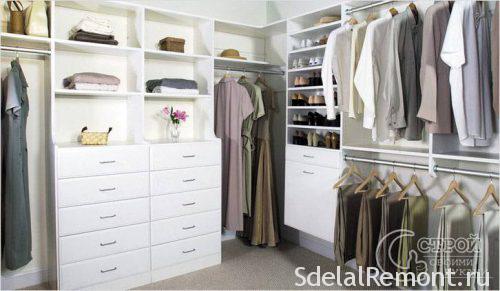
The filling can be of presets. The shops sell metal rack systems especially for cloakrooms. Also may well come from Ikea wooden shelves. You can make a shelf made of laminated chipboard, as in conventional cabinets, or even made of natural wood.
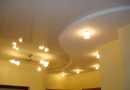
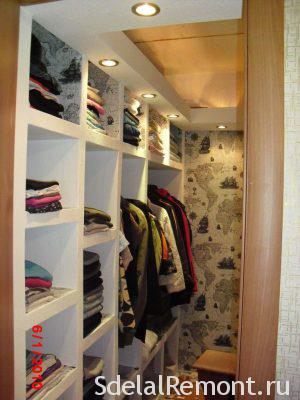
finally, filling can be made from the same plasterboard. It's not the easiest option, but the location, the size of the shelves and their appearance will be exactly as, what you need. The shelves of plasterboard can be built-in lights.
What is filling wardrobe:
- shelves,
- bars for hangers,
- hooks,
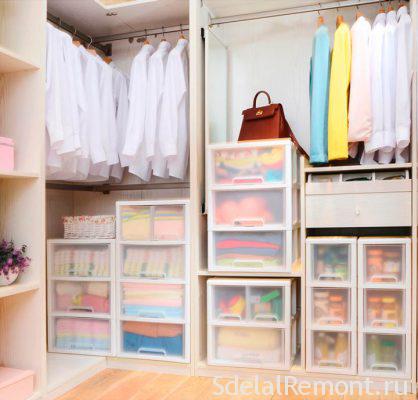
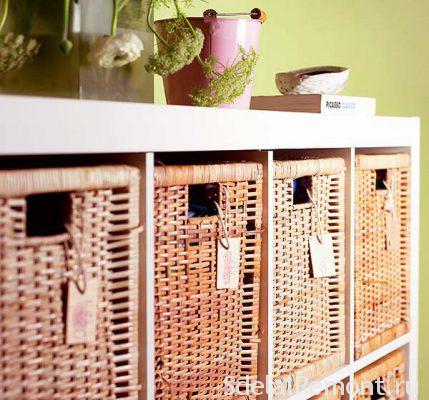
- basket (including drawers),
- obuvnitsy or shoe racks,
- drawers,
- section with doors,
- make-up table
- or simply a mirror.
In a very small space is best to avoid the drawers and doors. Think, What content do you really need. Try not to strive for uniqueness, let the foreground is the convenience and functionality.
A work plan for the creation of a masterpiece
With the next section to begin a detailed description of, how to make a dressing made of plasterboard with their hands. And this one - will be a brief guide. Pry into it, in crib, during the operation.
- Project. Future dressing necessarily need to draw. Never mind, how good or bad you are drawing; the main thing - a clear idea of the location of the components and their sizes.
- marking. The drawing must be carefully moved to the wall, floor and ceiling. Plasterboard work always starts with exact markings.
- Frame and electrician. Building a "skeleton" future wardrobe, protyahyvaem wire.
- Plasterboard. Sheathes frame plasterboard. Dressing becomes final contours.
- decoration. It remains to putty plasterboard. Then you can arrange a dressing of your choice.
Project
Measure the room or area, which will be located closet. Zarysuyte plan, Apply all sizes. Right on this plan begins to create your dressing.
The interior space is usually divided into vertical modules. Each module can be from top to bottom of the shelves, or comprise rods hangers (Sometimes rods are arranged in two levels), or, more often, one rod and shelves above and below.
What size the elements should be filling? Measure the shelf in the closet and proceed from these figures. Convenient depth of the shelves - 40-50 cm, height - 30-40 cm. You can provide storage of items in the baskets - then shelves dimensions must match them.

Inconvenient to use shelves, located on 15 see above your height. Often the top is a solid shelf for seasonal storage.
The height of the bar for shorter items of clothing - jackets, shirts, jackets - 90 cm, for long - coat, dresses - 1,3 m. Dress to the floor on growth 170 see take half meter in height. You also need to leave space above the bar - the more, so it is more convenient to use.
Do not forget to plan lighting. It is possible to provide an outlet. The switch is more convenient to install the outside.
Good, If you fancy yourself a clear future dressing. But do not leave her in the head, be sure to move the plan on paper. Dimension. Working without a plan, you risk to spend more materials, than necessary.
For the correct figure is important to know, on what basis is partition plasterboard for dressing.
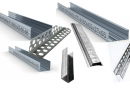
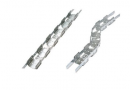
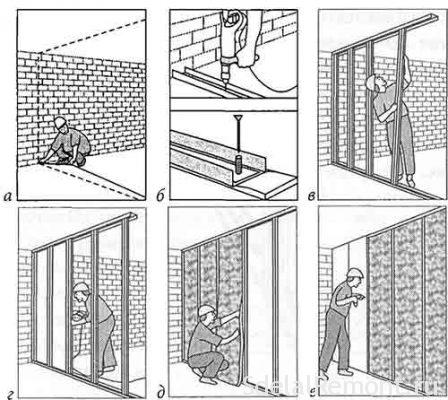
First we construct a frame of metal profiles. Two types of profiles: guide (PN) and rack (PS). The first thing the guide profiles are attached to the walls, floor and ceiling; then based on them are mounted uprights. Finally, them attached horizontal jumper. The width of all profiles - 50 mm.
Plasterboard filling is done on the same principle: the contours of the walls and shelves are constructed from the guide profile and are filled with webs of the rack profile for more rigidity.
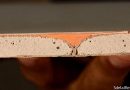
It should also take into account the thickness of drywall - 12,5 mm, and add more 0,5 mm at the finish.
marking
so, Apply the contours of the walls and shelves on your walls, floor and ceiling. You can draw a continuous line or short strokes. Try to observe the dimensions accurate to the millimeter.
Vertical and horizontal lines reconciling level. better laser. Note, that normal levels of construction are not always accurate. Check out, as "lying" your level, applying it to the different sides of one and the same surface.
Line on the ceiling should also coincide with the lines on the floor. They can align the plumb.
partition frame
It will be easier to first install the partition frame and sheathe its plasterboard inside.
Secure the guide profile on the markup. Start with the floor. Leave a gap to the doorway. For noise insulation sheet under the guide profile soft insulating material. suitable foam, izolon, substrate for laminate or similar material.
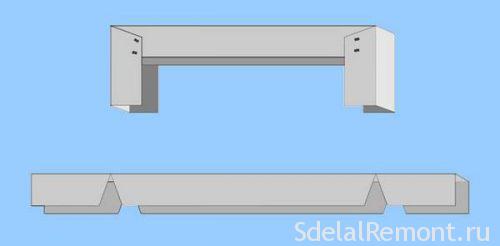
In the corners of the elements of the guide profile must be inserted into one another. In many cases, it can even cut completely, but only incise the shelves and bend.
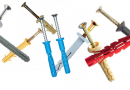
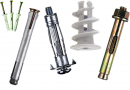
Attach the profile to be in increments of about 50 cm. Fasteners for concrete - dowel nail 6 x 40 mm. The guide profile can not drill in advance, and punching punch right on the spot fixing.
For attachment to the tree using the black screws with large pitch thread. Profile as possible not to drill, and pierce the self-tapping. Fastened to the plasterboard wall can be self-tapping screws for plasterboard, but you need to make sure, that all the screws fall into the metal profile. Otherwise, take a longer dowel-nail, that it goes through the drywall and into the concrete or have other options to fix in plasterboard sheet.
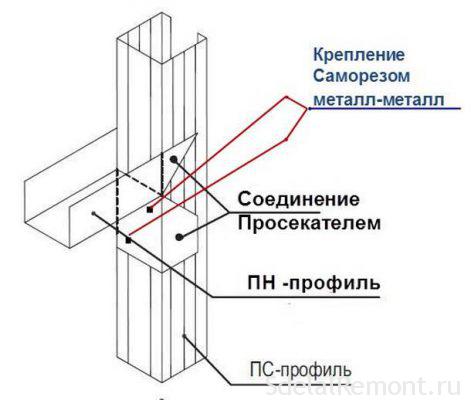
Mounting the guide profile, set the rack. In any case, cutting them by a few millimeters shorter.
Frequency counters - 60 cm, based on the most common sizes of the sheet of plasterboard: 1,2 m in width and 2,5 m in length. Drywall sheets are typically installed vertically. Each sheet must be fastened with screws around the perimeter and along the longitudinal center line.
Respectively, the middle of the first pillar must be exactly 60 cm from the wall. Mid next - in 60 cm from the middle of the previous. After inserting stand in guide profiles, align it and fasten Prosekatel or short screws for metal. Prosekatel on technology to do by two punctures on each side, diagonally.
Next you need to make a bridge for fixing the transverse edges of gypsum boards. It is important to place the sheets so, that their joints do not overlap cross. Therefore, the middle of the first two jumpers will be at an altitude of 2,5 m sex, and the next - in 2,5 meters from the ceiling. You may have other dimensions sheet; important - install them "vrazbezhku".
Jumpers can be drawn from the guide profile - it is easier to mount to the uprights.
Doorway definitely need to strengthen. To do this, insert pieces of wood in the profiles, shaping aperture, and secure them with screws through metal.
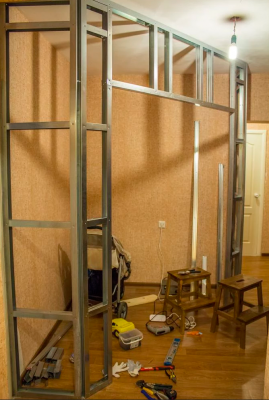
When you have finished the frame walls, sew it from the inside with plasterboard (This work is described in the next section). But before that, make sure, that you have installed all the required jumpers. Additional bridges will be needed in those places, where the partition will be adjacent shelves, and in places of fastening rods.
Frame shelves of plasterboard
Filling dressing conventionally consists of vertical and horizontal elements - walls and shelves. First, make all partitions, then all the shelves.
The frame of each element - a rectangular frame of the guide profile, if necessary filled webs with a certain step. This framework must be fastened to the walls of the three parties, floor, ceiling and other neighboring elements.

Keep, to front profile standing right: horizontally and vertically in the partitions in the flanges.
First fit the frames of vertical partitions. Set the jumpers in the field of fastening shelves and close the plasterboard lateral plane. Frameworks shelves attach with screws through the drywall to the webs. Even if they themselves are not shelves of plasterboard, better to fix them in the same way.
shelves Carcasses should be reinforced webs of rack profile with a pitch 40 cm. Of course, in length shelves 50-60 cm is better to make a jumper in the middle, than in 40 cm from the edge. sheathed plasterboard, shelves withstand such a solid load.
Before the frame is sheathed, Route wires. Be sure to thread them into the corrugated tube, do not skimp on safety.
Covering letters GVL
Sheets of drywall screws are screwed to the profiles for plasterboard (black, with frequent thread pitch). At the edge of the screws go every 15-20 cm, in the middle - every 20-25 cm. From the longitudinal edges of a sheet should be retreat 10-15 mm, from the cross - at least 15 mm. And at least 5 see the need to deviate from the angles.
At the cut edges (including factory ends entire sheet) We need to chamfer. Trim them at an angle, or a special treat a plane. Easier to do this before, as you screw the sheet.
Partition start dressing sheathing inside, off the wall. Place a sheet of vertically. All edges should lie down on the profiles. If some part of the edge is nothing to be fixed, add a jumper or rack.
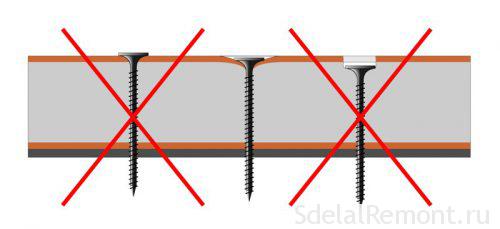
Fix the sheet, not only on the edges, but also to all profiles, which are under it. Tighten the screws carefully, gently pushing it hat.
Securing the first sheet, close the piece of the remaining space above it. To cut a piece, you'll need a knife with a sharp tip, type of wallpaper or stationery. Cut the paper in a straight line (Use a rule or blade profile as the line). Nadlomite drywall in nadrezu, then cut the paper from the back side.
The next series of drywall, probably, It begins with the same along the length of the piece. In any case, it should be moved, that the seams do not overlap cross.
Plasterboard shelves and interior partitions you zashote during assembly frame. The last will be coated with the front edge. cut out holes for fixtures.
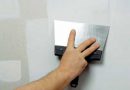
Finishing work
It remains to give a neat appearance Drywall. By plaster technology is applied in three stages:
- grouting and recesses of screws;
- second, leveling, layer at the seams and depressions;
- finishing the continuous layer over the entire surface of the plasterboard.
Before the first spackling apply primer. It should be dry for the time specified in the instructions. Stick serpyanku at the turn of the factory edges (with recesses) and corners.
Trim profile angles uglozaschitnym:
- generously apply the putty throughout the angle;
- press into her profile;
- align and remove excess putty.
This can be done during the first stage finish - filling joints and grooves.
After each stage you need to wait for the complete drying putty. Read the manual, but for this you need time. Before applying the next layer of diamond mesh Grind unevenness or trowel, sweep dust.
There was only finishing. And here it is difficult to advise something concrete - it can be wallpaper, or painting, or tiling - why not? It all depends on your taste.
Work carefully, in an unhurried manner, and the result is a long time will delight you and benefit.
In this article on how, how to make plasterboard dressing, I come to an end. See video tips masters, and wish you success in repairs!