Plasterboard is a modern versatile building blocks for constructing various types of arches, transitions, niches, designer ensembles, building a wall, ceiling finishes and more. As building material it has excellent strength indicators, resistant to wet environments, eco-friendly and non-flammable. All these qualities make it, widely used in the construction of any type.

The advantages of plasterboard structures

Gypsum construction has the following advantages:
- Are lightweight. Low weight of both the sheet, and the frame makes it possible to build walls between the rooms on the ground, under which there are no pillars;
- Ease of mounting. To create any design of the drywall does not require professional skills. It is enough to have an understanding of geometry and have the ability to solve simple examples. This will be sufficient even for complex arches with niches and transitions;
- The design of the drywall to hide the plumbing lementy, wiring, unnecessary niche. In this case, always turn perfectly flat and smooth surfaces.
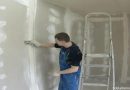
How to make drywall constructions with their own hands?
Before you begin construction of the planned interior element, you need to thoroughly think over the project. It should take into account all the details, that may prevent, and which will complement the future interior.
- The first step is to take a piece of paper and make initial sketches of your thoughts.
- Further, to create designs of plasterboard with their hands need to take a tape measure and make measurements with an indication of the results on the plan. Also at this stage it is necessary to make the wiring layout of wiring for lighting and household appliance, if the installation of such planned.
- If the substrate is strong and does not require preparations, you can move the layout of the paper on the wall. If the structure to be built in free space, it must be applied to the layout of its main points of attachment and the ribs on the floor and the ceiling. Thorough design of the whole structure at this time should already be fully prepared.
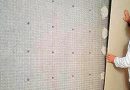
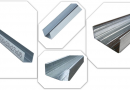
- Installation of drywall constructions starts with the choice of material for the construction of the supporting frame. As it can be of wood or metal profile. Here, the designer selects a preference to, which has more experience. But keep in mind, that dries the tree slightly changes its geometric parameters. this, in turn, lead to the appearance of cracks on your masterpiece and stakes.
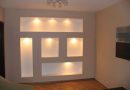
Making column plasterboard

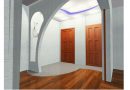
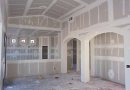
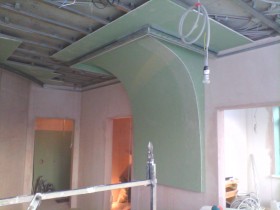
Especially popular are the construction of plasterboard on the wall. Because the use of this material can be constructed fireplace, beautiful arches with niches, make intricate transitions, stairs and columns for the subsequent decorative plants.
there are special flexible arched profile which allow a quick installation very difficult design.
All designs are created with their own hands Plasterboard require maximum attention and the desire to get excellent results.
- The first step is draw a on the paper. Choose its form, design;
- Further, using a spirit level and tape measure mete out its position on the wall. It is necessary to take into account the thickness of the sheet of drywall on all sides future niche;
- The niche is a recess in the wall, so to create it, must be shortened by the amount of space, equal to its depth. If it is performed in the wall itself, it is necessary according to its hollow;

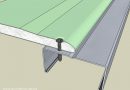
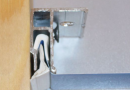
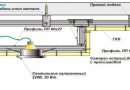
- Mounting of drywall fasteners begins with UD-profile to the floor, the walls on the sides and the ceiling. But for this you need to apply markup. Here you can use the plumb line. Retreat from the wall an equal distance in the two extreme points, if the straight wall with a plumb and transfer marks on the ceiling. If the trajectory is curved, it is necessary piece of wall to divide into equal lengths and markings applied in their end points. In this case, to perform applied plasterboard wall thickness 9 mm. It is not covered by cardboard layer, and reinforced with glass fiber, what, as a matter of fact, and provides flexibility. Profile can be given a desired shape by its notches equidistant scissors or grinder. Then it must be necessary to gently bend radius. To get the bend in another direction, necessary to make the same element, and attach it to the place of, deploying contrast to previous. And so on.
- After transfer marking is possible to start mounting structure for plasterboard. Fastening UD-profile carried out by means of anchors or anchors at intervals of not more 50 cm. Further, it set the vertical supports, which are fixed to the horizontal profile with screws or rivets;
- After mounting the core structure must be attached to the wall of the markup preformed chunks profile recess. Also mounted transverse structural elements, are ribs and railing for attaching drywall.
To design installation passes quickly learn recommend Secrets fast plasterboard work.
Creating a niche in the wall

You can perform a variety of gypsum board construction on the wall, to do this, just need imagination and desire. Especially a lot of ready-made solutions that can be found on the Internet, with detailed descriptions and photos. With such a finishing material, how plasterboard, the design can be very different in form and complexity of building. Find out more, how to make a niche in the wall drywall.