- Arch in the interior of the house
- Necessary materials
- profiles: types and application
- Tools for Installation of drywall arches
- Creation of gypsum arches
- arch made of plasterboard project
- Preparatory work
- Working with frame
- Installation of metal frame for arches
- frame cladding with plasterboard
- Finishing drywall arches
- Videos about how to manufacture an arch
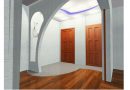
Arch in the design of the apartment played a big role. It visually enlarges the space, as well as the host may wish zonirovat room. Installation of arches made of drywall is easy, with no costly. Carrying out a step by step action algorithm can easily solve the important task - to make a smooth semicircle for construction.
Arch in the interior of the house
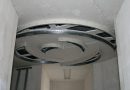
Arch interior has several functions. First of all, It is zoned room. This may be a separation between the kitchen and the hall, access to the balcony. Secondly, they make the apartment more and brighter visually. Thirdly, in creating structures instead of the doorway there is no need in the choice of doors, which can make the room small and dark. Creating a backlight arched openings will be an additional lighting at night, as well as the addition to the general design of the apartment.
How to make an arch made of plasterboard? Before we begin to educate the steps below, should be familiar with the types of arches.
in size, shaped openings forms of plasterboard are divided into views:
- Poluarka plasterboard. It has the form of a semicircle on one side, second - it is a right angle. It looks at the flat design - minimalism, Art Deco.
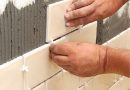
- Classical arch. The top has the shape of a semicircle, which coincides with the radial width of the door frame. It can be installed instead of a door to the kitchen, Output from the hallway into the living room.
- "Modern" - plaster arch. A small semi-circle at the top of the doorway abruptly turns into vertical lines of the door frame. Basically, instead of a door mounted in a room or a balcony.
- "Romance" - rounded corners, but a straight line at the top. Mounted in a large opening, instead of two doors - the entrance from the corridor into the hall.
- "Ellipse" - arch plaster. It is different from the "romance" more roundness. All depends on the size of the door opening at the standard height.
- "Trapeze". This broken line around the perimeter of the arch. Such drywall constructions is rarely used in the design of the apartment.


In order to improve interior, diversity arched openings, often shelves are placed to the interior side of the elements, created a niche plasterboard, The handrails and through windows.
Before you make an arch made of plasterboard, you want to take the dimensions of the door, to know exactly the type of construction, get acquainted with the methods of construction of the frame under the arch.
Necessary materials
For the production of gypsum arches needed materials. Only initially should decide, what material will create a framework for the arch structure. An excellent embodiment is a metal profile.
It is worth noting, wooden frame is produced only in a dry environment. The building should undergo shrinkage. Since "breathing" wood in the room should be kept the same temperature, as well as the normal humidity level.
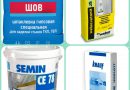
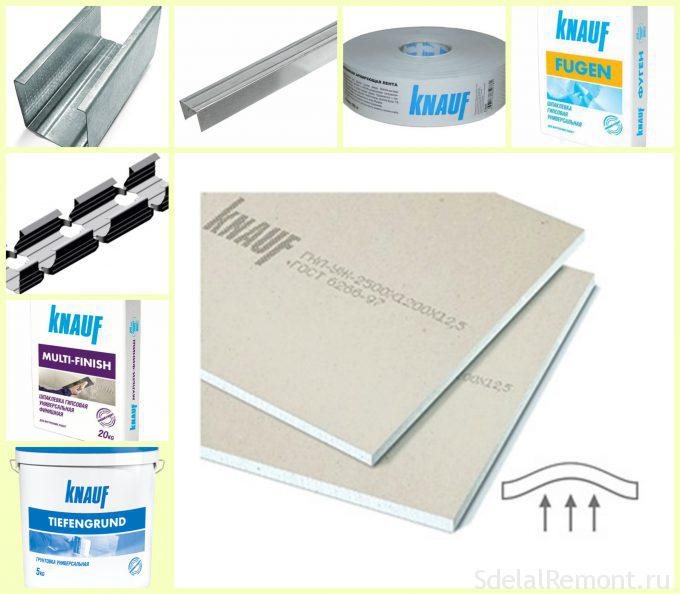
So we consider that it will take in the manufacture of the FCL :
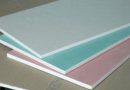
- Plasterboard. What is needed for drywall arches? To the ends will need GCR 12.5mm thick., for the semi-circle - 9.5mm ( or arched).
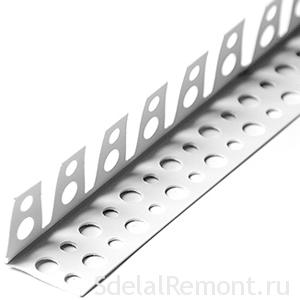
- Guiding and rack. Arched profile Knauf.
- Reinforcing paper tape Knauf.
- Primer.
- Screws for profiles or wood.
- Putty "Knauf Fugen".
- Putty "Finish".
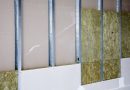
Plasterboard 9.5 mm. bend in the desired range is easier, than 12.5mm. Exists 2 method leaves sgibaniya.
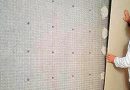
"Wet" method requires accuracy and time itself. Cranking plasterboard sheets should, if a large bending radius. Plasterboard is applied to the metal frame and from the center to the edge neatly, step by step, is bend the sheet with its fixing screws.
This method requires the use of needle roller. With this tool you need to go through the surface of the GCR (only one way, instead of back and forth), after wet the surface. Plasterboard is required to leave for the night at a special layout. Morning, dry sheet and acquires layout form.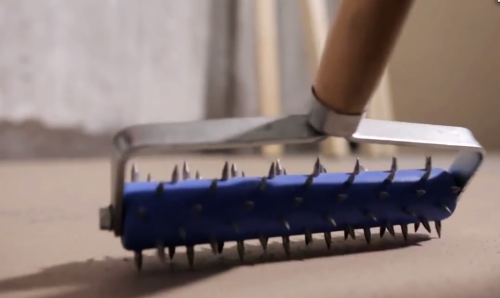
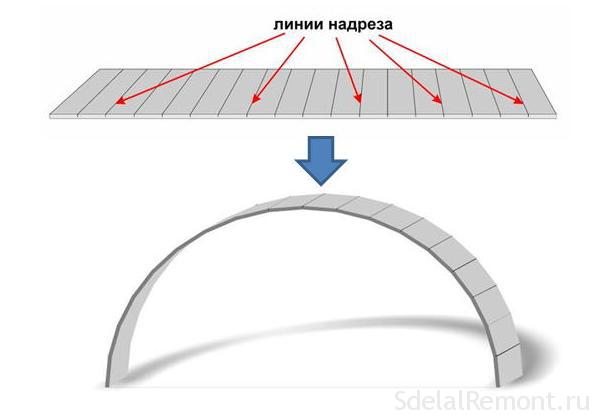
Another embodiment are notches across fold length. On cut sheets of drywall scarifying (the steeper the range - the more notches).
According to earlier do the layout all the dimensions are transferred to the GCR. With the help of a homemade compass (Profile or wooden slats mounted on the end of a pencil), the other end is fixed at a height of cross point and the width of its arch. Roundabouts strip on drywall from a pencil will trace in the form of a semicircle. Building with a knife or jigsaw cut traced a sketch in two parts. After that you should cut 2 rectangle (the lateral side of the arch).
profiles: types and application
When creating a drywall constructions basis is a frame made of metal profiles. Build the market offers these types of Profile:
- Guide - basic profile creating different frame types.
- Rack - profile, by which creates bridges. He is also a principal in the creation of partitions, align the walls and creating plasterboard products.
- Ceiling - suitable for ceiling structures of the GCR.
- Arched - only used to create the metal framework arches and curved forms for drywall.

Each profile fulfills its function. If this element is used for other purposes, frame is flimsy or do not work.
Knowing about profiles, can understand, how to make arch of the drywall firmer.
Initially for quality arches Knauf factory offers bend profile of your size by the method of cold bending profile. cost of 1 m 700 rub. Craftsmen learned to bend with your hands by cutting.
Tools for Installation of drywall arches
For the construction of drywall arches require a set of tools, to help make the job easier and faster.
- For markup will need a pencil, meter or measuring tape, and the line.
- To create a frame: metal cutting shears, Screwdriver or screwdriver set, level, Construction knife and a set of blades to it.
- For finishing: capacity for mixing a solution of, set of spatulas with narrow and wide spoon, zatirka (sandpaper), bead, brush.
- You may need a needle roller, plane to chamfer.
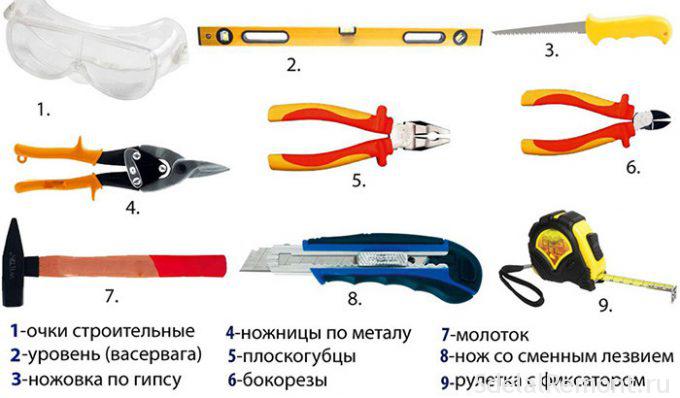
With this set of tools, you can safely proceed to the creation of drywall arches.
Creation of gypsum arches
Create arched doorway requires compliance with step by step instructions.
It consists of several stages:
- Preparatory work.
- Mounting frame for an arch made of plasterboard.
- plasterboard paneling.
- finishing work.
By following these instructions you can avoid mistakes, and the arch will turn solid, beautiful, emphasizing the design of the apartment and making it light, comfortable.
arch made of plasterboard project
Apparatus different arches. To produce this structure is required to determine the form and view it. Further, We need to measure the doorway: its width and height.
After that, take the cardboard and put it on a future structure according to the measurements of the removed. To create a semi-circle arch is required to take the center of the doorway and from the drop down to a height where it will be the highest point of the arch - to measure the distance. From this point, measure the distance down, where the arch will be a smooth transition into the uprights. Also required arch width (is the width of the doorway).
Cut out of cardboard arch should be attached to the doorway and look at the part of the layout. It is necessary that the arch was not low - it can enhance the layout center of the semicircle and smoothly into the doorway stands.
Upon application of the layout should also decide on the finishing material (painting, wallpaper, gypsum), and backlit (across arch or only the top), and may even, Lights will be superfluous.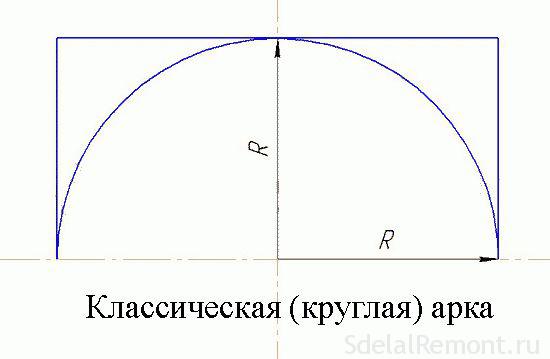
It is worth noting that the establishment of the arch is very rarely used right round shape arches. Look beautiful arch larger radius. Therefore, it is important to determine which is best done in a semi-circle design.
Preparatory work
To create an arch frame required to carry out preparatory work:
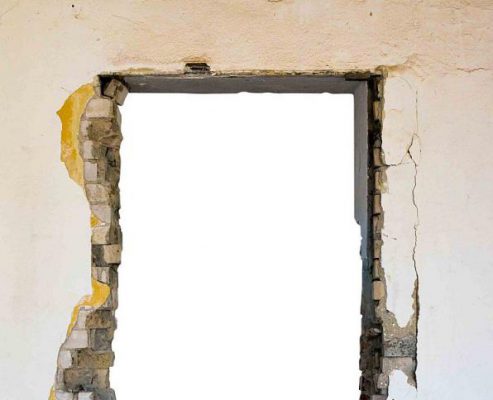
Remove the old door. A vacuum cleaner to collect all the dust, as well as to remove all the stones, possible waste.
If there is a hole, they should cover up. A little gap widen, plaster with reinforced tape.
Working with frame
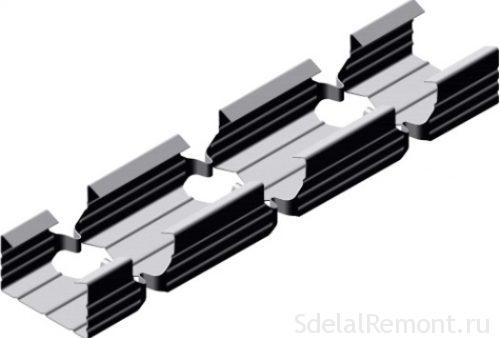
The guide profile should be bent in shape of a semicircle on plasterboard. To do this, take the profile, and a pair of scissors for cutting metal trim the sides of the profile. Undercuts should be done at a certain distance from each other. If the profile is to be bent in small radius, then the cuts will be more likely, if a large radius, cuts can be made through each 6 cm. when using arched profile Knauf, cut the side of the profile is not required. For arches frame mounting need 2 of the curved profile.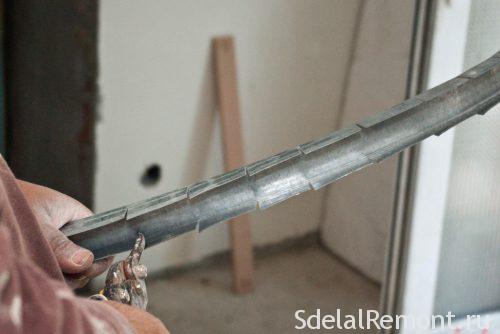
Trying arch layout, future construction elements should be placed loosely in the opening.
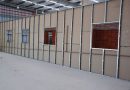
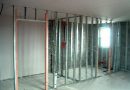
Installation of metal frame for arches
In order to frame for the arch was a tough and durable, It wants to use high-quality metal profiles. It is the top and sides of the entrance door lock guiding profiles.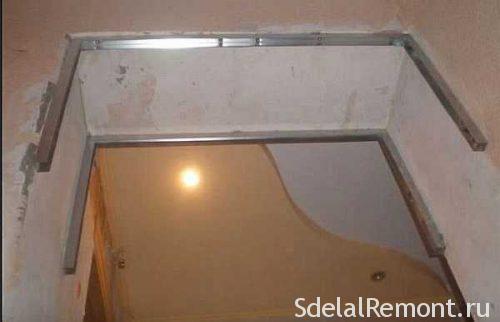 They should be attached to the base, slightly receded from the edges of the door opening. This size should be equal to the thickness of the sheet of plasterboard. To this end, in brick or concrete should make holes, size coinciding with dowels. The profiles are fastened with screws through 20-30cm. if the door wide, are placed between the carrier webs profile, fixed and to the wall and to the profiles.
Further, the guide profile mounted curved profile 27/30. To do this, use screws. To a semi-circle of a curved profile to obtain a flat, should make the layout of the board.
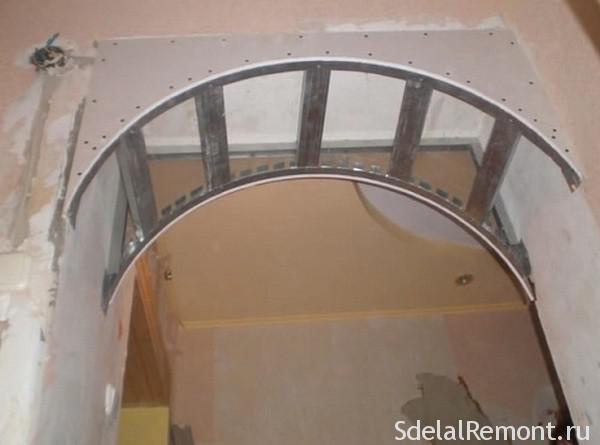
For the strength of the frame mounting of drywall around the radius of the curved profile must be set to fix the bridge. They basically cut from the rack profile and are attached to the curved metal screws. The distance from each other should be no more than 10cm.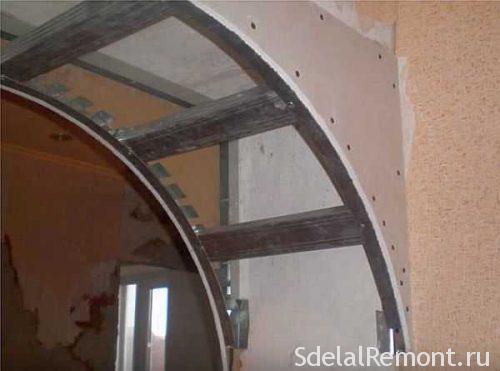
After fixation all frame members, it is required to check for smoothness and durability. If carcass basis shaky or uneven, We need to fix the errors.
Upon completion of the work with metal profiles, If you wish, make the backlight. For this purpose, the frame starts and extends cable ripple.
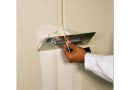
frame cladding with plasterboard
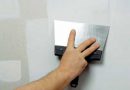
Created by a strong skeleton is sheathed with plasterboard pre-prepared. In order to make arch of the drywall is not only durable, but beautiful, need to:
- Fix the front side. Carved out of the semi-circle neatly mounted on a framed base with screws. Hats should be a little "drown" in the installation of the FCL, that they are not a hindrance when finishing work and do not violate the evenness of the surface.
- When the two parts of plasterboard front side will be firmly fixed on the basis of the frame, You can proceed to plating inside the arch. It needs to be prepared by the curved parts of plasterboard.
- Screws are screwed into the screwdriver sheet (screwdriver) at a distance from each other 10-15cm. no more.
- The curved drywall need to be fixed to the frame gently and slowly, so it does not warp and does not burst.
- The rest of the side portion to the floor sutured cut sheets of drywall the required size in the depth of the door opening.
Plasterboard is durable, but brittle material. When you work with him it should be remembered.
If part of the fixed screws on the frame parts of plasterboard, edge of the sheet may break or deform.
After plating the sheets GCR need to do finishing.
Use paint arched profile for drywall is an integral part of the framework for manufacturing, that creates curly design and forms a clear edge. The construction market offers 2 type of profile:
- Made of metal. This element is used to create arches and curved ceilings. Profile is characterized by its strength, practicality. applying it, It does not need to resort to different ways of bending the usual profile.
- Plastic arched profile. Not so practical, but the elastic element allows you to create shapes of small radius. In this case, on a plaster structure should not be weighting. These curly plasterboard only serve as decorative elements.
Finishing drywall arches
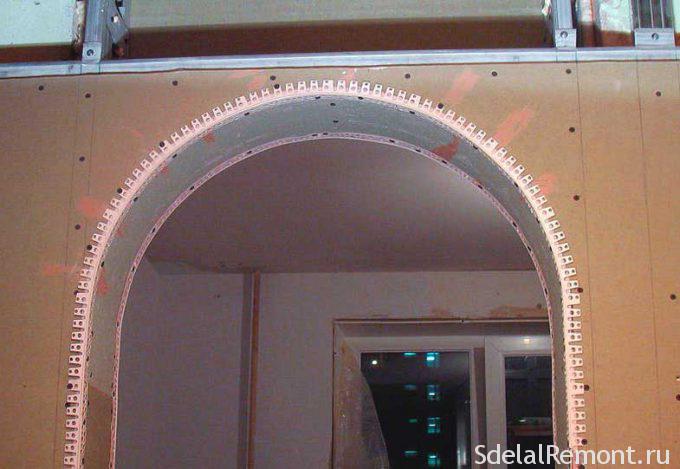
Drywall finishing plays an important role in the strength of the structure. All joints should be reinforced with arches created. For this purpose there is a special plaster and reinforcing tape.
- putty It is required to dissolve according to package directions.
- Thin spatula on a joint, a thin layer of mortar and reinforced tape is laid on top.
- After drying, the tape and the solution, required to impose another layer fillings.
The angles of the arches to be coated with special reinforcing corners.
After completion of the arch surface is coated with a primer. In plasterboard product depending on the fabric to be covered putties, after drying wipe sandpaper.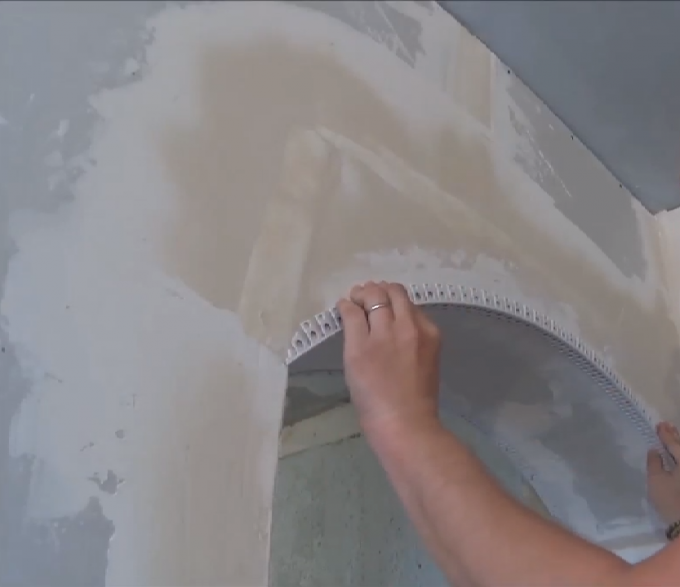
The final step is padding, is applied using a roller. Angles are processed primer with a brush.


Thus created Arch will emphasize the general interior of the apartment, its role in the zoning premises, or be a spacious entrance room.
Videos about how to manufacture an arch