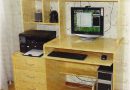
You do not know where to put the computer? You grew up in a family of the student, and he has no job? You live in a standard apartment, and can not even imagine, which can then fit the table? It's time to get to work and make a desk with his hands
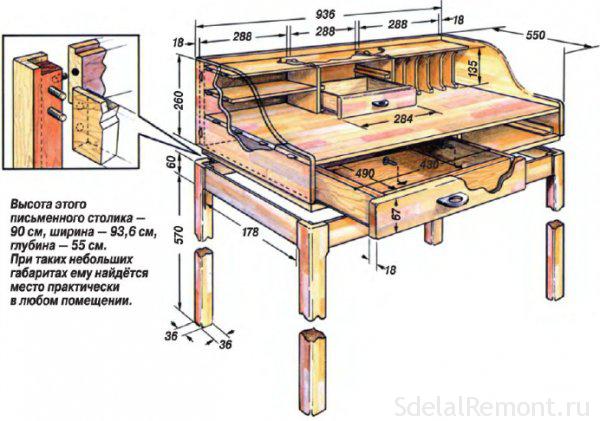
Table with shaped top and accessories
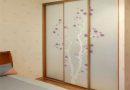
This type of table will be ideally combined with a light an office or nursery. As for curly countertops, it will make the table more ergonomic.
Detailing and sketches
How to make a desk with his hands? To begin to determine the size of the future structure and its configuration: dimensions, height, size and design of the boxes. Attention is drawn to the fact, it would be much better, If the table top cover, you will design and, as well as a table-top (in other words, it will be the same shape).
If you want to save a little, the lower part of the table can be made from non-laminated chipboard. Producing a drawing, It should specify the size of each part - so it will be much easier to cut out a sheet of chipboard.
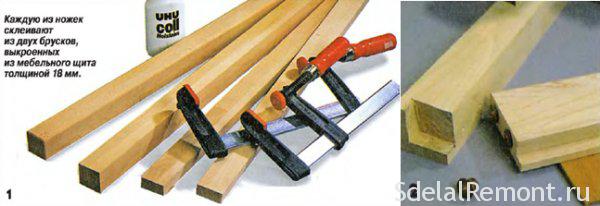
cut material
At all, cutting work material can be carried out independently, and order in the store or in a joiner's shop. In the latter case, Woodworking master within one working day sheets narezhet. But it is worth noting the fact, in order to avoid claims for carpenters, desk with his hands drawings, It should be done with high quality and detail.
In that case, if you are not prone to spending money on their own and can cut material, you will need jigsaw. Raschertiv all the lines and shape of parts directly to material, We produce sharp. Experts recommend to carry out this type of work is a thin blade, which does not crumble material.
Process and the adhesive edge
Now we go directly to processing - align and grind the edges (This is necessary in order, not to get splinters). In that case, If you order the cutting material, the edging may not be necessary, but still, experts recommend to take fine-grain sandpaper and process the edge.
Desk for a student with his hands often pasted over the edge of the paper. Why this option is so popular? It's simple - low cost finishing material. There is only one drawback - paper edge is not durable and has the ability to rip and abrasions. If you do not want to many times its glue, you can use the edge on the basis of PVC. Glue it slightly more difficult, but it will last much longer.
PVC edge - especially work
In order to qualitatively paste PVC edge, you need to arm themselves with a respirator and a hairdryer. Pay special attention to the fact, that treatment (glueing edge parts) all due to the fact - must be done in a well ventilated area, that when heated, PVC-edge allocates air pollutants.
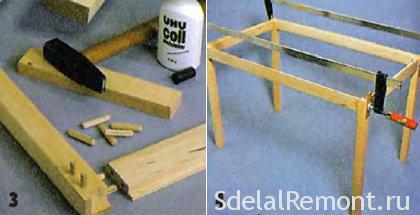
Assembling the parts into a whole desk
To make the desk with his hands, it is required to collect. The assembly starts with a frame - the legs and the table top are fastened to each other. Then, in the remaining parts of the drilled holes confirmee (furniture bolts), and fastening them to the base structure. Cap (tabletop) mounted on the main frame and releasable by means of plastic parts and bolts.
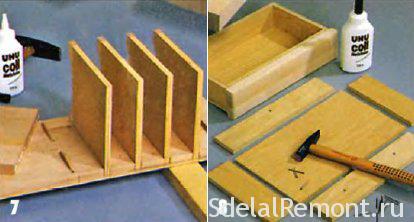
For, desk drawers to get easy and convenient to use, bottom of them cut from fiberboard, and the side walls and facades of chipboard. As for guides (through which boxes are smoothly retracted and advancing), the two self-tapping screws are mounted in a special niche (where there will be boxes), and two directly to the drawer. In that case, if a serious burden on the planned box, the best guides to insert metal. here you go, boxes installed and it only remains to fasten the handle. Cap screws and bolts can be hidden by means of plastic "blotches" or chipboard stickers color.
Likewise, you can make the production of the desk with his hands for two people. To do this you need to increase the length of the table top and add an extra leg. In the same way it can be carried out the restoration of the desk with his hands, by replacing one or more structural elements.
A small table for teens
In that case, if your child is not only to acquire knowledge by reading books, but finding the right information on the Internet, then you probably fit a small desk, that does not take up much space in the children's room and is suitable for a laptop installation.
so, how to make a desk for a teenager, and that we need:
1. Furniture sheets (oak or walnut);
2. Chipboard or plywood sheet;
3. Dowels and dowel;
4. Confirmee and screws;
5. Varnish for wood;
6. joiner's glue;
7. A circular saw (hand);
8. jigsaws;
9. hacksaw, hammer;
10. Clamps and Grinder.
Make a drawing
At this stage you should carefully work out all the nuances - an arrangement of shelves and cabinets, consider the connection types of parts and assembly procedure for the construction.
We produce base table
Now we produce all the necessary construction details, the dimensions of which we picked up in advance. Fastening the frame elements interconnected by dowels, screws and furniture screws, all connections are recommended to glue joiner's glue.
Parts are assembled in a certain order: first attached to the legs of the short side, then, after sizing and drying, attached longitudinal edges. The finished basis (held together and glued together) We leave for a few days to shrink.
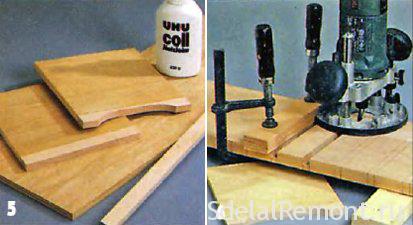
Making the worktop
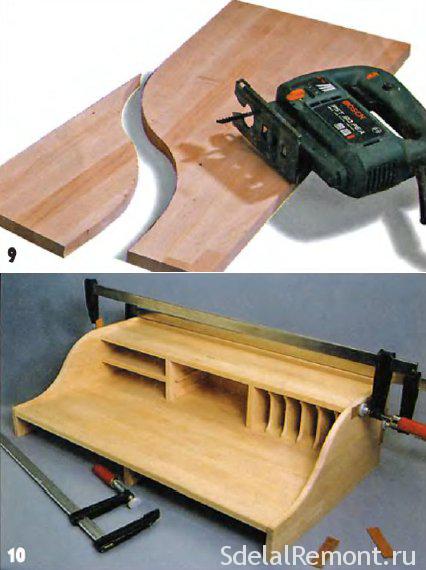
Now, appeal to the drawing, and do according to the specified size countertop. After she is sawn, take the cutter and carefully treat edge, rounding it all burrs and stachivaya. It should take care of holes, by which the table top is attached to the bottom of the table. Desk with his hands photo will help you to get it right.
mount countertop
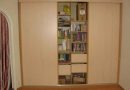
For the reason that, that turns a small table, you can completely abandon the drawers, or make them small plywood. As for the table top, then it is fixed by means of glue and dowels. Then, We give the glue to dry (1-2 day) and proceed to mount ornamental elements. As an additional storage space for writing utensils, and CDs, You can set Tabletop design, which provides for the shelves and "pockets".
The resulting structure is covered by three layers of varnish and all, our table is ready. Desk his hands video, more detail all the questions, related carpentry work. success!