Quite interesting question becomes tiling on plasterboard in bathroom. In this process, there are plenty of nuances, you need to know before starting work. In particular, this applies to both the choice of material, and directly laying process. That is why this issue should be given special attention.
Plasterboard as the basis for tiles
Such coating is used as an arrangement of plasterboard, that has become quite popular, and at the same time a way to align the walls. His confession caused a number of reasons, and the exact benefits, such as:
- Versatility in use.
- Ease of installation and handling.
- Full compatibility with various decorative trim elements.
Besides, Drywall can be used in any room, including high humidity. In this way, tile laying on the drywall in the bathroom helps to give not only completed, but at the same time, virtually flawless appearance room. In this case, no difficulty in carrying out the work there, it can handle even a novice.
The only thing, on what to look for, is the right choice primer and materials, most tile and glue mixture. It is on their characteristics and quality of the result depends on all the work. Important, a drywall for tiling laid. note, that it must necessarily be moisture-resistant.
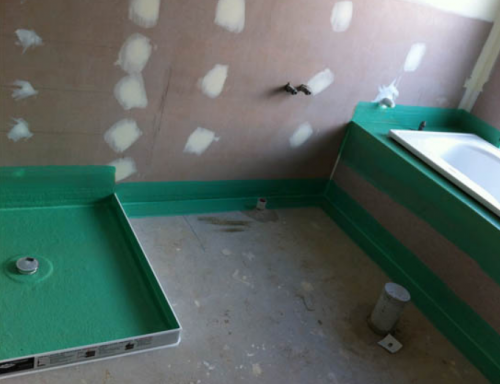
is recommended that, to plasterboard sheet is not in contact with water during operation. Ideal - pass bitumen sheets or rubber waterproofing compound and then perform the installation of the tiles on the GCR.
The choice of tiles
We must start with tile selection. When choosing should rely on a certain number of characteristics, including notes:
- Quality tiles and pattern. It must be said, on the surface of the material should not have any defects, divorce or inconsistencies. In particular attention should be paid to the picture itself - sometimes come across tiles with blurred patterns, it should be avoided.
- flatness. note, that perfectly flat tiles just does not happen, in any case there are any irregularities, but at the same time to pay attention is the fact, that the material should be as flat. Determine the rate can put the tiles on each other, while paying attention to any gaps, snug fit and pivotally.
- The reverse side of the tiles. It should be defined drawing, Besides, It must clearly show the brand and the name of the manufacturer. Otherwise, if it is not visible or difficult to see, It means low quality tiles (shoddy) and it is better not to take.
- The hardness of the tiles. Approximately, of course, this indicator does not determine the, of course, not counting the tiles perekalennuyu, that is very fragile. There is almost always necessary to test all things by experience. It should be gently knock on the tile, if from the impact sound muffled, tile quality, if ringing, it is fragile.
Besides, before going to the store to calculate, qs tiles. It recommended once considered in the number of tiles, rather than square meters. This is because, that the squares you can miscalculate, because it does not take into account the thickness of the seams, the need for cutting and other production aspects.
The choice of adhesive
In addition to the selection of the most tiles directly, special attention should also be paid to the choice of the glue mixture. Among all kinds of mixtures, directly for laying on plasterboard you must select one of the following types of glue:
- The first embodiment is a cement-based adhesive. Such an embodiment would be the most optimal, Considering that, that the stacking is carried out on cardboard base, instead of gypsum.
- It is also possible to use special elastic compositions. Such normally sold in a ready-to-use form, or as a dry mixture.
- And the last one are liquid nails. Such an adhesive is the most expensive, but it determines the quality of the. It is also recommended that you use during installation, as an additional element, for fallen off of gluing tiles.

Speaking a little more about the latest version of, note, it is necessary to pick up moisture resistant brand.
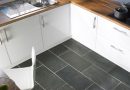
Floor technology
And now gradually turn to technology. In particular, fully consider the rules of tiling in the bathroom. To begin to deal with the stages, which divided the entire process:
- Preparation tools and materials.
- Cleaning and priming the surface.
- marking.
- Laying tiles and zatirka seams.
Now it is necessary to consider each item details.
Tools and materials
The first step is considering the order of laying the floor in the room is worth paying attention to the necessary materials and tools. We begin with materials:
- Tile.
- tile adhesive.
- Primer.
- Zatirka.
- crosses.

And also look at the tools, among which:
- Level and generally.
- plumb.
- Level, desirable laser.
- Tile or Bulgarian.
- several spatulas: usual, gear and rubber.
- Solution tank.
- Building drill mixer or beater.
That's all, you can go further.
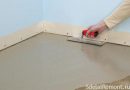
Blasting and priming
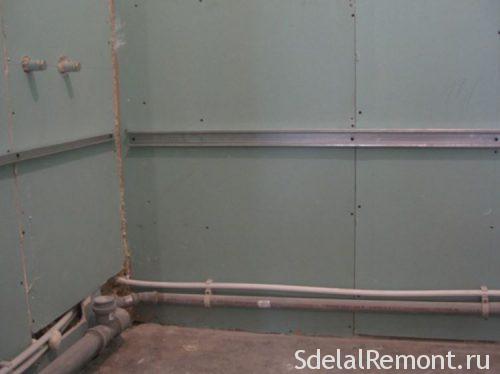
- The first step is the preparation surface.
- It implies a complete dismantling of the old coating.
- After which the frame assembly for fastening drywall and, respectively, its consolidation.
Further purification is carried out on the surface of dust and primer.
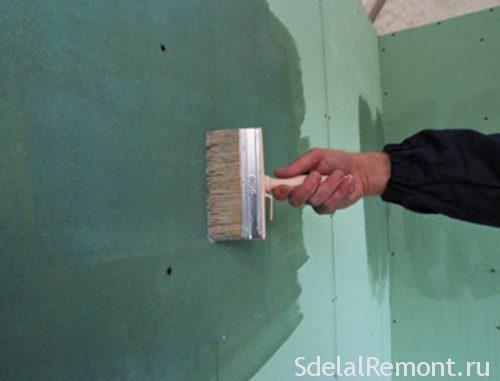
Priming is carried out in several layers, between application of each layer must wait for the drying of old. Besides, applying a composition for the first layer is held vertically, and for the second horizontal.
Calculations and markings
Now you need to perform layout and calculate the required number of tiles.
- To start sketch done sketch of the layout scheme. Then considered the length and width of the room (for sex) or the length and height (wall) divided into corresponding tile size. Thus we get the number of rows, and the number of tiles in a row.

- When, if necessary will involve the carved pieces of tile, which have a size of more than half of the tiles, the folding and layout should be carried out, starting from, which will be highly salient. Tile for the carved parts taken on a number of.
- If the size is less than half of the carved, the packing should be carried out, starting with the center of the room. Thus the kind of circumcision tiles will be more balanced, neat and elegant.
- For applying markings is recommended to carry out rough layout (in the case of floor laying). It helps us to see, as will lay tile, pick weld size, and see, where necessary trimming.
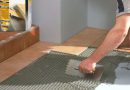
Laying tiles
And the time has come to deal with the, how to put the tiles on the drywall in the bathroom. Consider the entire process in the form of step by step instructions for easy perception.
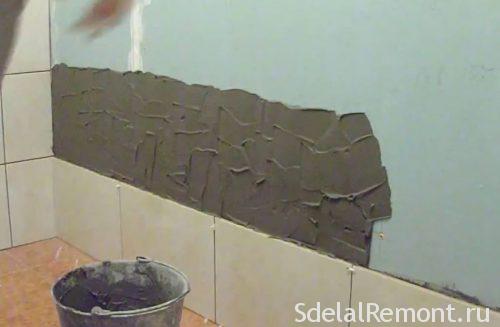
- The first step is the preparation of mortar. As we have already decided, the best option would be the purchase of the composition based on cement. All cooking is carried out strictly according to instructions, written on the packaging.
- The container is filled with water, after which it gradually added to the adhesive mixture, thus it is necessary to stir the solution all the time. As mentioned construction is used for this purpose mixer or a drill with a special nozzle.
- also note, that we should not just kneading a large amount of glue, because it can start grasp and will no longer be usable. Mixing must be of such a volume, which will be used during the 30-40 minutes.
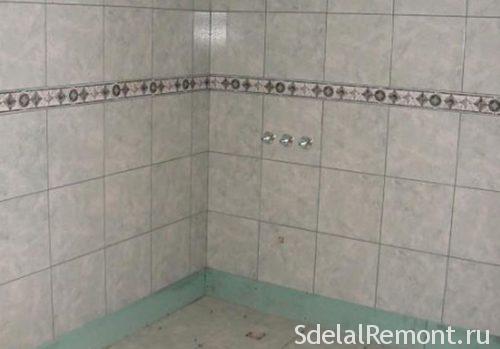
- In the case of laying tile on the wall is necessary to measure the height of the first row and put a restraining bar, on top of which will be held styling. The first series is laid out in the least.
- The work itself begins in two variations, or from the center of the wall, or end, depending on the layout, which took place earlier. From the strip is laid horizontal row, as well as vertical.
- Be sure after installation of each element should be checked for level and plumb level, and leveling tiles interconnected.
- Besides, necessary to control the size of the joints. For this purpose special crosses the selected size, depending on the desired thickness of the seam.
- Upon completion of the laying, a day later, held grouting. In the case of the floor, this procedure is performed not earlier than 2-3 day.
In this process of laying can be considered complete.
Useful tips and tricks
And finally, give you a few tips, which experts recommend to follow during installation:
- It is mandatory to fit tiles only on the moisture-proof sheets gipsovolokonnyh. Or, when laying on a conventional plasterboard sheets, It must be specified in the special guide for the entire area in steps 40 cm.
- When applying the primer, minimum interval between each layer is h, but it would be better to wait for the complete drying.
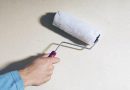
- Sheer primer is applied with a brush or roller. It is also recommended to use a notched trowel, through which the composition is distributed after application.
- at laying tile, He pressed his hands to the surface, If necessary, use a rubber mallet, that helps to regulate an adhesive layer thickness.
- The works themselves are recommended in several stages. In particular, laying of 4-5 series, to give 1-2 hours the glue grips, for voltage drop, and then continue to work.
- Laying the tiles under the bathroom can not be held, when, when provided gated bath, which saves material.
- It is important to use a specific tile adhesive thickness.
- After the grout must also cover the joints with a special compound for protection.
conclusion
Observing all the tips and instructions given, you will be able to hold the tiles laying. Besides, do it with maximum quality, at the same time save on tiler services, which to date are rather expensive. We also recommend to look video presented below, which clearly shows, how to lay tile.