- Mounting type "Cremmer"
- Method for the installation of beacons wall
- Clips beacons plaster
- Proper installation of rails on the clip
- Fasteners "Ushastik"
- installation technology guides to fixing "Ushastik"
- String beacons
- construction installation rules
- Installing metal lighthouses
- How to fix the beacons of metal on the wall?
- Plaster walls without beacons
- execution of works
Capital repairs are almost always accompanied by a plaster walling. These works allow to align the surface of the ceiling and walls to make further quality finishing works - painting or stickers wallpaper. And to improve the quality of plastering using special guides, called beacons. They can be and strings, and slats of metal, and even conducted via plumb solution strip. Thus there are different ways to install beacons and several types of fasteners. A particular embodiment should choose depending on the application conditions of materials - the level of surface smoothness, the slope of the walls and the financial possibilities of the customer.
Mounting type "Cremmer"
Beacon mount "Cremmer" is made in the form of a rectangular plate made of galvanized metal with holes arranged at the edges and to bend the central slot for fastening. A mounting technology such differences from other beacons are the following nuances:
- possibility of bending and fixing fasteners on beacons even without special tools ("Cremmer" bends easily and is pressed against the fingers) simplifies and accelerates their assembly;
- using "Cremmer" beacons can be mounted at a shorter distance from the base as compared with other fasteners, which saves a significant amount of plaster;
- devices can be used with any types of fasteners (by screws to the dowel-nails) and guides (plastic, metal or made of plaster). In this case, the thinner the lighthouse, the shorter the distance between the fasteners - since, to 10 mm "Cremmer" a thickness of about 30 cm apart;
- stretch fasteners when installing beacons plaster walls ensures a secure fixing, after which you can immediately begin to carry out works;
- the location of the guide easily adjusted even after installation. Shifting fastening and twisting it in the direction, we can first open access to the fasteners, and then return back device.
Method for the installation of beacons wall
One way to put beacons for plaster walls using "Cremmer" fixtures is to perform the following actions:
- Screws screwed into the base mounts;
- Hold for level adjustment caps fasteners;
- Align mounting the guide to be folded edges. Folds in "Cremmer" center to be sent out;
- Firmly press the lighthouse to the cap and move the mounting screws.
It should be noted, that the attachment should not be bent together with fasteners. Otherwise fixing may not be too reliable, and beacons will be shifted.
Accelerate efforts to consolidate the "Cremmer" can, not using a screwdriver, but shurupovёrt. It should be installed on the device slow speed. And in adjusting the position of the guide already installed, be sure to take into account the number of revolutions (screwdriver or screwdriver). To move all screws have the same amount otkruchivatsya. detail about fixing Kremer.
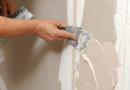
Clips beacons plaster
Plastic mounting-clips for lighthouses KDM-2 is used when performing the rough plaster walling (basically, ceilings and walls). Consisting of 2 parts (clamp and base) structure is made of environmentally friendly and allows the polypropylene any variants beacons (A-frame, T-shaped and other). The base of the clip is mounted on the cap of the screw. The total thickness of the plaster layer should not be less than 12 mm (6 mm lighthouse and the same plaster).

Unlike beacons for plaster walls of metal, requiring a sufficiently large amount of time and appropriate temperature conditions, KDM-2 installed much easier. consumption of plaster much less - an average of about 24 kg per sq. m. BUT, so, attachment of this type can not only be mounted beacons, but also to save material and time, improve the efficiency of plastering work and get result fairly level surface, not using self-leveling mixture.
https://www.youtube.com/watch?time_continue=179&v = kKUIQPsWcyE
Proper installation of rails on the clip
To install beacons for plaster walls should be:
- Prepare a place for mounting rails, drilled for each six-millimeter multiple holes (usually quite 5 or 6) depth to 6 cm;
- Insert the prepared hole size dowels 6 x 30;
- Screw the screws in length 4,5 cm (or more, if the plaster layer thicker standard);
- With line and construction level hold alignment screw heads thus, so they were in the same plane;
- Wear on the screws, plastic clips;
- Fit the beacons, fixing plugs.
The ability to move the already installed guide ensures maximum accuracy of work. While no need to strictly control their position more and faster installation. The average consolidation takes 3-4 times less time compared to other fastening options. And due to the minimum thickness of the plaster, even when repairing an ordinary apartment, you can save 2-3 cu. m. plaster mix. More detail of plastic clips and how quick installation guide.
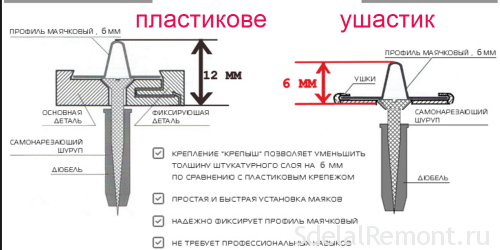
Fasteners "Ushastik"
Fixing "Ushastik" is a special model, intended for more accurate and quick installation beacons for plaster, used in the decoration of the walls, floors or ceilings. But the main advantages of this product include the ability to: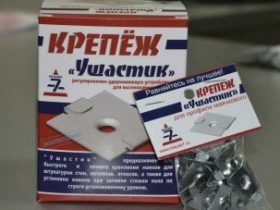
- spend on the installation of each beacon minimum of time - from 3 minutes;
- improve the reliability of mounting the beacons to the wall, so that the probability of falling off when plastering a wall or ceiling is practically zero;
- start finishing work immediately after installation guides;
- to perform the work, even in damp areas. AND, if desired for conventional mounting options, the humidity does not exceed 65-70%, using the "Floppy's Perilous" allowed increasing its value;
- save about one-third of the material.
The use of fasteners "Ushastik" increases productivity and allows you to quickly dismantle the guides and use them when performing other plastering. And artists do not need special training. Therefore, to install such fixtures and mount them on the guides can not even very experienced specialist.
installation technology guides to fixing "Ushastik"
Install a mount for lighthouses under the plaster on the walls is recommended, observing the following order of work:
- prepare wall, Using for determining vertical level or plumb. As a result, the thickness of the plaster layer is minimal (not more 10 mm), material costs, but, so, and the estimated cost of, below;
- Drill the first six mm hole, from which to start counting. It is advisable to opt for this point, located in 20 cm on the left and in 10 cm below from the top right corner of the structure;
- Insert the dowel and, applying otbivochnogo thread, make a vertical layout;
- Perform layout in the horizontal direction;
- Mark and drill the same hole at a distance of 1-1.5 m from each other in the horizontal direction and about 400 mm in the vertical;
- Insert them in six mm dowels, screw the screws while wearing the bindings and align the heads in one plane (using the same or plumb leveling).

The final stage of work - cutting the flashing profile exactly in the height of the wall and its consolidation. For this beacon is applied to the surface and is crimped "Floppy" using special pliers. Once all profiles are set you can start plastering the walls - and, finish the job, remove the rails for reuse on another wall. More details about the technology fasteners Ushastik.
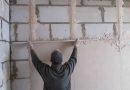
String beacons
Quite rare variant of the lighthouse - a string. You need some experience for its installation. However, this technique mastered professional repairers trying to mount beacons for plaster string type when working with large surfaces - thanks to an affordable price, and due to the high speed. Applying another embodiment for the walls of the same size, a team of builders will spend several times more plaster and guide themselves.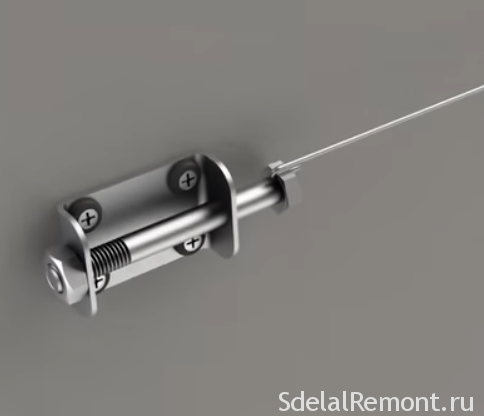
When using these types of fasteners required for all lighthouses 2 strings, mounted within minutes. But for work will need to have a small number of tools:
- hammer;
- plummet;
- pliers;
- otvёrtki;
- key;
- 2 strings (which can be replaced using cables or thin wire) and 4 dowels and bolts;
- plaster and 4 wooden bars.
construction installation rules
To install the brackets for plastering lighthouses string type will need to drill a first 4 openings, for this departing 150-200 mm from every corner in the horizontal direction and a few centimeters - Vertically. The next step - clogging dowels, in which are screwed bolts. When screwing the fasteners should be left around 10 mm of its length to tighten the strings.
The process of securing a string beacon is to perform such actions:
- string unwinding;
- Fastening beacon on one of the upper bolt;
- Tensioning strings or wires using bars of wood and stranding a second fastener;
- The repetition of the same actions with the lower bolts and the second guide.
After fixing the two strings checked their verticality. BUT, in order to reduce the likelihood of subsidence, for each block in a small amount of solution for the installation of beacons. Without this string can prosest, and a section of the wall is necessary to equalize again.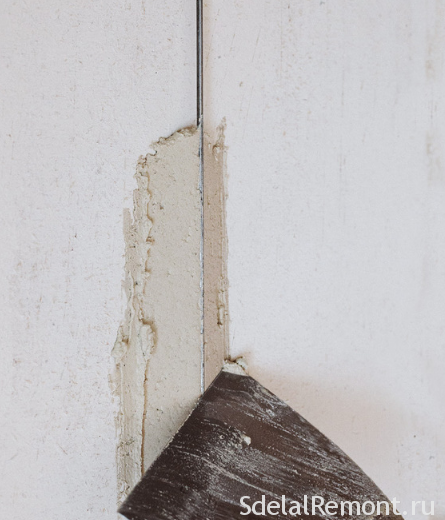
performing works, avoid distortions strings . Beacon checking is performed using rules, which should be easy to slide on the strings.
Begin further finishing should be only after complete drying of the solution, and removing strings. It should also be removed and dowels, which is attached to the lighthouses. Remaining after the rails, and hardware footprints embedded with the same mixture immediately after the completion of plastering work. Step by step Mounting Instructions string of lighthouses.
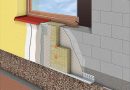
Installing metal lighthouses
One of the most convenient and reliable ways to get a flat wall is to install metal lighthouses, Made from galvanized perforated profile. Such products can withstand significant deformation and require a minimum of solution. And, A special variants- and the T-shape allows to install beacons not only on a flat plot, but also in the corners of the room.
Stiffness is provided by using such a metal guide within 10.6 mm. The length of each beacon is 25 or 30 cm. And for their installation are special clips made of plastic, secured with dowels.
How to fix the beacons of metal on the wall?
Process alignment walls on beacons from metal It includes a number of types of work:
- Checks vertical deflection lines enclosing structure and to install the guide vectorization;
- solution preparation suitable consistency (It is allowed to add a small amount of gypsum, allowing the mixture to quickly grasp);
- plastering the lighthouse, attaching it to the wall at the pre-marked location (on one side of the wall) and alignment;
- Additional fastening rail solution;
- Repeating the same steps to the lighthouse on the other side of the wall;
- Fixing the intermediate guide, which must be the first two in a single plane.
For more reliable fixing as fasteners for beacons plaster selected self-tapping screws. A coplanar alignment desirable to not using plumb, but, using water or a laser level. And, by the correct geometry plastered surface should hold and after work - with the same tools.
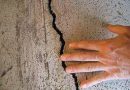
Plaster walls without beacons
In some cases, the finishing work is carried out without the installation of plaster beacons. Use this method of grout wall without using beacons, It recommended only for advanced repairmen. Laymen spend for the same work much more time and is unlikely to be able to achieve the same quality.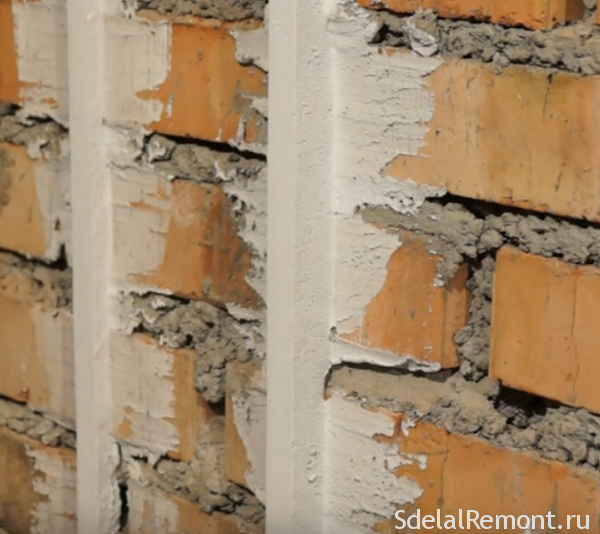
The decision to refuse the use of beacons to align the walls is made after a thorough check of each wall using a level or a leveling. Indicate the need to install guides are too large distortions (more 1,5 cm) in the horizontal or vertical direction.
If work is not carried out in a residential, and such, in the back room, where perfectly smooth wall is not necessary, you can consider the option of plaster and without guide. The more so because it reduces the consumption of plaster, and savings (both material, and on all the lighthouses).
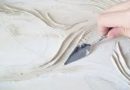
execution of works
Before you carry out plastering walls Rotbandom without guide should perform about the same training, which need, If you decide to install beacons plaster:
- Prepare all the necessary tools and materials;
- Clear wall from contamination and loose particles of old finish;
- Mix the solution by hand or using a mixer for mixing materials and, when the solution is prepared, start plastering.
To improve the adhesion of the material to the walls should be primed wall. After that, the surface snaps plaster - vertical stripes of width. By filling an entire wall, the mixture is spread rule, performing a short zig-zag motion from the bottom up. grout clean trowel. Further, the level is set flat or generally bar and left for about an hour in a plaster solution vtoplenym. After shooting a rule, and a smooth vertical line. Next, in the same manner exhibited the following beacons from solution.
Less of this method is, that it is difficult to align the wall, without using metal beacons. And at the end of a milestone hard to get a flat surface. However, the method is good for professional builders.
Through the installation of beacons for plaster, or performing work without these guides, should know, what, besides the right technology, it is important to consider other factors. These include the quality of the materials and tools, which is not worth saving. AND, naturally, artists work experience - and its absence can considerably increase the plastering, and significantly worsen the result.