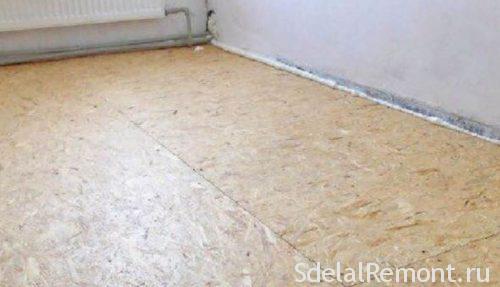
people, are not faced with the construction business, the question often arises whether it is possible to put the tiles on the OSB. Largely, when it comes to settling the frame house and furnish it becomes necessary to tile laying on OSB. This technology is most often used in the arrangement of the cottages, and cottages. OSB is the main material in the construction of frame houses.
What is RSD?
To begin with we shall understand, what constitutes such material. Such a plate is pressed several layers of wood and laminated together using a mixture of resins. Struzhchataya wall has high strength and at the same time ease of handling, it is multifunctional. But glue the tiles on the wall struzhchatuyu without training can not, OSB moisture resistance despite prolonged contact with water deforms, so first you need to prepare the wall.

preparation OSB
We now proceed directly to the issue, how to put the tiles on the OSB? And for this purpose should initially prepare the surface. At large distances between the joists and shifts sheets must be laid 2 layer OSB-3.
To achieve the maximum level of adhesion and moisture resistance is required to improve the surface of its preliminary preparation, which is carried out in several ways:
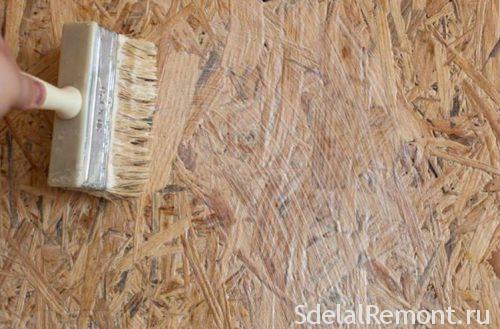
- The first and one of the most popular is a primer. Before its implementation must be carefully sanded coat with sandpaper, then apply a coat of polymer composition, which in turn will ensure full protection of the coating against moisture. The layer of soil dries out usually for several hours, then applied next. Upon completion of the priming procedure, you must leave a coating on the day, and only then continue to work and start laying the tiles.
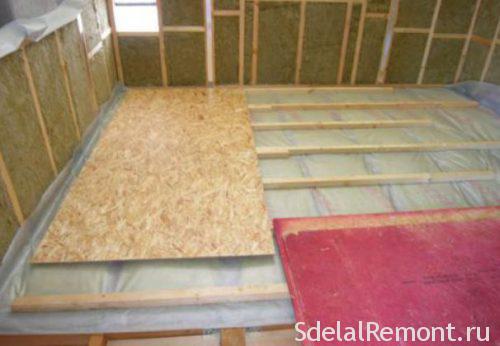
- Another common way is to sufficiently arrangement further layer. This is done via an additional arrangement lag and coating them with plywood or gypsum sheet (necessarily moisture-resistant). The plane must be flat otherwise lining may eventually fall off.
- Reinforcement can further align surface. The next option is to conduct additional reinforcement, namely reinforcing mesh installation, which is mounted using an adhesive mixture or special fasteners. When mounting glue, it is applied to the coating, then pressed into the grid itself in it, and give the dry composition. after 10-12 hours the surface should be primed, and then you can begin to work on laying.

Fixing adhesive and tiles
Since the skeleton structure is subjected to deformation, and shrink under the influence of climate, it is not recommended to use a cement adhesive, because it is prone to cracking and damage to the tiles respectively at strains base.
In this case, it is not necessary to save on adhesive mixture, as it can be fraught with disastrous consequences for the coating.
Among the obligatory performance of the required adhesive note:
- the main thing, the adhesive was the most flexible and high-quality.
- Besides, the mixture should be designed to work with distressed bases and have good moisture resistance.
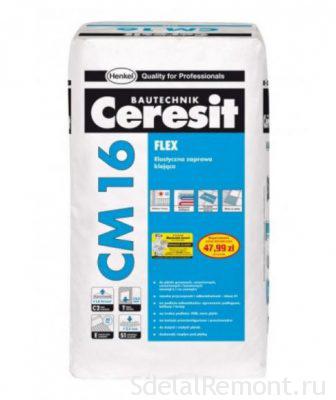
Small irregular frame glue stand. Best of all traces of glue, brand fit for work: Ceresit CM 17, Soudal 24A and KNAUF-Flex. Through these brands can be safely put on the stove tiles. The liquid nails can be used as an alternative material, but it is better to give preference to the glue.
Tile also need to choose the right. It is desirable to use tiles of 30x30 cm.
Instruments
Among the necessary tools and materials should be noted:
- Primer, as well as its application roll.
- several spatulas, including ordinary, gear and rubber for grouting.
- Building level, and preferably a laser.
- The adhesive mixture and grout, also recommended that you purchase the sealant.
- Capacity for glue.
- Tile.
If you select 1 or 3 way of, It is additionally required lags, plywood, reinforcing mesh and fastening materials for it.
Bonding of tiles on the wall
Now let us consider some of the nuances of laying tile on the wall, as well as process technology in the form of step by step instructions:
- To tiling on OSB carried out as straight as possible, using "beacons tiles". In small rooms they are settling along the edges of the walls. In large spaces the fixing is carried out with an exposure step 50-60 centimeters.
- Another important factor is checking the horizontality tiles, which uses a building level.
- Before laying tiles Beacon performed markup, which is done using the level and plumb. It becomes necessary for the preliminary sketch and sketch of measurements.
- Laying tiles carried out from bottom to top, performing on all row by row.
- To preserve the evenness of masonry set guides, which are removed after the complete drying of the glue mixture.
Features stacking considered, Now about the process:
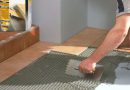
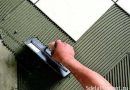
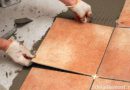
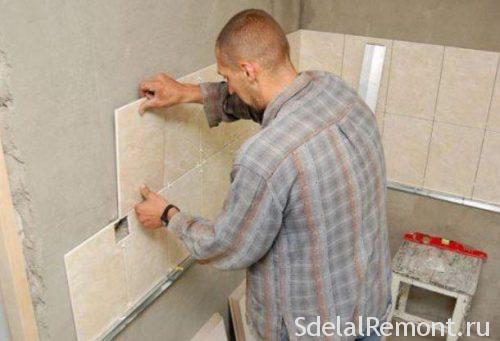
- Directly on the substrate itself and tiles applied adhesive composition, what is done with the help of a spatula. Subsequently, using a trowel adhesive composition distributed on the surface.
- After that, the adhesive laid tiles.
- Further tapping tiles with a rubber mallet or a hand. This solution necessitates pressing tiles, for its better grip, and correspondingly increase the quality of the masonry.
- To maintain the distance between the special tile crosses used, or floor leveling system.
- In this way, continues tiling for tile.
- Every fourth row should be done sixty minute break in order to avoid bias.
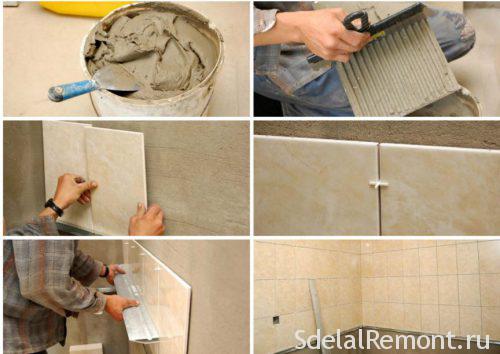
So to the end surface and is held on the wall styling, At the end sealing is carried out and grout, as we'll discuss a little later.
Laying on the floor lining
Now consider stacking technology to the floor, to a greater extent its features, because the process is almost identical to the installation on the wall with the exception of some features.
Among the characteristics noted:
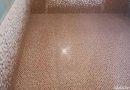
- Laying tiles on the floor OSB plate is performed with the center of the room.
- To scrap was at least, may be slightly shifted tiles, pre-calculate the necessary distance.
- Sometimes, for finding the center, the tiles are placed on a dry floor, more specifically, It carried out a preliminary layout of the tiles.
Stacking made as follows:
- Apply glue to the surface and tiles.
- We apply the material and presses it.
- Check the levelness of the level of.
- Continue similar actions followed tiles, while respecting the size of stitches using crosses or SVP.
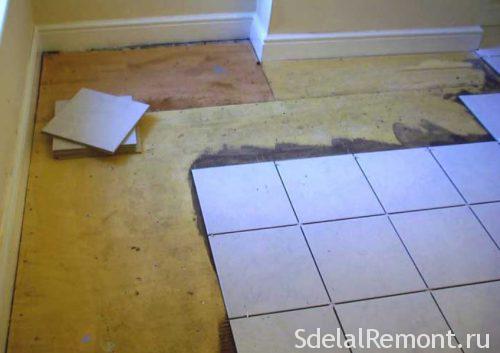
Thus we continue to work on the entire area. After completion should wait 3 day (to 10 days in wet areas) and then move on to the final stage of work.
The final stage
After that, as the mixture was completely dry adhesive is necessary to remove the spacer and embarking zatirke. The excess grout is recommended to be removed immediately, later it is harder to do, You can use a damp sponge. Angles should be treated with a hydrophobic composition, and then install the plinth. Now the tiles can be washed.
Drilling small holes in the tile in order to avoid cracks operate the drill without perforation. Wide holes are cut in advance. For more information on tile drilling can be found in a separate article.
Thanks to the right technology, laying tiles on the OSB sheets is quite feasible task. It is compliance with the rules laying will create a high quality coating, which will last for many years. And at the end we suggest you familiarize yourself with a few videos on the tiling on OSB sheets, that show, how to stack a tile and help consolidate their knowledge.