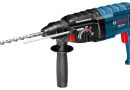
- How to extend the performance of Bosch rotary hammer
- Assembling the gun Bosch 2-26
- Assembling electrical perforator Bosch 2-26
- Assembling the rotor perforator Bosch 2-26
- Installing the stator housing
- Installing the punch control units
- Assembling the mechanical parts of the gun Bosch 2-26
- Assembling countershaft
- Assembling the shock of the barrel assembly
- Assembling the rotor assembly and the mechanical
- Setting the mode switch knob
- The assembly of the quick chuck
- Video Repair Fault perforator Bosch.
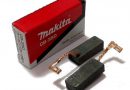
For long work Bosch rotary hammer is necessary to any regular and timely maintenance, the use of quality lubricants, timely replacement of carbon brushes, rubber products. Condition monitoring of bearings and wear. Getting to repair their own hands perforator Bosch, recommended those lubricants, which advises the manufacturer.
How to extend the performance of Bosch rotary hammer
Bosch rotary hammers require a mandatory inspection and maintenance. In order to properly operate the drills, must:
- to prevent dust from entering the cooling holes (you can wear a nylon stocking or use a vacuum cleaner);
- lubricated with special grease shank drills;
- Do not overheat the tool (Overtemperature lubricant crystallizes and ceases to lubricate rotating parts);
- intensive work to replace the rear rotor bearing every 6 months;
through 70 hours change the carbon brushes; - when drilling holes in the ceiling and down to turn perforator scroll in a position to flow lubricant into place;
- after work, be sure to blow compressed air inside the gun;
- often change the rubber sleeve on the chuck punch;
- to avoid the appearance of sparking on the collector brushes in an idle mode;
- duration of continuous operation should not exceed the 30-minute interval;
- do not use often mode "Blow".
Being accepted for the repair of Bosch rotary hammer 2-20, 2-24, 2-26, refer to the lubrication chart indicating the points of lubrication and lubricants.
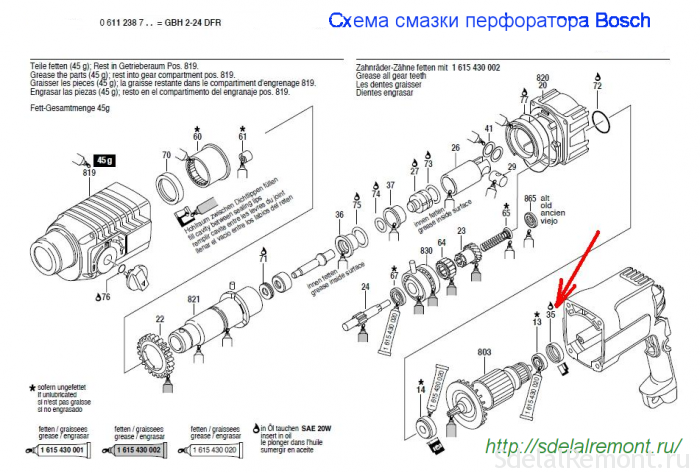
For lubrication Hammers Bosch uses several types of lubricants, depending on the operating conditions of components and parts.
The Bosch rotary hammers are used four types of lubricants:
- grease 1615430001- for the gear unit and the cavity;
- grease 1615430002- for gears, the pendulum roller bearing, clutch;
- grease 1615430020 - bearing (FT1V26);
- grease SAE 20 W - for rubber products.
Lubricants vary in viscosity and consistency.
Of Russian lubricants may be recommended lubricant for resonant name of "Zubr":

The rotary hammers Boschprimeneny 8 bearing: three rolling bearing poz.13,14,67, bearing pendulum (drunk bearing) and four needle poz.60,61,62,63.
Assembling the gun Bosch 2-26
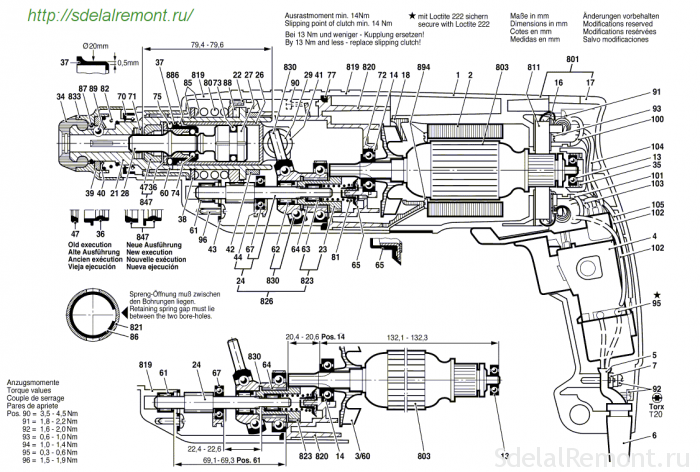
Assembly punch is recommended to perform under the scheme, eg, perforator Bosch 2-26. The presence of the assembly scheme simplifies the process, prompts the sequence assembly of the parts and assemblies.
Assembling other rotary hammers Bosch is similar, although some design features in the Hammers Bosch 2-20, 2-24, 2-26 there are.
Assembling electrical perforator Bosch 2-26
the tool assembly, including Bosch rotary hammer 2-26, should be performed on a pre-prepared place.
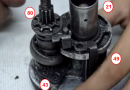
Prepare your workspace, Cover the table clean paper or cloth. Prepare tools, necessary for the performance of work. Of the tools you need: screwdriver, passatiži, tester, hammer 100 g, soft metal spacers. Spacers useful when installing the bearing on the rotor and the intermediate shaft perforator Bosch, for their heads.
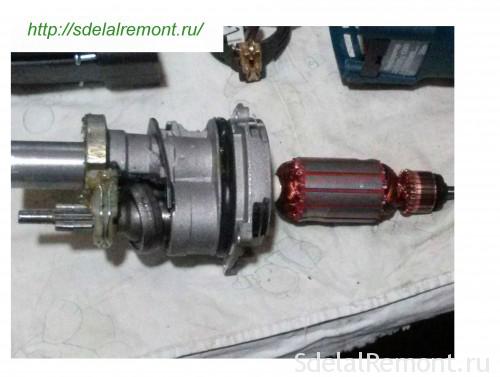
Assembling the rotor perforator Bosch 2-26
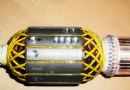
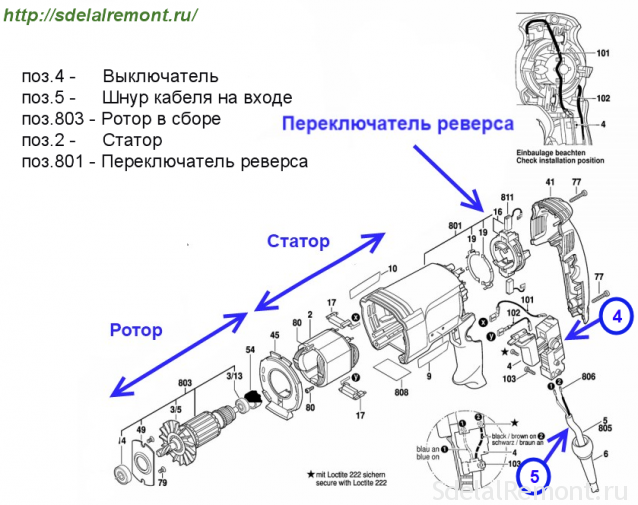
The repaired or new rotor poz.803 set the fan item 5, and bearings poz.13,14. For lubrication of the rotor bearings use grease 1615430020 from Bosch.
Installing the stator housing
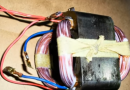
Installation in poz.801 pos.2 stator housing starts with threading through the body connecting wires of the stator coils. The stator is fixed in the housing by two screws poz.80. To protect the stator from dust or dirt, it is set in the casing plastic casing poz.45.
Installing the punch control units
The housing poz.801 consistently set button on the gun Bosch, poz.19 contacts and charge reversing switch pos.16. TEN track, that all lead wires are caught in grooves in the handle of the gun.
Assembling the mechanical parts of the gun Bosch 2-26
Before assembling the mechanical parts, check for new rubber sealing rings, the integrity of all parts, the presence of lubricants according to the lubrication chart, above.

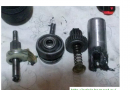
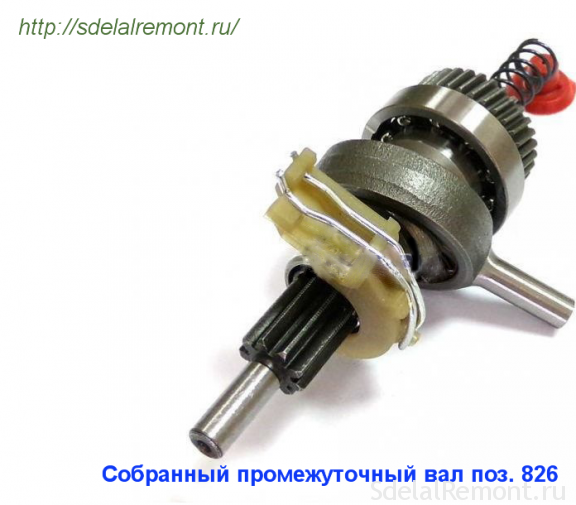
Assembling countershaft
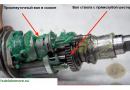
The assembly of countershaft poz.826 begin with the installation of the bearing shaft poz.67, clutch poz.62 and drunken bearing poz.830.
The shaft sleeve worn gear poz.823, needle bearing poz.63, poz.81 compression spring, retaining sleeve poz.65.
An intermediate shaft assembly is installed in the inner housing and is fixed poz.820 clamping bracket poz.48.
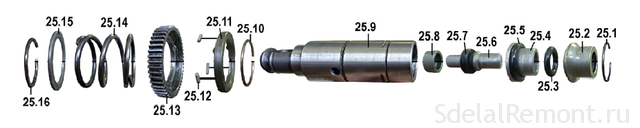
Assembling the shock of the barrel assembly
The assembly of the hammer assembly starts with installation on the barrel shaft poz.821 spur gear poz.22, conical spring poz.80, circlips poz.85 and steel ring poz.38.
Mounted on gear poz.22 stem shaft fixed roller poz.88, not allowing it to rotate gear.
On the opposite side is inserted into the shaft cavity poz.847 firing pin assembly and a piston assembly impactor at 26.
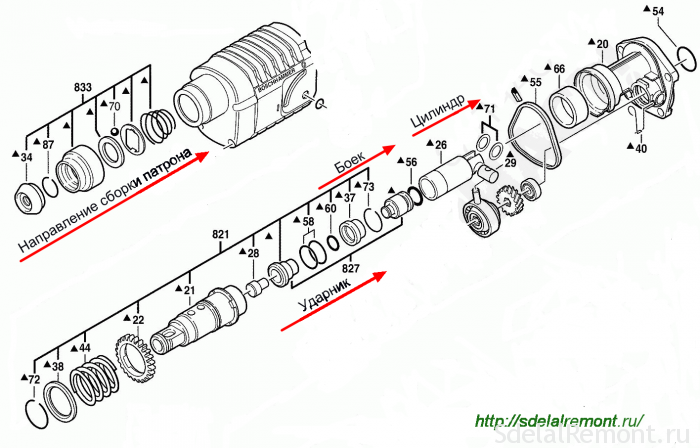
Drummer assembly begins with the installation of rubber O-rings pos. 74,75, scraper poz.71. Assembled drummer tightly inserted into the cavity of the table.
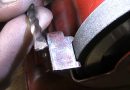
The assembly of the percussion piston begins with the installation of two washers poz.41. For, to washers held in a groove of the piston, grease lubricated surface grooves. It remains to establish the piston pin poz.29. In the inner cavity of the piston hammer peen set and the entire structure poz.27 insert into the cavity the hammer barrel.
the hammer assembly is assembled.
The impactor shaft and the intermediate shaft, set in the inner housing poz.820.
Assembling the rotor assembly and the mechanical
To Collect mechanically joins the rotor assembly. rotor gear and the hammer assembly tightly into each other. To set the rotor in a mechanical perforator assembly, helical gear is necessary to insert the rotor into the inner housing into contact with the helical large gear countershaft. After assembling the crank rotor, checking smooth scrolling.
Assembled mechanical assembly closes black plastic cover poz.819. The lid is secured with four screws poz.90, installing a sealing rubber ring poz.77. A rubber sealing ring before the assembly is required to lubricate the lubrication SAE 20 W.
It remains to connect the stator housing (green color) a mechanical block body (black color). Corps joined with four screws.
In the last step the carbon brushes mounted in brush holders poz.811 reverse switch pos.16. The handle is embedded pos.4 speed control button.
By the button connect the wires from the stator windings poz.101, 102, power cable poz.806.
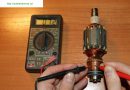
Crank shaft impactor (first hand, and then live), and make sure, that the rotor is smoothly rotated, brush and do not prevent it from moving, evenly touching the commutator bars. Sparks in the brush area does not have a tail, and sparked evenly across the full working width of the.
It remains to close the cover with two screws poz.41 poz.77.
Setting the mode switch knob
To set the mode selector knob poz.832 necessary Hammers Bosch 2-26 put to one side.
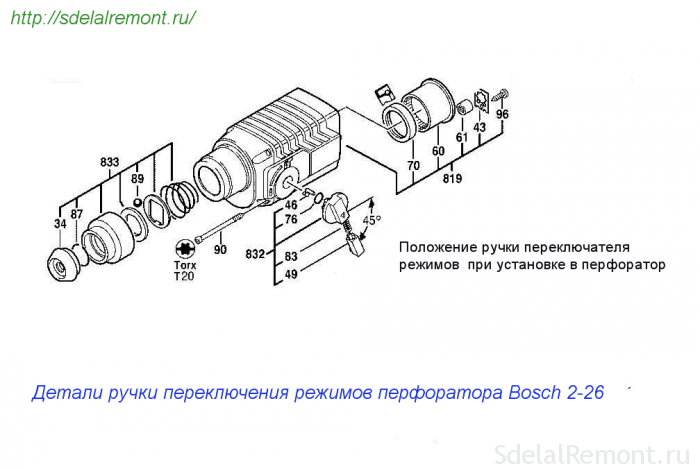
The assembled pen poz.832 mode switch is set to the perforator housing so, the red pen button is oriented parallel to the handle of the gun.
The handle is rotated in a clockwise direction to the position of "drilling". There will be a click. Handle perforator inserted.
Be sure to check the operation mode switch, turning it to the desired position and including the punch in each mode.
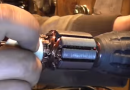
The assembly of the quick chuck
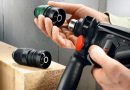
The Hammers Bosch used cartridge model SDS-plus .
they are structurally different device working bodies of the clip.
Hammer chuck assembly is carried out after the repair of the cartridge, replacing the destroyed part.
Before assembling the chuck it is mandatory to check the locking balls. They must be corrosion, and their diameter must not vary from the nominal by more than 0,01 mm.
quick chuck assembly sequence repeatedly described on our website.
The build quality of the quick chuck is defined by its capacity for work. Insert the cartridge in the gun of any tool with a corresponding shank. Hold the hand on the body of the drill, try to get him out of the weight cartridge. If you do not succeed, the work chuck deemed reliable,.
That's all. Hammers Bosch 2-26 collected. Build models of Bosch rotary hammers 2-20, 2-24 It is almost the same except for small details, do not affect the assembly process.