Now there and used three basic ways to mount the toilet. they differ fasteners (dowel, glue, screws), and a base material or, material of the floor in the bathroom. It will also vary the time, which will take place from the moment the job to start using the toilet. We will try to consider these ways to mount the toilet and nuances, are worth considering.
Ways securing the toilet to the floor
The main ways:
- Fixing dowels.
- Installation on the adhesive base.
- Installation with taffeta.
Before buying, you should also decide, how to fix the toilet to the floor. Consider these ways.
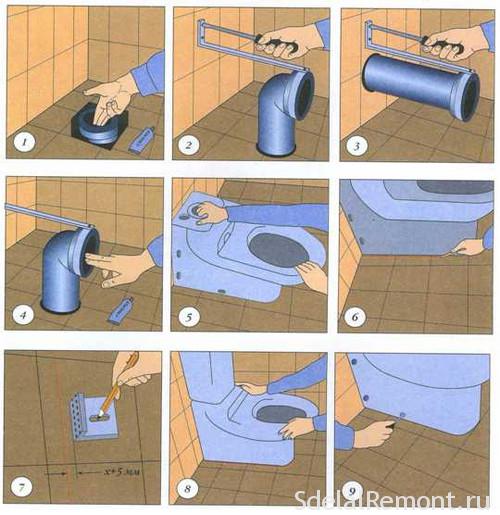
Fixing dowels
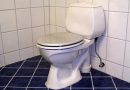
This mounting method is the most common. The reason for this is the concrete floor mounting. Also, the floor can be tiled, amenable to drilling.
The underlying surface must be sufficiently smooth, to the toilet was installed without distortions, and further drain system is working properly.
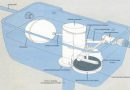
How to properly install and secure the toilet bowl
before, to installation, need to make, that a coherent link between the toilet and sewer pipes allows you to mount it to the desired location. If you use a flexible corrugation, no problems. If rigid pipe is used, or knee, this must be put in their working position, and, in case of need, fit them to the size of, cutting off the excess. This adjustment is performed with any method of attachment.
When buying, make sure, that included him going bolts for toilet. Otherwise, you must purchase a kit to.
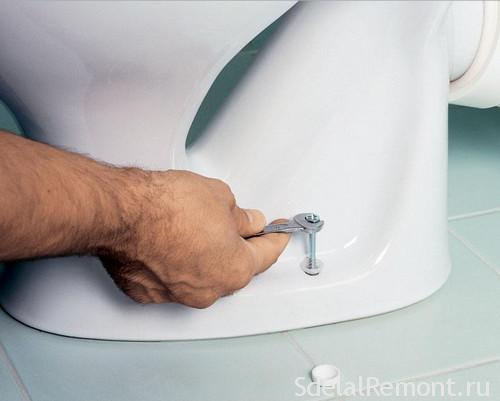
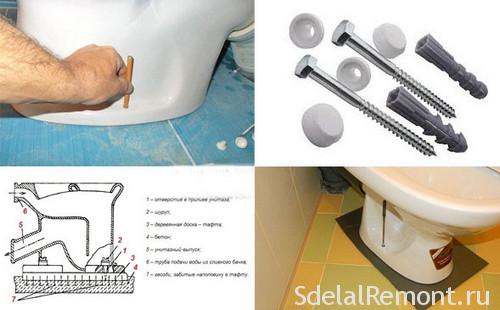
Check, The diameter dowels and bolts was appropriate opening in the base of the bowl. Bolts have to be provided with a rubber seal under its head.
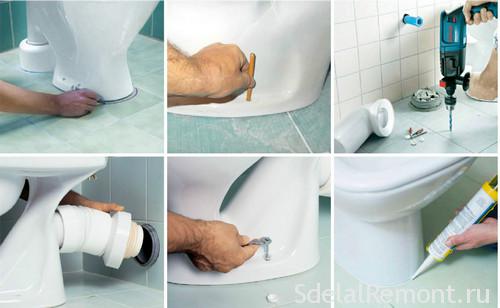
To secure the toilet bowl on tile floor, it is set to the desired position and mark out holes future. clean toilet, then drill a normal drilling mode drilled hole diameter, listed on the dowels, to a depth of not less than the length of dowel.
Drilling holes in concrete (not in the tile) must be at a slight angle with the departure of the drill inside, because the shelf at the foot of the toilet bowl, for which he will be attracted, also has some deviation.
- drilling tiles. drills are used for drilling tile with special tipped tile. Do not use the drill for impact drill or rotary hammer. After that, as the tiles will be drilled, concrete drilling can be continued in the hammer drill mode, drill on concrete. If the drilling depth is large, should be given to cool the drill bit.
- drilling porcelain. Drilling stoneware tiles using bits of porcelain stoneware. Since the small diameter of the crown do not have a centering drill, to keep the crown in place using a jig. It is made from a piece of the board by drilling holes in it with the corresponding crown diameter. The jig is placed over the marked holes, insert drill with a crown and drill a small indentation. After that, the need for jig is no longer.
- Cooling crowns made spreading of small amounts of water directly to the bore and a recess around the future opening.
When the holes are ready, they are inserted plugs, placed on top of the toilet and bolted to the floor attracted.
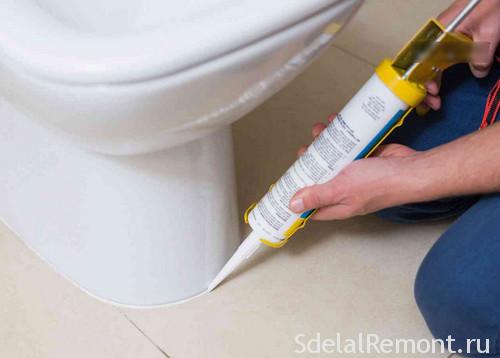
Some experts advise to use a rubber gasket between the tiles and the toilet. It will serve as a damper, which will provide a more uniform fit the toilet to the tile and close possible gaps. This strip must be cut exactly according to the shape of the mounting surface.
For sealing gaps can also apply a transparent sealant. His pre-coated on the bottom of the bowl, or they are on the circumscription after installation.
To avoid damage to the ceramic coatings on the toilet, under the bolt head is necessary to put a rubber pad minimum diameter of the head. Also, the bolt has to be screwed on tightly, but without excessive force. This pottery, instead of metal, it is fragile.
Now we have to (if necessary) ensure tightness diverter element at the joints with the toilet bowl and the sewer pipe receiving ferrules, connect the water supply, establish the work of drainage and the product can be used.
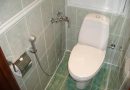
How to fix the toilet with side openings
This is a variation of the first method. However, side mount the toilet to the floor has a distinct. Attaching themselves will be located inside the mounting legs toilet. For them, the layout of holes made also on the floor, and initially screwed mounting. Then on top of them mounted toilet bowl and through the side holes is fixed to anchorages. This type of fastening slightly more complicated, but it has a more aesthetic appearance.
If the installation of the toilet made before laying the tiles (undesirably), it is necessary to provide a substrate, on which it will be elevated to the next level of the floor. Subsequently, it will facilitate maintenance and replacement of the toilet without damage to flooring.
Installation of toilet on the adhesive base
When sex is unacceptable drilling at the site toilet installation, the only way of fixing is mounted on the adhesive base. If you thought, how to fix the toilet, that it move not, then this method, probably, It would be most appropriate.
Beginning with the floor cleaning and dust from the toilet base, mud, fat and other substances, preventing adhesion. After that, the toilet is mounted on its future place and encircled his marker shape.
Tile in place first bonding necessarily processed coarse sandpaper or other tool for imparting surface roughness. It will substantially strengthen the adhesion (gluing) glue for tiles.
Thereafter, the dust is removed from the glued surfaces, and they are degreased with acetone or solvent. On the floor of the circumscribed line deposited layer of a special epoxy adhesive. adhesive thickness should be no less than four millimeters. To avoid the trouble of cooking, It is much easier to buy it in the prepared form.
On top of the applied adhesive carefully install the toilet, combining issue with toilet sewage pipe. presses the toilet bowl, aligning the level of the surface for sitting.
Now it needs to be left alone for at least 12 hours to harden the adhesive. At this time, it is advisable not to touch. Once hardened, established the necessary connections.
The toilet is ready for use.
Installation with taffeta
If your bathroom has a wooden floor, and the thickness of the small boards, you need to think about, how to fix the toilet, to not swayed.
The problem is to solve how the toilet mounting using taffeta. These methods involve creating a void in the floor of the toilet installation surface shape with a recess in 5 – 7 centimeters. It will be filled with cement mortar to a depth from the floor minus the thickness taffeta.
Taffeta made of hardwood (oak, acacia). Board thickness is taken 28 – 32 millimeter, She cut out the shape of the, corresponding to the shape of the sole of the toilet bowl. This form is required to liberally treated with varnish to avoid wetting and swelling. The bottom of this form of staggered stuffed nails or anchor. They should advocate for the board on 2 – 3 cm.
Produce mortar or concrete mix. Depending on the desired thickness of the solution should be adjusted its strength. for thicknesses 3 – 5 centimeters will be sufficient proportion of cement 400 to sand 1 / 4. With increasing solution thickness should decrease its strength, and the amount of stuffed nails grow.
If there is a possibility, better to prepare the concrete mix at the rubble fraction 5 – 10 with volume proportions cement / sand / gravel - 1/3/3. It will zapesochenny concrete, which does not crack at a high layer thickness, but it will be agile enough, to bury him in taffeta.
Then immersed in the solution taffeta, filled in the groove, and vibrating movements is lowered to the same level with the floor. Excess solution thus should raspolztis laterally. If this is not possible, It should be possible to remove the excess solution. To this end, a recess in the floor should be slightly wider than the taffeta, a solution must have sufficient ductility. This is achieved by the addition of a plasticizer, but not water.
Now you need to give a solution to grips. Although advised to wait 12 hours, this time, it is desirable to increase the, If not added into a solution reaction accelerators. Wait at least a day. After complete reaction time of cement without additives - 28 days.
After setting the solution may be installed toilet. His long screws securing the appropriate diameter. Do not forget under the screw heads to put a rubber gasket.
It is desirable to pre-lubricate the screws graphite grease or grease, to be able to unscrew them easily if needed.


Our toilet was fixed to the floor with dowels, the toilet in our concrete floor, so special was not difficult. I stood toilet years 10 and never staggered, toilet attached at my mother's friend was on the adhesive base and how much I was there, He constantly roamed, although it caused a wizard, she re-filmed the toilet and pasted, and this was enough for half a year. Cause no one can be called. Snipe she can not attach as the tiles is such, that by drilling crack. Just recently we changed the toilet and uncle fastens it again dowels and reason about other ways will not hear. In a rented apartment, we just toilet attached dowels. In general, I am in my life seen two fasteners, on adhesive base and expansion, but the bitter experience of his mother's friend shows, that the adhesive agent is an individual matter and not very strong. I for dowels!