- The causes of the gap between the bathtub and the wall
- Methods for sealing of joints
- Sealing joint with a solution
- Polyurethane foam with caulking
- Applying a sealant to seal the gap
- Plastic plinth for the joint between the bathtub and the wall
- Exterior finish of the joint between the bathtub and the wall
When major repairs in the bathroom completed, It is to hide all the flaws, that catch the eye. One of the main tasks, encountered in the repair of the bathroom - the joint between the wall and the bathroom. This gap can be minimized, and can have high resolution, but anyway - it has to be repaired. The correct way to seal helps not only to improve the aesthetic appearance of the bathroom, but also to prevent moisture from entering the gap and formation of fungus.
The causes of the gap between the bathtub and the wall
Manufacturers baths adhere to certain standards, Producing acrylic, cast-iron or steel baths only certain sizes. Most often, the length of the bath is of two variants - 150 and 170 cm. If a small bathroom, consumers choose the first option, the second case is suitable for larger rooms.
but, there are cases, when the size of the bathroom not quite fit the length of the installation site. Then, faced with a gap between the bathtub and the wall. In the event of non-elimination of the gap, a number of problems: the risk of flooding neighbors, mold formation, insect emergence, loving dampness. To avoid such troubles, must:
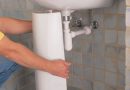
- At the initial stage of repair the bathroom to check the evenness of the walls. The angle of the walls must be equal 90 degrees, otherwise gaps will appear not only in one place, and there, where there is a wall deformity. When uneven bathroom bowl adjacent the wall, formed slit.
- When installing the bath be sure the, to become bowl flat on the floor surface. To do this, adjust the feet, to the required level.
Slots can not be avoided, if the bath is shorter, than the wall, along which it is installed. In this case it is necessary to hide the joint, selecting the appropriate method of termination.
Methods for sealing of joints
If the joint can not be avoided, you can resort to some tricks, eg, an extra wall of plasterboard sheet, or to try to break the wall and establish a long bath. Such methods take a lot of time and suggest the presence of a spare space in the bathroom. Increasingly, such methods do not solve the problem with a joint bathroom wall, therefore it is necessary to seal the joint manually.
Sealing joint with a solution
The most popular way, which is used by the master for many generations - sealing joints with a solution. Usually, after laying the tiles is a little tile adhesive or cement. These mixtures can be used to seal the joint between the bathtub and the wall. The solution makes it possible to close up a very small slit, because if there is a wide gap solution simply will not be able to hold between the wall and the bathroom. This method is considered the most flagrant termination method, because after working with solution, You will need to give the aesthetic appearance of the joint.
The procedure for sealing the gap between the bathtub and the wall is as follows:
- First, you need to completely clear the gap from dirt, dust, foreign objects, remnants of the old finishing materials;
- Handle wall at the junction primer for subsequent better grip;
- prepare a solution, as indicated on the packaging. It is better to make the mixture slightly thicker, than usual, that the mass was firm and does not fall out of joint;
- Apply the solution to align the gap with a spatula and;
- after drying,, decorate a joint bathroom and wall materials, at its discretion. Usually in such cases, glued plastic moldings or curb.

Polyurethane foam with caulking
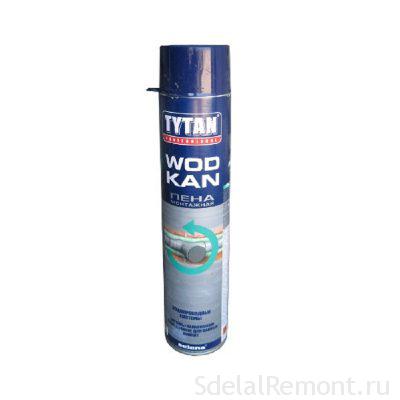 Polyurethane foam is a special property. In the process of drying, she begins to increase. therefore, if the experience with the foam had not been, better to entrust the masters. If there is a knack for foam application, You can use this method of sealing joints.
Foam allows to seal the gap size 8 cm. Cylinder foam is almost always equipped with a special long spout, by which the weight is applied evenly. Experts recommend the use of fine-pored foam when working in areas with high humidity. Do not forget, the foam must be waterproof.
The process of sealing the joint between the bathtub and the wall in several stages:
- surface preparation: clean the joint and treat it to a degreasing liquid, dry;
- Stick masking tape on the joint place on the wall and on the bathroom, so that later it was not necessary to clean the surface of the dried foam;
- Shake the bottle with foam, and using the nozzle cause the foam to the slot. Apply foam evenly and worth little, due to its tendency to increase in the future. Work better with gloves, since in contact with the hand, construction foam poorly removed, when dry;
- Wait, until the foam is completely dry. It usually takes about 7 hours;
- Carefully remove the extra portion of the dried foam using a sharp knife;
- Make a finishing seam.
Polyurethane foam for sealing joints good speed and ease of use.
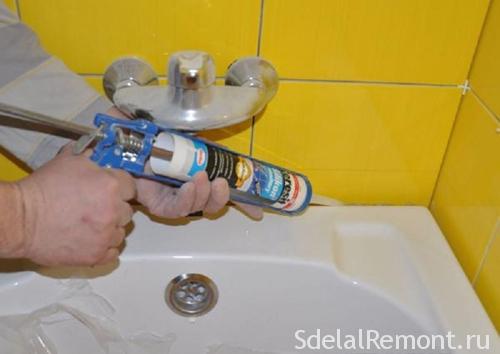
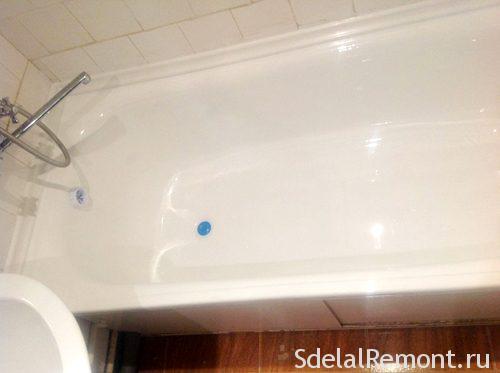
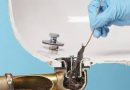
Applying a sealant to seal the gap
small cracks, during the installation bath can be eliminated by sealing silicone. He copes with this task, both in aesthetic terms, and in terms of protection from moisture. The sealant layer seals the gap between the wall and the bathroom, thus resistant to moisture and temperature extremes.
Choosing Silicone Sealant, note: on the pack must be specified, that tool is designed specifically for the bathroom. Such sealant will possess antibacterial properties, which prevent the appearance of mold. Sealants can be transparent, white or in color. If further sealed seam will be hidden under the trim, You can use the white sealant.
The process of sealing the joint by means of sealant is quite simple:
- remove dirt, finishing residues at the junction;
- Treat the surface of the bath and the wall of a degreasing agent, let dry;
- Make a hole in a tube sealant. Keep in mind, that the greater the hole, the thicker layer is obtained applying means. Insert the tube of sealant to the special fastening tool and draw a smooth uninterrupted bandwidth at the interface and the bathroom wall;
- So far no remedy has dried, Use a sponge with soapy water, To align layer and remove the excess;
- after drying,, suture should disguise any desired manner.
The use of a sealant for sealing joints in the bathroom has recently become very popular, due to its antiseptic properties and elasticity.
Plastic plinth for the joint between the bathtub and the wall
This plinth is a success, because it is rich in coloring and low cost. Some skirting on the inside, which is attached to the joint, have a rubberized insert, which additionally sealed gap between the bathtub and the wall.
On sale are skirting PVC ready-made adhesive backed, however it is not recommended to use these options for bathroom. Because of high humidity, adhesive side is unreliable and quickly moves away from the surface.
Stick plastic skirting advise on waterproof glue or liquid nails. The adhesive is desirable to select the colorless and quick-drying, because when gluing the plinth it is necessary to press his hands before, how to grab the glue.
When self-installing skirting follow such a course of action:
- Degrease and dry work surface;
- Measure and cut to the necessary length of the pieces of a plastic plinth. In places, where baseboard will connect with each other on the corners - perform the cut at an angle 40 degrees;
- On the perimeter of the bathroom, which will run plinth, stick masking tape, to avoid getting glue;
- Apply the adhesive evenly around the joint;
- Attach the plinth to spray glue and press down for 20 sec.;
- Wait a bit dry and peel off the masking tape.
Avoid contact with the adhesive or sealant, which will hold the plinth, on the surface of the bath or tiles. Over time, this tool can darken or turn yellow, that will be noticeable on the surface finishing.
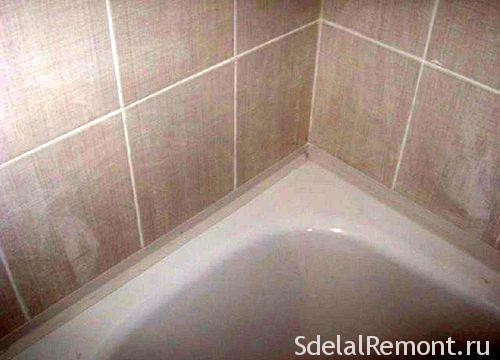
Exterior finish of the joint between the bathtub and the wall
After sealing the joint by any selected method, the question arises, how to hide the sealed gap. Experts offer several options:
- Using curb tape. elastic band, made of polypropylene, It makes it easy to hide the seam on the outside. Such a seam finish requires no additional decoration, and will be well protected from moisture joint. Inside adhesive tape impregnated base, which is attached to the joint. Feeds come in different widths and colors. However, there is a downside in choosing this method. The tape is not durable, and even with proper care will last no more than 2 years old.
- ceramic border. Such an option would be ideal, when you want to repeat the texture of the laid tiles. With proper packing, border effect creates a smooth transition from the wall to the bathroom. Such curbs are selected separately for main color tiles. Mounting curbs occurs via tile adhesive.
Upon completion of the repair should not forget about the visual beauty of the bathroom, and match exactly the method of caulking, that will not break the aesthetics of the room.


In my parents' house I remember the gap between the wall and the bathroom was decorated with small rectangular pieces of tile, which is decorated with a wall surface. We used the repair sealant. From the article for myself I have found a solution to hide the external trace interface, bought an elastic band, playing the role of a border. The article indicated drawback - fragility. I think this, conversely, dignity, tk. there is at least something to update the interior bathroom with a periodicity 1-2 of the year.