Construction technology, as well as building materials themselves are constantly improving, and with each passing day it becomes more and more. In this case, no one is going to experiment in making repairs in the apartment, and prefers variants tested. This indicates, that the first material has to show a good side, only then it will start to rise in the level of popularity. Very soul became self-leveling floor, in particular, its ease of installation. If you want to make quality Self-leveling floors step by step instructions should be followed from beginning to end. See the video and avoid common mistakes when filling floors.
Features
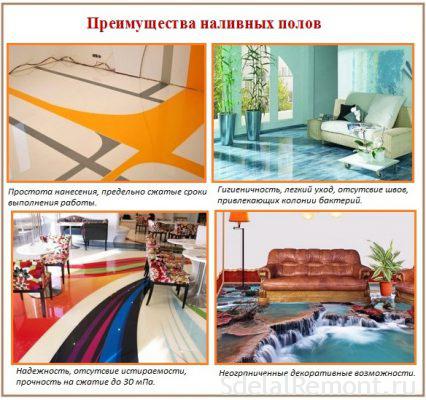
If you pay attention to the distinctive features of the floor fill, they primarily come from the advantages of this technology.
- Long life. If the self-leveling floor laying technology observed, it can last for several decades.
- Preparation of a solid foundation.
- confrontation moisture, Chemicals and Minerals.
- The high level of fire safety.
- Environmentally friendly after drying. Even heating process does not allow to allocate to the environment of harmful substances.
- Great looks, which is adjusted for the interior space and depends on the customer's wishes.
- Is not afraid of changes in temperature.
- The surface becomes smooth, It can be used as a finish base or deck act as the basis for any type of floor covering.
- Dust does not stay on the floor of the filling, and mold and fungus do not develop.
The possible use of leveling floors, followed by applying a decorative

It is worth noting, what Self-leveling floors It can be poured on the existing surface, including base layers of self-leveling floor. Except there is not, and warm floor, which must be arranged according to the rules and parameters.
To avoid damage to the self-leveling floor layer, floor heating system can not be turned until dry final solution. Otherwise cracks may appear and will sometimes failures due to uneven temperature distribution in the drying process.
Options for self-leveling floor
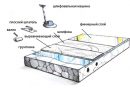
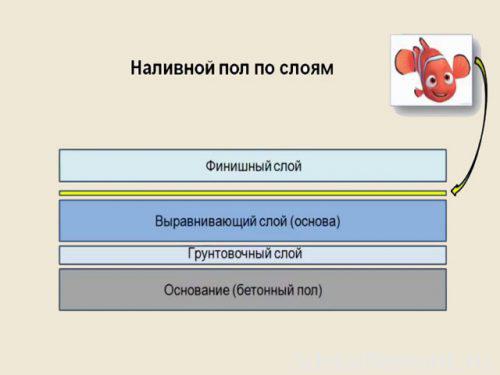
Before, how to choose a specific version of self-leveling floor, should consider, what will be the final thickness. It will affect the base for pouring, nicks, unevenness and other surface defects. It may be performed over the filling inlet floor floor, but this is accompanied by leveling the base to the required level. Total isolated three main types of device Self-leveling floors:
- Apparatus topcoat. Its thickness is typically 3-5 mm. Since a very thin layer, It requires a high level of adhesion. He then reached, when used floor primer before pouring. The number of layers will depend on the base. In this case, self-leveling floor firmly engages with the lower layer, however he was not. But the primer is applied to the prepared surface, after passing the scraper or sandpaper.

Layers of self-leveling floor - Floating type floors. It is used under such floorings, linoleum, laminate, parquet. This is due to the fact, that such materials have properties leveled over time stacking line. Influenced by temperature changes here, humidity and other factors. Its thickness typically ranges from 25 and more millimeters. Self-leveling floor in such a case will harden without defects and damages. As the separation layer here is a film of polyethylene. Alternative film - roll waterproofing, parchment. Everything will depend on the size of the purse and customer preferences. Overlap of bands thus should be about 10-15 cm. we can not forget about the damping tape, which travel along the perimeter of the room and along the walls of architectural structures (columns). The main purpose of the tape - sound and movement of the floor over time.
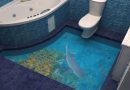
- separating layer, is used to cut off the ground. Most often used in self-leveling floor device on wooden beams, if necessary to create a surface thickness 10-20 mm. Here, as the separation layer between the timber and the solution acts oilpaper. To fill had no adhesion to the base, created waterproofing impregnation. This is done, to progress of wood, occurring almost constantly, no effect on the self-leveling floor. Likewise made 3d floors, that create three-dimensional effects. In them as a separation layer serves banner or picture.
The layers of the decorative filler floor


Each individual scheme can not be the benchmark for a particular room. All created individually, to some extent it is added and improved. In reality, such variants pouring self-leveling floors in the apartment there are many more.
choice of instruments
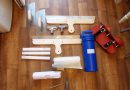
Prior to the beginning of all the works should be prepared set of tools, is required for the casting floor in the room. This includes:
- specific capacity.
- aeration roller.
- Mokrostupy.
- Drill with paddle.
- Wipers.
- Rollers and spatula.
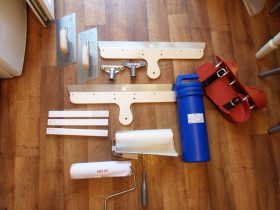
- Means of protection.
- A vacuum cleaner.
- spatulas.
A complete list will depend on the particular circumstances and the particular variant of self-leveling floor. The most important thing - to worry about their health, because in the process of pouring self-leveling floor, solution allocates enormous quantity of harmful substances, which may adversely affect the health of the professionals.
When choosing kraskostupov, should pay attention to what, so they do not "walk" on the leg, and sit tight. Only in this case the work can be performed quickly and accurately.
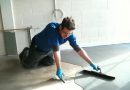
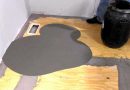
Substrate preparation
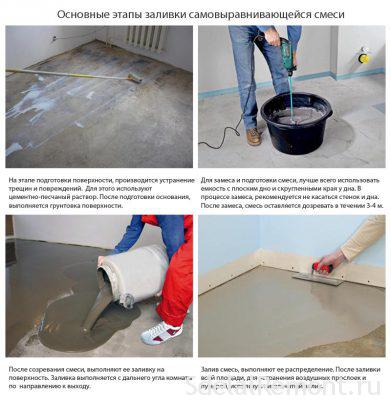
A very important stage in the device layers of self-leveling floor - training grounds. We should make every effort, to really get the desired result. To start a base self-leveling floor is aligned horizontally. If there are significant differences and projections, they have to be removed and dismantled. The smoother the surface will, the easier and cheaper to arrange the base layer self-leveling floor.
If there are loose parts of the floor before pouring the need to remove them all. All these surfaces are cleaned in the future of debris and soil. If you want to fill weighty defects, You can use ready-made mixes. They are quite dilute with water. Drying takes place as soon as possible, then you can begin to fill the base layer self-leveling floor.
To grip was at a high level of self-leveling floor training should include cleaning of the surface of debris and dust using a vacuum cleaner construction. No harm will be wiped with a damp cloth. some deem, that did not happen quickly pour the floors. In fact, it is the preparation should be given utmost importance. From it will depend on the quality of the floor.
It is important to know at what temperature is poured self-leveling floor. Average her figure 15 degrees. Below temperatures will slow the reaction in solution, which will affect the degree of flowability. Such conditions often increase the flow, reduce quality, Color change material.
Worth checking the humidity in the room, as well as the base for pouring self-leveling floor in the apartment. The surface should not be more 4% humidity. Otherwise, you must make a few layers waterproofing, to prevent ingress of moisture in the filled solution. Only in this case, the liquid self-leveling floor will turn out excellent quality.
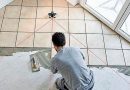
Priming the surface
Pour self-leveling floors to be flat only to the prepared surface. In addition to thorough cleaning should also be use a primer a self-leveling floor. It allows you to avoid the appearance of defects on the surface, followed by. To further increase the grip, in the primer is added quartz sand. 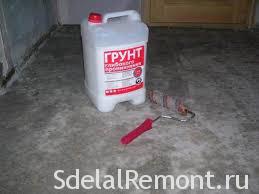 With it appears roughness. Primer for self-leveling floor is purchased off the shelf at the store. For the application uses roller.
There may be situations, when the self-leveling floor coating is absorbed. Then follows after drying carry out another layer and wait for drying. According to the result will be to make some conclusions. But without it to start pouring the base layer in any case be. All work will be for nothing because the probability of delamination is high.
Mixing the solution
Yourself can determine the, what amount of the mixture It needs to work in the room, pouring liquid to the floor has been performed. One liter is enough per square meter area of the room, if the thickness of the layer will be 1 mm. With increasing layer will increase and the consumption of mixture.
It is worth paying attention to the consistency of, which differs depending on the manufacturer. Pour the floor in the room should be at a time, that the result has pleased. It is for this solution is prepared with a stock, not to have to watch his hardening before cooking a new batch. Do not be amiss to seek the advice of the seller, which will help to orient with the choice of the mixture and the number of mounting.
Since the self-leveling floor can be performed in two layers, the first layer, called "base" is made of less expensive blends, as their thickness will be much more finish. To this mixture there are self-leveling, having sufficient set of qualities and characteristics.
For cooking solution sufficiently pour the mixture into a container and pour the required amount of water. This was all spelled out in the instructions from the manufacturer. It should be guided by, to comply with all parameters. After mixing the solution was left for several minutes, and then all mixed again. Any additives and filler should be added in the second kneading solution. When a self-leveling floor applying the solution must occur immediately, so that he could not get to grips. Typically, time is set up to 40 minutes.
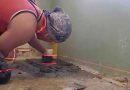
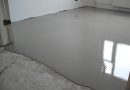
Pouring leveling solutions
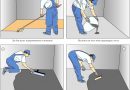
When you fill the base layer should be observed phasing and sequencing of actions:
- do stop in the doorway. This may be a piece of drywall, profile or rail. Similarly, one can arrive at the device self-leveling floors in two stages in large rooms.
- The width of the bands when pouring the floor should not exceed half a meter. First of strips laid along the wall opposite the entrance.
- The second fill strip should be carried out without any interruption. Similarly implemented and the remaining strips across the room. Simultaneously with pouring the solution should be leveled with a spatula.
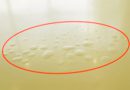
- After complete cycle pouring surface extends aeration roller. It allows you to get rid of air bubbles. In order not to damage the surface of the used kraskostupy.
- Above the self-leveling mass of polyethylene film is laid, to the drying process was evenly. The set time should be couched in mandatory.

This layer of self-leveling floor is arranged for, the base should be tailored to the ideal. Self-leveling compounds are smoothed out all the flaws and errors, removed irregularities and other moments. Only then you can proceed to the installation topcoat or leave the surface for a flooring of any kind of floor covering. In the latter case, you can think about, whether to pour the floors topcoat.
In hot weather, do not let the sun hit, Do not use heated heat gun, the floor should dry out evenly. Use water to moisten the screed and cover film, it promotes uniform, smooth drying.
"Warm floor
Leveling the floor with liquid floor has its own quirks and peculiarities. This largely relates to a system underfloor heating. We should clarify the implementers of the polymer coatings compatibility. After all, when heated, not every option is perfect in terms of health and environmental safety. true, then the estimated surface temperature of 30 to 36 degrees, It is favorable for a human foot and is compatible with the filling floors.
underfloor heating system is arranged is filled with ready solution, then it is necessary to wait about an hour for his grasp. After this will merely fill the thin finishing layer, which will make the surface is perfectly flat and smooth.
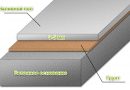
finishing layer
As for the topcoat, here do not have their features, besides stacking the thin layer to 3-5 mm. Mixing the solution and the preparation of the base occurs in a similar manner. should only remember, first layer (base) must necessarily dry, after which he covered with primer. When the primer is dry - Getting to spray topcoat. special mixtures used for cooking solution for leveling floors.
You can not at the same time forget about the care of the casting after it is applied to the surface: bubble removal, razravnivanie, creation of conditions for complete drying and uniform.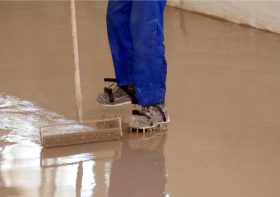
It is possible to create conditions against sliding. For this purpose, after pouring into a solution of the washed sand sprinkle, after which the work roller aeration. If, however, do without the sand, then roll to work less, to burst the bubbles in the subsequent crater. This is what will prevent slip. The main requirement is to carry out self-leveling floor in stages, observing technology.
Tips & tricks
Before installation, you should decide so, what material to fill in the floor. For this purpose there is the Internet network, where you can find numerous reviews and advice on their choice. Preference is given to trusted manufacturers, that more than a year working on the market.
When sex casting technology in the apartment was not respected from the very first stage - preparation of base, you will eventually get a crisp floor, covered with numerous cracks. All existing cracks will contribute to the emergence of air, which will go through it flooded the floor.
Mixing the solution can bring disadvantages, if it will get garbage, insects. Subsequently, not get them already get from the flooded floor. We'll have to break areas and produce self-leveling floor repair. This applies not only topcoat, but base. floor-filling rules must be followed scrupulously. Thus itself solution should have a smooth consistency. Otherwise, it will solidify unevenly and the quality of its manifest not all sites.
Pouring liquid floor with their hands performed at least twice, to have time to spread all the ready solution for the entire area of the room. All given time no more 35-40 minutes, after which the mixture begins to thicken and lose its quality yield primarily.