- Отделка потолков гипсокартоном – это выгодно
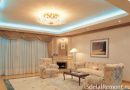
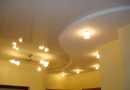
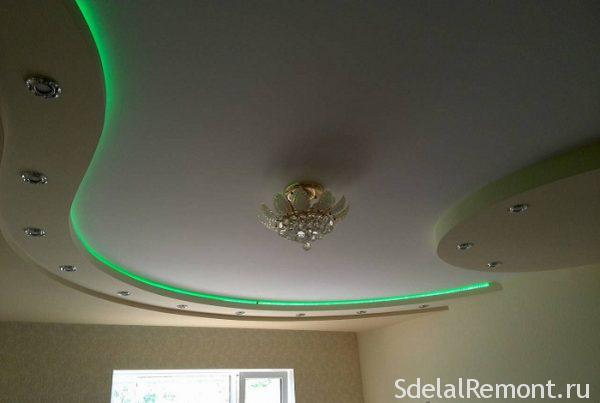
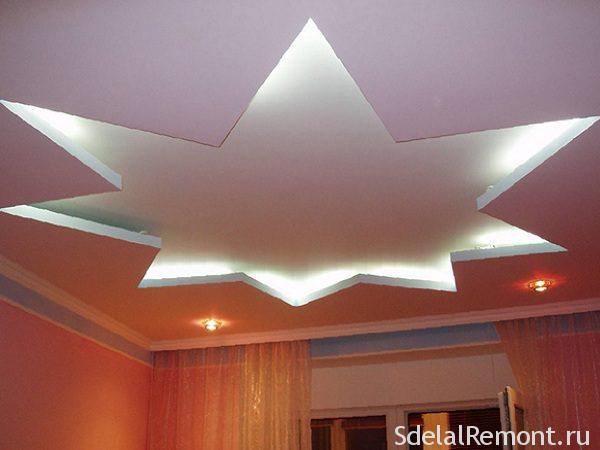
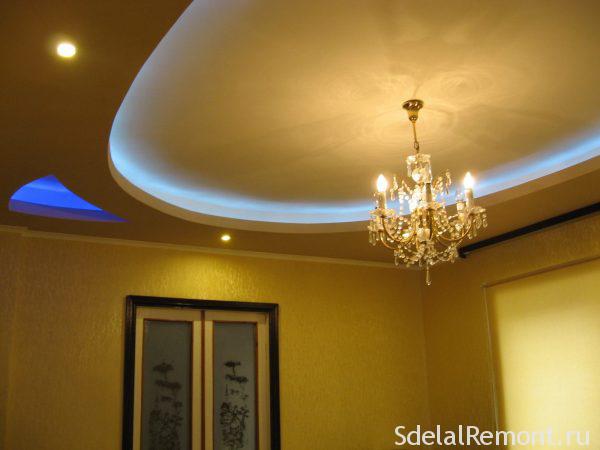
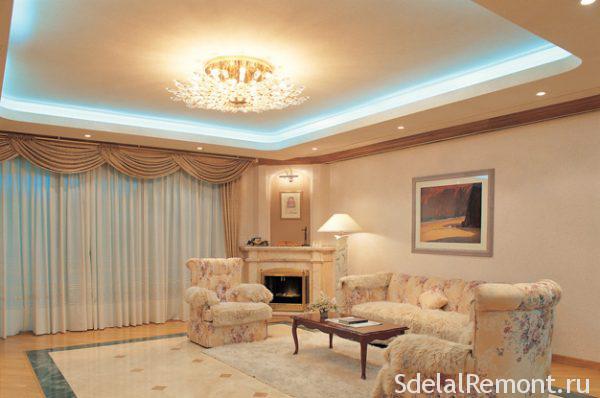
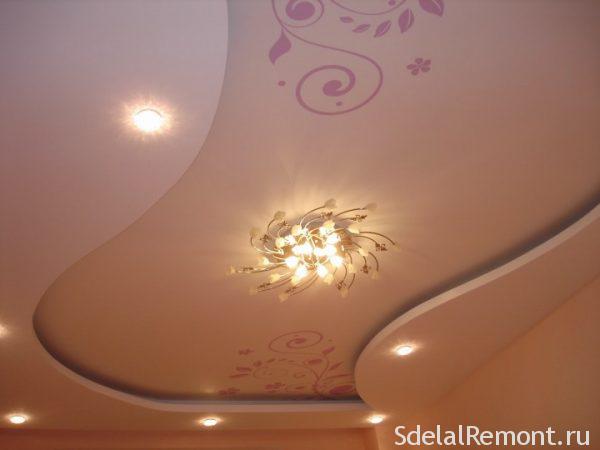
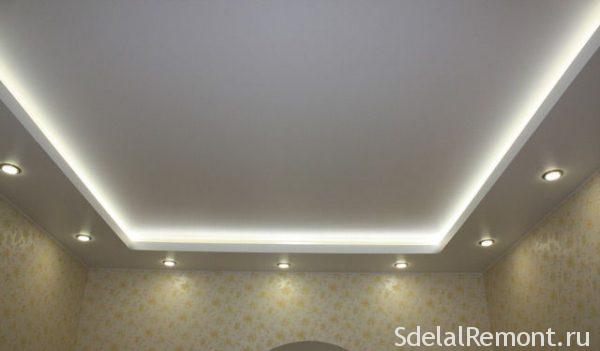
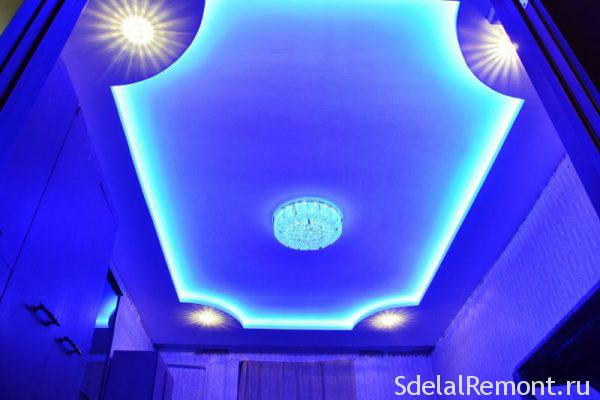
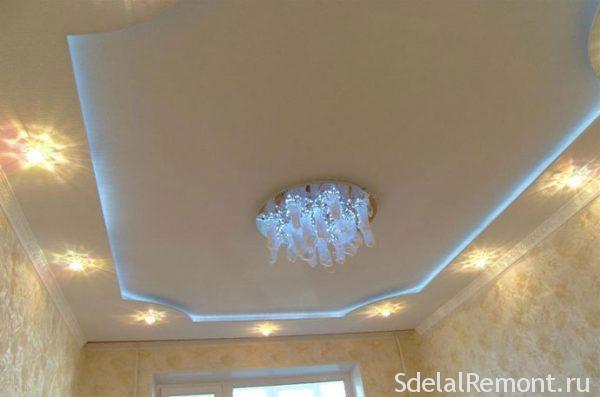
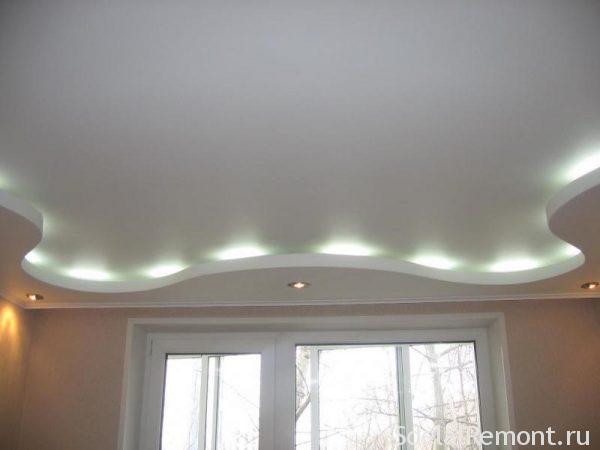
- Фото красивых двухуровневых потолков
- Делаем изысканный потолок своими руками
- Материалы и инструменты, которые пригодятся при монтаже
- Монтаж каркаса двухуровневого потолка – нелегкая задача для новичка
- Продольные ПП на потолке
- Схема устройства второго уровня потолка с нишей для подсветки
- Чертежи каркаса двухуровневого потолка с нишей
- О чём нужно не забыть во время работы
Многим знакомо выражение: «Ремонт не заканчивается никогда!» Особенно актуально это выражение для тех, кто всю жизнь живет в своем доме. Но и жителям квартир хоть раз в жизни приходится заниматься этим неблагодарным делом. От этого никуда не денешься – никому не хочется «жить в шалаше» или прослыть ретроградом. А в строительстве и отделке каждый день появляются новые материалы, конструкции и решения. Есть смысл рассмотреть подробно, как сделать самому двухуровневый потолок из гипсокартона с подсветкой и предать оригинальный дизайн квартире.
Отделка потолков гипсокартоном – это выгодно
Существует много современных способов превращения потолка в произведение искусства. Это и подвесные системы, и натяжные потолки, и специальные пластиковые панели, и потолочная плитка из пенополистирола, и металлические конструкции. И всё же потолок из гипсокартона по-прежнему востребован. Почему?
Первая и главная причина – относительная дешевизна такого метода. Многим при строительстве и ремонте приходится считать каждую копейку. И потолок из листов гипса позволит немного сэкономить.
Другой положительный момент: подвесная конструкция позволит скрыть все недочеты старого потолка, а также провода, кожухи вентиляции, трубы и т.п. объекты, портящие дизайн комнаты.
Третьим плюсом можно считать однородность фактуры стен и потолка. Если стены отделаны ГКЛ, логично обшить ими и потолок. Нужно лишь прикупить чуть больше материала. К тому же потолок можно сделать как простым, так и неповторимым. Полет фантазии в данном методе ничто не сдерживает, кроме содержимого вашего кошелька.
Немаловажен и тот факт, что любой мужчина, умеющий пользоваться строительным уровнем и шуруповертом, способен смонтировать двухуровневый подвесной потолок из гипсокартона с подсветкой самостоятельно. Конечно, придется серьезно зарыться в интернете в поисках информации, попросить помощи у друзей и найти несколько свободных от основной работы дней. Но результат того стоит.
Для начала нужно нарисовать или найти фото понравившегося потолка в интернете. Замерить потолок и нарисовать несколько чертежей. Двухуровневый потолок из гипсокартона с подсветкой – довольно сложная конструкция и сделать его «на глазок» не получится. Отдельно нарисовать схему расположения основного и точечных светильников, определиться с видом подсветки между уровнями. Наиболее распространена светодиодная лента, но можно использовать и другие источники света.
Фото красивых двухуровневых потолков


Делаем изысканный потолок своими руками
Если есть опыт в строительной сфере, инструменты и свободное время, можно попробовать себя в роли отделочника-профессионала. Сделать двухуровневый потолок из гипсокартона с подсветкой своими руками сложно, но вполне по силам каждому мастеру, который не боится грязной работы. В смысле – пыльной, ведь гипс оставляет после себя много пыли.
Просчитать заранее и закупить все необходимые инструменты и отделочные материалы. Их ассортимент и качество выбирают согласно той сумме, которую решено потратить на ремонт.
Брать лучше «в обрез»: в любом населенном пункте материалов для таких потолков выше крыши и докупить их, если не хватит, можно в любой момент. А вот куда деть остатки после ремонта в малогабаритной квартире – это большой вопрос! И выкинуть жалко – деньги на дороге не валяются, и поставить некуда. Однако каждый должен решить этот вопрос самостоятельно.
Существуют несколько лидеров по выпуску изделий и материалов из гипса:
- Knauf. Компания занимает лидирующее положение на нашем рынке, да и во всём мире. Гипсокартон и всё для отделки этим материалом. Качество, проверенное временем. Среди ассортимента – арочный ГКЛ толщиной 6.5 мм. Прекрасный выбор для создания криволинейных линий двухуровневого потолка.
- Фирма из Скандинавии, «помешанная» на экологичности. Их продукция пользуется заслуженным спросом во всём мире. Многие изделия дороже, чем у её германского конкурента.
- Lafarge Group. Польская фирма разбросала свои заводы по всему миру. Европейское качество продукции при вполне демократичных ценах. На нашем рынке известна не так хорошо, как Knauf. Первой наладила производство ГКЛ с полукруглой фаской по всем четырем сторонам листа.
- ОАО «Гипс». Единственное российское предприятие, качество продукции которого соответствует европейскому уроню, а ассортимент товара широк и многообразен. Базируется в Волгограде. Продукцию с логотипом «Волма» можно увидеть на всех стройках нашей страны.
Что касается комплектующих. Самые известные и дорогие на нашем рынке – у фирм Knauf и Gyproc. Большинство остальных производителей – небольшие частные российские заводики. Так что проблем с приобретением не возникнет. Такой же богатый выбор комплектующих – от дорогих до роскошных – для монтажа освещения.
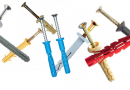
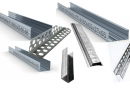
Материалы и инструменты, которые пригодятся при монтаже
Двухуровневый потолок из ГКЛ своими руками с подсветкой потребует много материалов и инструментов. Если есть чертежи с размерами, примерное количество того или иного материала легко высчитать. Понадобятся листы потолочного гипсокартона 9,5 мм, лист арочного гипсокартона 6,5 мм для отделки извилистых линий перехода уровней. Если 2-й уровень будет прямым, покупать арочный гипсокартон не имеет смысла.
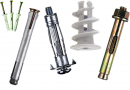
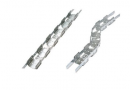
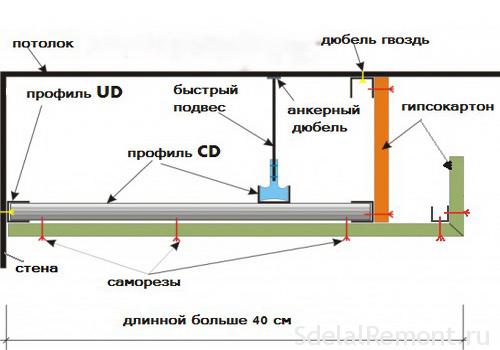
Кроме этого нужна грунтовка и шпаклевка по гипсу, самоклеющаяся лента (серпянка) для заделки швов, демпферная лента для улучшения звукоизоляции. Металлокаркас монтируется из потолочных направляющих профилей (ПНП), потолочных профилей (ПП), арочных профилей, прямых подвесов, одноуровневых подвесов (краб). Для крепежа используют дюбель-гвозди, анкер-клинья, саморезы по металлу 3,5 на 9,5 черные («семечки» на жаргоне мастеров) либо белые ПШ, а также саморезы для гипсокартона черные.
Всё это не смонтировать молотком и отверткой. Потому нужно приготовить или купить необходимые инструменты. Кроме вышеназванных потребуются лазерный и пузырьковый уровни, ножницы по металлу, ножовка с мелкими зубьями, красящий шнур (отбивка), рулетка, нож канцелярский для резки гипсокартона, рубанок, наждачная шкурка или сеточка малярная, шуруповерт, перфоратор, шпатели разной ширины для шпаклевки готового потолка.
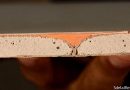
Не стоит забывать и про освещение. Двухуровневые потолки из гипсокартона с подсветкой кроме центральной люстры, должны быть оснащены светодиодной лентой, дюралайтом или неоновыми лампами. Кроме этого можно добавить точечные светильники напряжением 220 вольт как на первом, так и на втором уровне потолка. Их выбор огромен и простое перечисление ничего не даст. Всё решается конкретным выбором стиля и дизайна потолочной конструкции.
Монтаж каркаса двухуровневого потолка – нелегкая задача для новичка
Есть два пути монтажа двухуровневого потолка из гипсокартона с подсветкой. Первый путь более легкий и понятный для непрофессионала. Второй более длительный по времени и более трудоемкий. Зато у каждого есть свобода выбора. Рассмотрим первый способ более подробно…
При этом методе устройства двухуровневого потолка из ГВЛ сначала монтируется каркас первого уровня. Он представляет собой горизонтальную обрешетку из металлопрофилей, на которую будет крепиться гипсокартон.
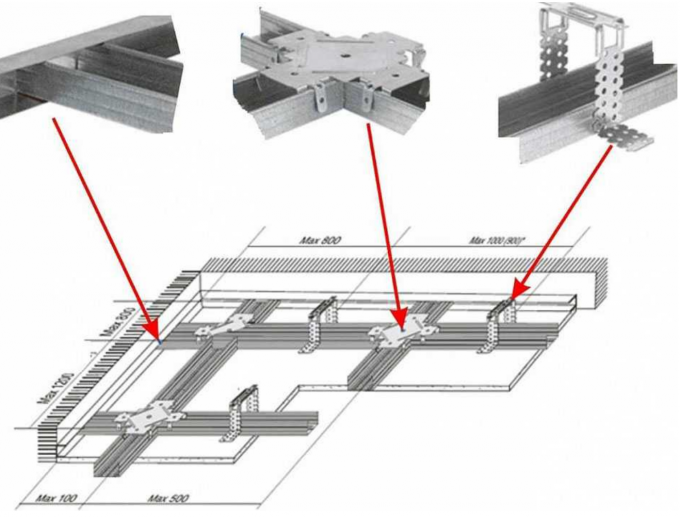
Делается чертеж каркаса, проставляются размеры. Стандартный лист ГКЛ имеет ширину 1200 мм. Для создания конструкции с хорошей жесткостью достаточно 3 потолочных профиля на лист, т.е. расстояние между центрами продольных ПП равно 60 см.
Сначала монтируются направляющие профили (ПНП). На стенах с помощью лазерного уровня ставятся метки на расстоянии 6-7 см от потолка. Эти метки соединяются линией при помощи длинного правила либо малярного шнура (отбивки). Не забудьте наклеить с обратной стороны профиля демпферную ленту; она послужит дополнительной звукоизоляцией для комнаты. Сверху к линии приставляется профиль, отмечаются отверстия для его крепления. Отверстия сверлятся в стене перфоратором, затем профиль крепится на дюбель-гвозди. Самая легкая часть этапа монтажа готова.
Затем на потолок наносятся линии продольных потолочных профилей (ПП). Старайтесь четко выдерживать расстояние в 60 см. Ширина комнат редко бывает кратной 60, поэтому отступ от противоположных стен рассчитывается примерно одинаковым; для каждой комнаты он свой. На нанесенных линиях через каждые 60 см делаем перпендикулярно отметки. Это места крепления прямых подвесов. Подвесы крепятся к потолку с помощью дюбель-гвоздей или анкер-клиньев. Выбор зависит от конструкции старого потолка. Концы подвесов оттягивают вниз.
Продольный профиль одним концом вставляется в направляющий. Второй конец закрепляют с помощью расположенного рядом прямого подвеса. Правильность крепежа контролируется лазерным уровнем или длинным правилом. Для закрепления деталей используются саморезы ПШ, а также «семечки» – черные шурупы по металлу. После этого профиль фиксируется по всей длине в прямых подвесах и направляющем профиле.
Данная операция повторяется для всех продольных профилей. Если длины ПП не хватает, он удлиняется с помощью продольного соединителя и отрезка ПП нужной длины.
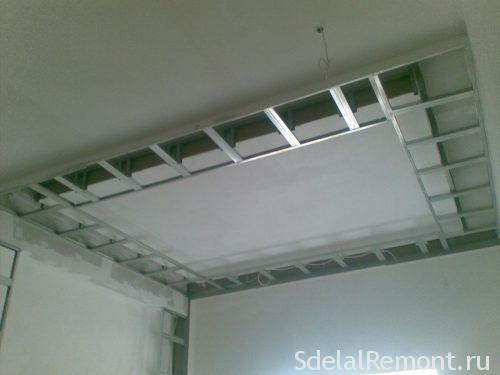
Продольные ПП на потолке
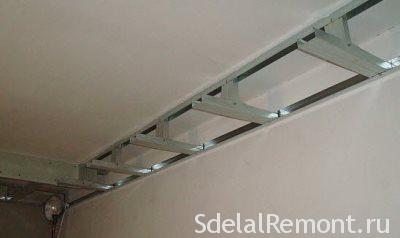
Остаётся смонтировать поперечные планки. Их длина на 1 см меньше, чем расстояние между продольными профилями. Крепятся они при помощи одноуровневых соединителей (краб) с промежутками 50 см. Это делается для того, чтобы край листа гипсокартона – а его длина кратна 50 – пришелся посередине поперечного профиля для удобства и надежности крепления. Все соединения фиксируются саморезами. В итоге должна получится конструкция, как на фото выше. Затем монтируется электропроводка. Обязательно помещайте провода в гофрированную негорючую трубу. Делаем петли в местах размещения точечных светильников или люстры.
Во избежание попадания шурупов запрещено прокладывать внутри металлических профилей прода!
Полученную обрешетку обшивают гипсокартоном. Для крепления используют черные саморезы с мелким шагом резьбы длиной 4-5 см. Расстояние между саморезами берут равным 20 см, расстояние до кромки листа – 2 см. Это предохранит лист от разрушения. Шляпки саморезов слегка утапливаются в поверхность, позже их маскируют штукатуркой.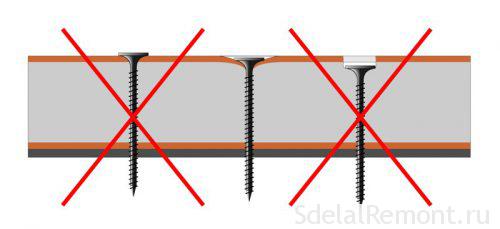
Если лист приходится резать на куски, на отрезанной части делается кромка рубанком или острым ножом. Потом срез обязательно зачищается наждачной бумагой.
Швы первого уровня проходят черновым слоем штукатурки с применением серпянки. На этом первый этап монтажа двухуровневого потолка с подсветкой из гипсокартона завершен.
Начало второго этапа идентично началу первого. Отступаем вниз по стене 12-15 см. Почему так много? Раз делается потолок с подсветкой, то это в самый раз: высота бортика, заслоняющего источник света + возможность просунуть в нишу руку для замены сгоревшего элемента.
Схема устройства второго уровня потолка с нишей для подсветки
Итак, ниже потолка по стенам делаем отметки, соединяем линиями и монтируем направляющие профили. Если второй уровень планируется по всему периметру комнаты, направляющие идут по всем стенам. Если это диагональ, значит профиль крепится лишь в тех местах, где второй уровень примыкает к стене.
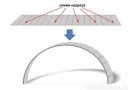
Второй уровень потолка обычно криволинейный. Для создания плавных изгибов лучше всего применить арочный профиль. Но большинство «мастеров» предпочитают экономить. Они вырезают треугольники на боковинах потолочного или направляющего профиля как можно чаще и изгибают его по рисунку. Рисунок лучше всего нанести на потолок первого уровня. Эту линию повторяют, отступив от будущего края второго уровня вглубь на 10-15 см. Это расстояние может быть меньше, если использовать в освещении светодиодную ленту либо дюралайт. Здесь будет проходить крепление этого уровня к первому.
Нарезаем куски потолочного профиля длиной 12-15 см (высота уровня). Эти куски заменят прямые подвесы. По внутренней извилистой линии изгибаем и монтируем на потолок арочный профиль либо изрезанный направляющий профиль. К нему крепим куски-подвесы. Соединяем их нижний край с ПНП, закрепленном на стене, при помощи отрезков ПП. Длина данных отрезков должна быть равна расстоянию от стены до наружной, крайней извилистой линии будущего уровня. Если длина таких отрезков больше 60 см, рекомендуется сделать поперечные вставки из одноуровневых соединителей и отрезков ПП.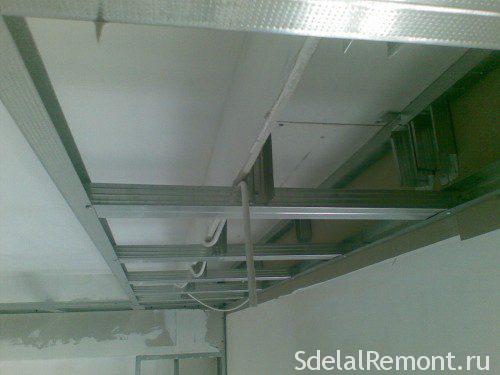
Старайтесь, чтобы конструкция вышла максимально жесткой. Последним штрихом будет окантовка торчащих ПП направляющим профилем с разрезанными боковинами. Его изгибают так, чтобы при взгляде снизу линия этого профиля повторяла изгибы рисунка на потолке. Полученную окантовку закрепляют саморезами. Каркас готов.
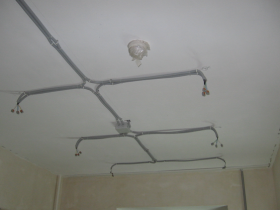
Электропроводка монтируется аналогично первому уровню. Расположение точечных светильников вчерне отмечается на потолке.
Обшивка полученного каркаса гипсокартоном будет следующим шагом. Ровную поверхность обшивают, как описано выше для первого уровня. Края пропиливаются по линии изгиба. Проблемой будет обшить торец второго уровня. Для этого есть два проверенных способа:
- Полоску гипсокартона с внутренней стороны накалывают игольчатым валиком или кончиком ножа. Затем поверхность смачивают водой с помощью губки или тряпки. Влага пропитывает гипс и полосу прикладывают к профилю. Изгибают её медленно и осторожно, фиксируя поэтапно к профилю саморезами.
- Внутреннюю сторону полосы разрезают V-образно до внешнего картона через небольшие промежутки. В этом случае полоска повторит изгиб профиля. Но этот метод хорош лишь для небольших по длине участков.
Далее гипсокартон грунтуется, наносится черновой и чистовой слои шпаклевки с помощью шпателей. Прорезаются отверстия под точечные светильники, в нише крепится светодиодная лента, другие трековые источники света. Контакты хорошо изолируются и прячутся. Поверхность красится в выбранные тона. Потолок из гипсокартона двухуровневый с подсветкой своими руками готов.
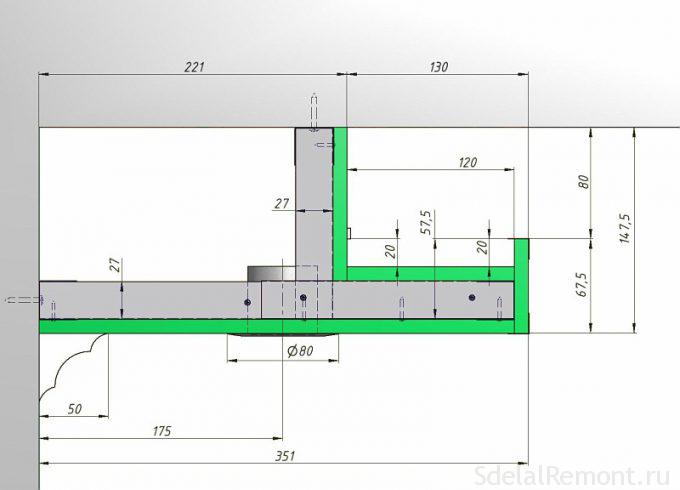
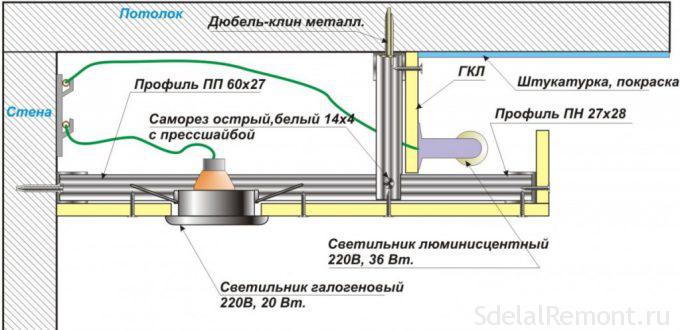
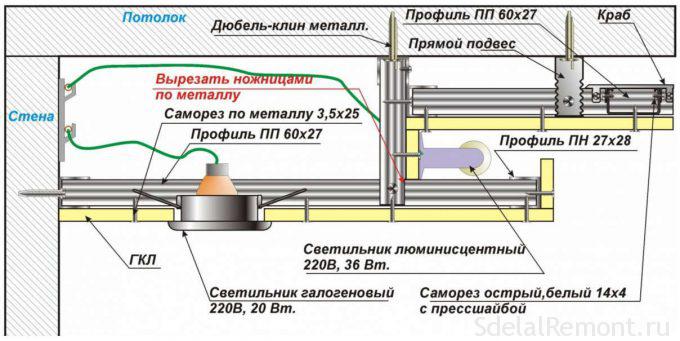
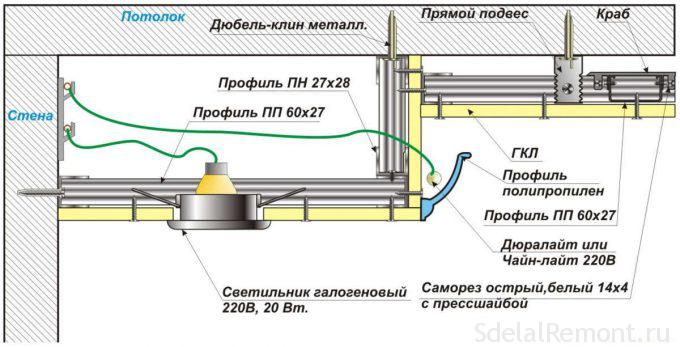
Чертежи каркаса двухуровневого потолка с нишей
Подробно рассмотрим различные схемы устройство гипсокартонных потоков с устройством подсветки в один и два уровня.
О чём нужно не забыть во время работы
Монтаж двухуровневого потолка из гипсокартона с подсветкой не будет непосильной задачей, если придерживаться нескольких правил.
- Нужно верить в себя :).
- Тщательно разработать эскизы и чертежи будущего потолка, начиная от разметки каркаса каждого уровня и заканчивая расположением каждого светильника. Проследить, чтобы светильники не совпадали с обрешеткой.
- Выбирать проверенные по качеству материалы, которые будут служить вам десятилетия.
- Не торопиться. Начинать следующий этап работ, лишь закончив предыдущий.
- Если возникают проблемы, тщательно изучить весь доступный материал, чтобы выбрать наиболее простой и эффективный путь её устранения.
- Не стесняться пользоваться помощью друзей. Одному справиться с такой работой, не обладая опытом, практически невозможно.
- Работу с электропроводкой желательно поручить профессионалу.
Если всё вышеизложенное вас не устрашило, тогда удачи! В дополнением посмотрите видео по устройству потолков.