Отделка пеноблока внутри – необходимый этап строительства жилого здания. Отделанные блоки имеют повышенную прочность и служат дольше. А для того чтобы сделать всё правильно, требуется не только выбрать подходящую штукатурку, но и строго соблюдать все этапы выполнения работ.
Материал для отделки дома из пеноблоков внутри достаточно сильно отличается от стандартных вариантов штукатурки, и его отделка может показаться достаточно сложной для не слишком опытного исполнителя. Однако обойтись без этапа отделочных работ при обустройстве пеноблочного здания невозможно, так как преимущества блоков в виде низкой теплопроводности и небольшого веса снижаются при попадании на них влаги. Защита стен с помощью штукатурки предотвращает появление на их поверхности трещин и различных дефектов. Поэтому ответ на вопрос, нужно ли штукатурить пеноблок, способен серьёзно повлиять и на декоративные, и на теплозащитные характеристики стен, и на период времени, оставшегося до следующего ремонта.
Особенности внутренней защиты пеноблока
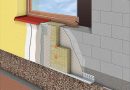
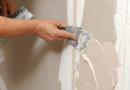
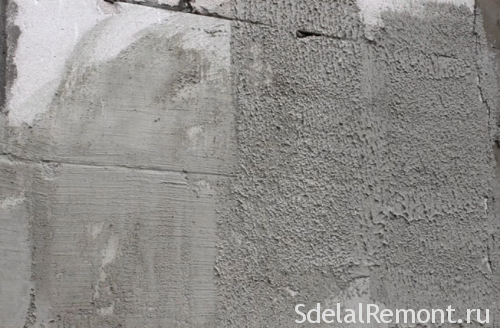
Покрытие штукатуркой представляет собой не только самый быстрый, но и наиболее простой вариант отделки пеноблока внутри. Хотя из-за слишком гладкой поверхности блоков держаться этот материал будет сравнительно плохо. Если, конечно, не воспользоваться специальной технологией нанесения, позволяющей покрытию не осыпаться даже через несколько лет после окончания ремонтных работ. Кроме того, от исполнителя требуется в точности придерживаться инструкции, соблюдая толщину слоя (от 10 до 20 мм), подходящую для сохранения теплоизолирующих свойств материала.
Впрочем, качество работ зависит не только от штукатурки, но и от самих пеноблоков. Стеновой материал может изготавливаться с помощью литья – в этом случае его поверхность должна подвергнуться ошкуриванию. Для блоков, изготавливаемых с помощью распила, специальной обработки не требуется. Нередко сцепление отделки и стены увеличивают с помощью специальной армирующей сетки.
Независимо от способа получения блока, ответ на вопрос, можно ли штукатурить пеноблоки цементным раствором, будет отрицательным. Не подойдут для выполнения таких работ и штукатурки, создаваемые на основе цемента и известки. Плохое взаимодействие этих составляющих с бетоном не обеспечивает достаточно прочности получившейся отделке, которая практически сразу осыпается, только благодаря металлической сетки можно удержать раствор на стене.
При необходимости сэкономить средства и увеличить прочность отделки, используя цементные смеси, можно с помощью обычного (и недорогого по сравнению с любыми штукатурками) плиточного клея. Имея высокую степень прилипания к поверхности, он обеспечит сцепление с пенобетоном даже не совсем подходящего материала. Основные рекомендации по штукатурке пеноблоков плиточным клеем указывают на возможность изготовления из него и специальной сетки армирующего слоя перед нанесением цементных смесей.
Подготовка к выполнению работ
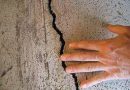
Перед тем как начинать работы по отделке пенобетона, следует убедиться в том, что с момента производства стеновых материалов прошло не меньше 30 дней. В течение этого периода на поверхности и внутри материала могут появиться трещины и дефекты. Поэтому ещё до оштукатуривания желательно обработать такие деформации блоков, способные повлиять на качество дальнейшей отделки.
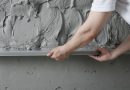
Выбирая, чем штукатурить пеноблоки внутри дома, следует приобрести сетку, грунтовку, крепёж, шпатель, кисти, отвес и ножи. Список пополняет зубило, дрель, отвес и специальная металлическая щётка, строительный уровень для проверки ровности поверхностей и чаша, в которой будет разводиться раствор.
На этом же этапе работ следует подобрать и смесь для штукатурки пеноблоков, которая должна обладать такими параметрами:
- высокой эластичностью;
- хорошей паропроницаемостью;
- водо- и морозостойкостью.
Найти подходящие материалы можно в соответствующих разделах онлайн-маркетов или обычных строительных магазинов. Самыми популярными среди них являются смеси марок «Победит», Ivsil и EuroMix. Продукция этих брендов удобно приводится в нужное для работы состояние и подходит для пеноблоков.
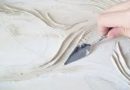
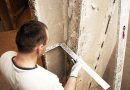
Следующая стадия работ – подготовка поверхности под отделку. Она заключается в тщательной очистке стен от пыли, грязи и мусора. Для этого применяется металлическая щётка, которую для повышения удобства можно прикрепить к электродрели. Вращающийся с большой скоростью инструмент позволит очистить подготавливаемую поверхность в несколько раз быстрее.
После очистки выполняют следующие действия:
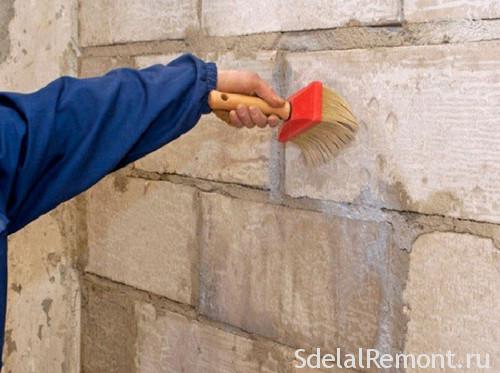
- Грунтуют поверхность (в 1 или 2 слоя) для устранения щелей и деформаций пенобетона, а также улучшения адгезивных свойств материала.
- После высыхания первого слоя грунтовки наносят второй.
- Закончив второй слой, переходят к шпаклёвке.
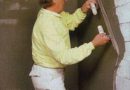
Нанесение штукатурки
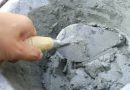
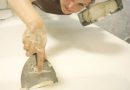
Для того чтобы подготовить сухую смесь для штукатурки пеноблоков её размешивают в заранее подготовленной ёмкости (баке или бочке) с помощью дрели и специальной насадки. Готовый материал наносят шпателем сверху вниз, соблюдая рекомендуемую толщину и максимальную равномерность распределения. После первого прохождения стены следует подождать высыхания слоя и только потом наносить второй.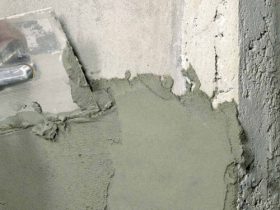
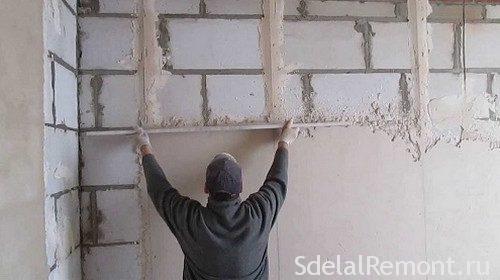
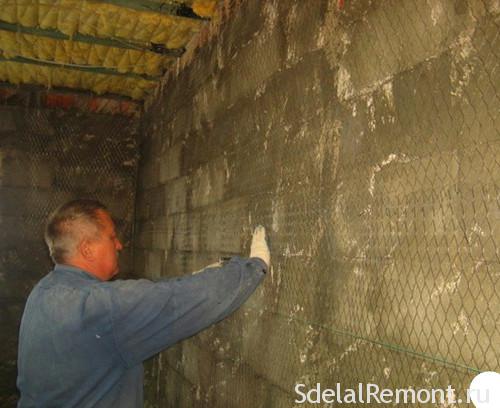
Если до начала работ установить сетку для штукатурки пеноблока, смесь будет схватываться значительно лучше. Если отделка достаточно толстая (до 2 см), желательно выбирать металлическое армирование. В других случаях достаточно и стекловолоконной сетки.
Завершающий этап
Работы по отделке стен из пеноблоков внутри можно считать практически законченными. Теперь от исполнителя требуется только подождать окончательного высыхания штукатурки, после которых можно приступать к декоративно-отделочным работам – например, оклейке обоями или покраске ограждающих конструкций, отделке их гипсокартоном или деревянными панелями.
Для малярных работ по стенам из пеноблока подходят краски, на упаковке которых указана возможность использования с этим материалом. Чаще всего они сделаны на силиконовой или силикатной основе и имеют максимальную паропроницаемость. С помощью таких красок или другого варианта (обоев или панелей) отделка будет закончена, а ремонтно-строительные работы приблизятся ещё на один шаг к завершению.