To the balcony can be used not only in the summer, but also in winter, It needs understanding, how to insulate a balcony. Wisely by doing simple work, you will greatly increase the usable area of the apartment, You will be able to use it for recreation, Sleep in a cool room, storage of different things, You can also arrange on the balcony of the office or winter garden.
What are the advantages of warming?
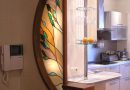
Insulated hinged design will be useful at any time of the year. It will not only protect the area from wind and rain, but also will be a good buffer between the apartment and the street. Despite the small area of balconies and loggias, it is convenient to use as an office, hookah, other premises, which do not require a large amount of furniture. On the balcony, easy to read, as the glazing miss a lot of light, and insulation make the space comfortable.
Apartment for extra space, protected from the cold. You will be able to hold on to the loggia heating, post those articles here, that get in the room, but require storage at room temperature.
Rules insulation balcony
Before you decide, to begin warming balcony, you need to learn a sequence of actions carried out. In total, it includes several stages:
- Preparatory work. In order to carry out work on warming, You need to make the extra items from the balcony, to prepare the floor and walls to finish, remove the previous frame, if they do not cope with the tasks, and quality design glaze.
- Installing glazing. warm balcony, not having a glazed or glazing Cold, old, transmissive cold wooden frames, It makes no sense. The design should be sealed. Heat often goes exactly through the frame and glass, therefore they should be given special attention.
Council: to the balcony well kept warm, it is recommended osteklyat with plastic windows. wooden frames, if it is not eurowindow, unable to cope with the cold enough, and aluminum glazing, usually, cold.
- floor Warming. After the new frame will be installed, the floor is made crate and held its insulation. This is exactly, where to start warming or balcony loggia, since through a floor heat loss also occurs, walls and finishing is performed after.
- Walls and parapets. Insulation is required to place directly on the walls, facing the street, that is to insulate the wall of premises do not need.
- chief wall, usually, It does not require additional insulation, especially if high-quality plastic frames have been installed. However, if you feel the need to do so, the operating principle is the same, as well as from the balcony walls. Harm does not bring extra insulation.
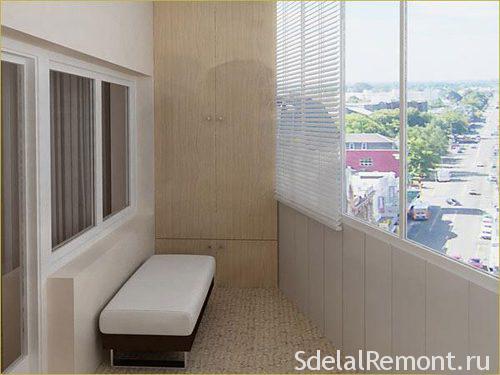
- The final stage: it is a wall decoration. Whatever the insulation you may use, You need to continue fine finish, covering it with something hard. For these purposes from the inside, you can use a variety of materials: bunk, brick, DSP, plywood, plasterboard, plastic. Besides, You need to install the windows on the slopes.
How are preparing for warming?
Before to insulate a loggia, you need to carefully prepare the site for work, different foreign objects you will interfere, and you will spend a lot of time, moving them from place to place, You will not be able to make the right crate.
Check out, how strong railings and concrete partition structure: possibly, they need to enhance or restore. The outer side railing sheathed with plastic or other material, do not absorb moisture. It is necessary for insulation and wind protection insulation from rain. If the parapet of brick or concrete, outside need not do anything. If the concrete has a gap or crack, their required repaired with cement mortar or blow out using the foam.
Installation of windows may not be required, if you are already plastic frames with glass. Even if you did not change the frame, vacuum the floor, clean the debris from the tracks before, you start to warm.
Working with the floor
To make the crate, you will need to purchase wooden slats. The most convenient way to mount them on the screws. As a heater can be used penoplex, mineral wool or foam. Rail must be chosen the same thickness, how penoplex, if you're going to insulate them; optimum height will 50 mm.
Reiki is placed on the floor, fasten with screws. Place the mounting need to distance, approximately equal 40 cm apart. Applicable use anchors, if you loggia. It is important to take into account the, how wide plate, otherwise there is a risk to break through it. You can then go to the installation rails, their width must also not be more than a heater: eg, suitable for Penoplex 1 cm. On the sides is necessary to leave a gap, because it will be filled with foam. The most convenient way to mount the rack along the balcony design.
Council: rail should be installed on a level, otherwise get a flat floor, you can not. To raise the rack and align it, use special plastic spacers, more often they are sold in stores, implementing plastic windows and doors.
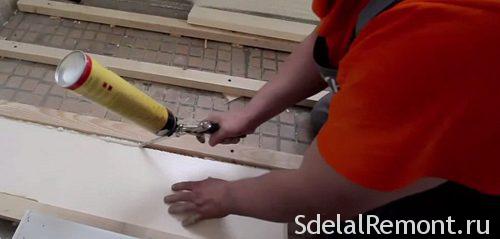
After penoplex be stowed in a cell, empty space to fill with foam. It `s that, that it is necessary to insulate the balcony necessarily,
because, if left slot, the heat will go through them, and insulation will be ineffective.
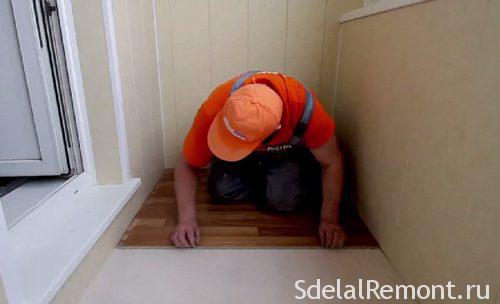
After the heater will take its place, and dry foam, Installation can proceed to the final coating. You can use the whiteboard, plywood, DSP. material thickness must not be less than 2 cm, otherwise they will bend. The selected material is attached to the joists with screws: they need to be screwed, retreating 15 cm apart. Using chipboard or plywood sheets, lay them across the boards, leaving a small gap.
Council: while we are working to consolidate the material, step on it is not recommended, otherwise there is a risk of the folded sheet and get the curve floor.
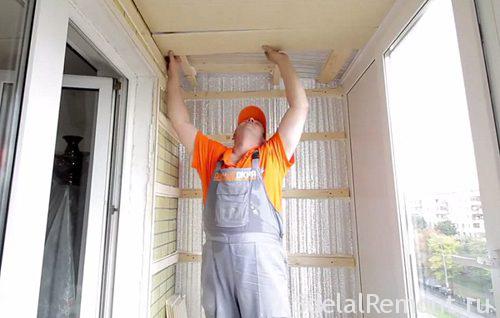
Working with the walls and ceiling
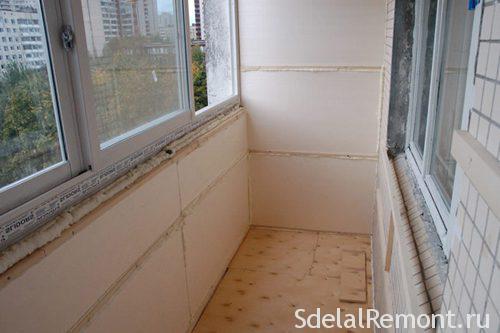
For walls, you can use the same insulation, as for sex: suitable mineral wool, and foam, penoplex. The last is a bit more expensive, but it has improved performance, making it more profitable to material.
If you take a hard insulation sheets, work with them will take much less time. Attach it possible for liquid nails. The sheet is easily cut by a conventional knife, so, if it is too large or if you want a piece of some form, you can effortlessly do so out of the ordinary sheet or foam Penoplex.
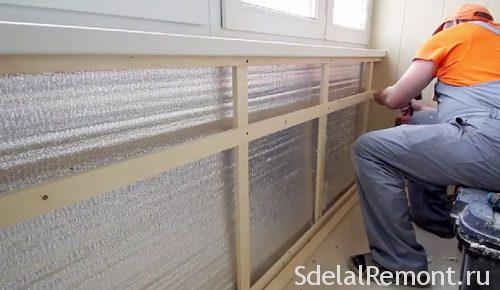
Once you were able to insulate yourself from the bottom of the loggia, you need to start working with the walls and ceiling. It is desirable to stack the sheets to each other as close as possible, the joints between them can be filled with foam: This will not only ensure a better coupling between the materials, but will also get rid of potential gaps and drafts. When working with walls also need to ensure that, to a heater went smoothly.

When you attach all the sheets, Allow the glue to dry. If you use liquid nails, it will take about an hour, complete solidification of the adhesive occurs in a day. On top of the insulation must be attached penofol: This special material, which repels heat, directing it back into the room, and the cold air from the street it does not pass. If you can stick it to the minimum number of joints, will create the effect of a thermos, and on the balcony will be cool in summer, and warm in winter. Seams between sheets penofol sealed with a special tape, foil having a surface. Working with the ceiling is held on the same principle.
Thermal insulation of walls of the capital
Capital is also known as the wall, which performs the function of carrier, it rests on the main load of design. The surface optionally insulate, but if you decide to do it, you, as is the case with floors, require rail, plugs and insulation.
As mentioned above, insulation of the walls is optional, Besides, at work you need to be ready to, that it "moves" almost 5 cm, than take useful terrace area. The principle of operation is similar: first you need to fix the rails (consider, penoplex that need to be laid horizontally). Use the building level: rack must be fixed exactly like the vertical, and in the horizontal plane.
Polyurethane foam you do not need. Joints formed are not, since Penoplex sheets necessary to get under the rack and pressed together as tightly as possible.
Methods of finishing the loggia
Once warmed own balcony you could, you need to bring design to the completed view, outdoor insulation since not only is less effective and may suffer from mechanical impact, but looks ugly.
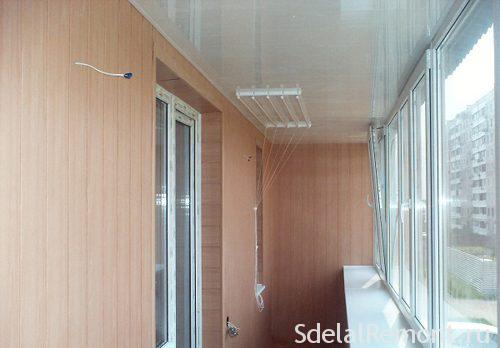
For finishing, you can use a variety of materials, suit your taste, budget, the overall style of interior. The easiest option is the plastic panel. they are light, conveniently mounted, They are inexpensive and have an attractive appearance.
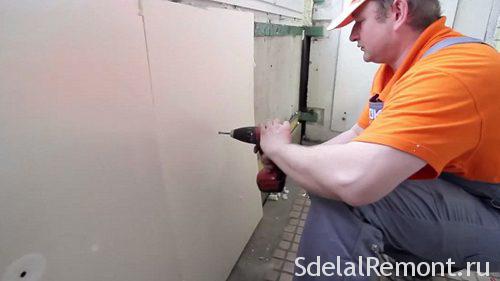
In order to secure any finishing material, you need the wooden slats. They can be bolted to a wooden frame, which you already have. Take care, to rail to be secured exactly. For the main wall, you can use the same elements, which hold the insulation: it will save and materials, space and loggia.
Once the crate is ready, it is possible to fasten any finishing sheets: plastic, MDF, plasterboard. Last aesthetically pleasing, therefore any paint, pre-plastered joints and screws, or glued wallpaper.
Conclusion: self insulate a loggia or balcony simple, if you have detailed instructions, quality materials and tools. It will take a few days to spend, however, you get protected from the cold room, which can be used in any weather.