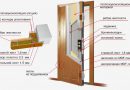
Sufficiently important element of any door are door hinges. For doors must be made of durable materials, as the door daily experiences high loads. Besides, loop should look harmonious, it needs to be able to properly embed door hardware, so that the slightest flaws are not evident. The following types of products:
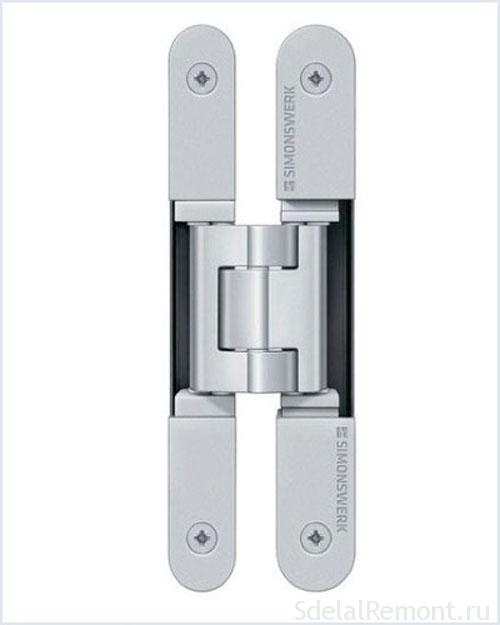
- hidden: such a structure is not visible, when the door leaf is in the closed state. The hinge part is shown only when the door is opened. Mounting attachment occurs at the ends.
- overhead - looks almost exactly, as similar to the wooden door. Such loops are superimposed on the flap and a box of doors. Have low reliability, therefore suitable for light doors. This type of hinge is also called (butterfly). detail, about installing overhead loops.
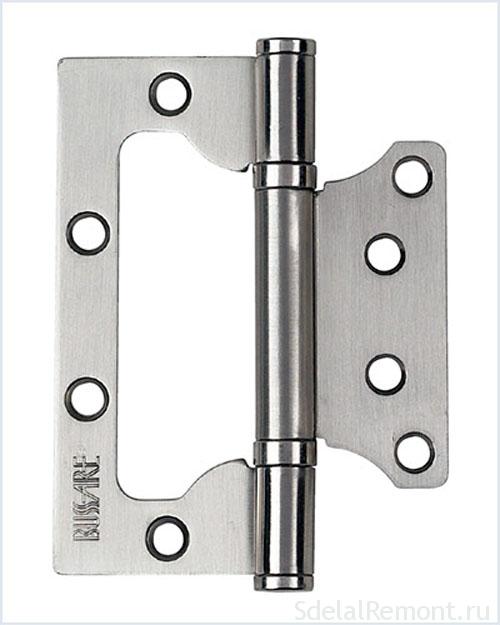
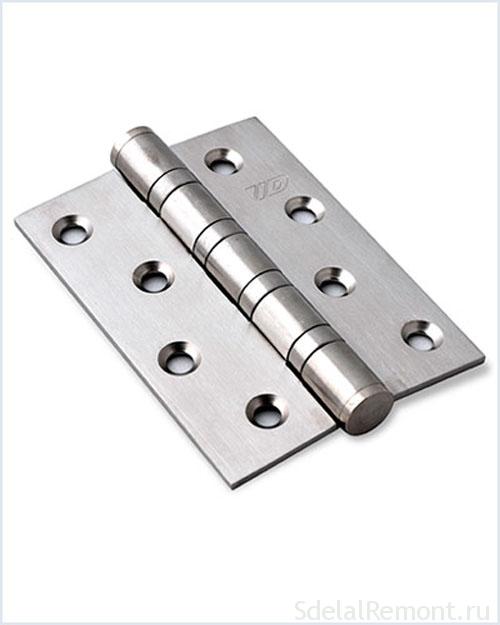
- Mortice: another name for the design - loop roller. They are attached by special grooves, accounting to cut into the door and the box. Such loops have high reliability, it is difficult to remove the attacker.
- Universal It applies to any web, whatever structure it had no.
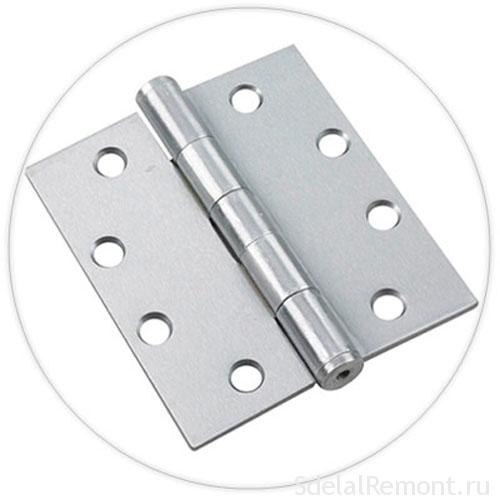
- pendulum It applies to doors, We are in public places with high traffic. This mount is equipped with a hinge, It has a spring, returning the flap to its original position.
How to make the sidebar accessories: phased plan
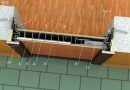
So it's time to install the door, Typically, this press is better to make after the wet work. Since the door and the box draw moisture and expand, that after installation they begin to strike sharply, and then when the humidity drops, gaps may become more and you can not guess the very moisture doors if they are on-site.
IMPORTANT! If you decide to install a door at the end of finishing work, you need to clearly Gaugeable opening size and vertical walls, that there are no distortions jamb to the wall.
When you have decided on the size and fittings, it's time to define, future where the door will be opened. When the door is much better than they are installed according to the plan of the apartment. Now we decide on a floor, that is, if you already have a parquet covering, laminated or otherwise coated. Then there is simply possible to calculate the gap between the floor and the door, if not then you can calculate the gap with tile or laminate plus solution, plus pad, gap under the door, depending on the make, whether or not the rug will usually make the calculation of 15 -20 ml.
Cutting loops independently
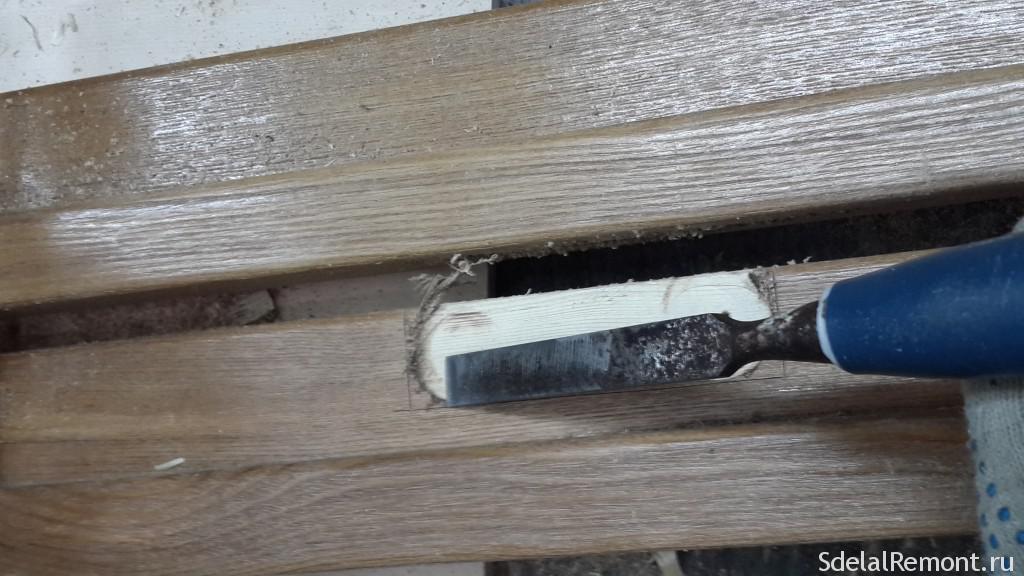
Determine, which opens the door, watch the convenience of opening. Put to one side the door, ideally for the convenience of work to make Miter guide for the door, that the door was kept alone, This will greatly facilitate the work of. retreat, by 20 cm from the edge of the door We put a pencil mark, We are putting a noose and put labels. take, fasten with screws to the door hinge, look, to loop a well-kept. Take a knife and carefully building and with little effort encircle circuit hinge, as shown in the photo, then with much effort holding circuit hinge, We perform the same operation with the second loop. As a result, we get a clear outline of slaughtered.Learn about the new modern way to quickly sidebar locks and hinges, using special templates and a carriage which greatly help to speed up the work and increase the quality of. detail the accommodations and the templates used in the installation of doors masters professionals.
loops Box can produce a chisel own eye. You can of course more, faster than with a manual router. should not think, that router is, something, and large industrial, this is a perfectly acceptable tool, which need at least a couple of diameters for different types of locks. Fraser will greatly facilitate and accelerate the process of tapping the door hinge with the help of it you can clearly guess the tie-depth, and it is very helpful if, across knots and irregular fiber wood.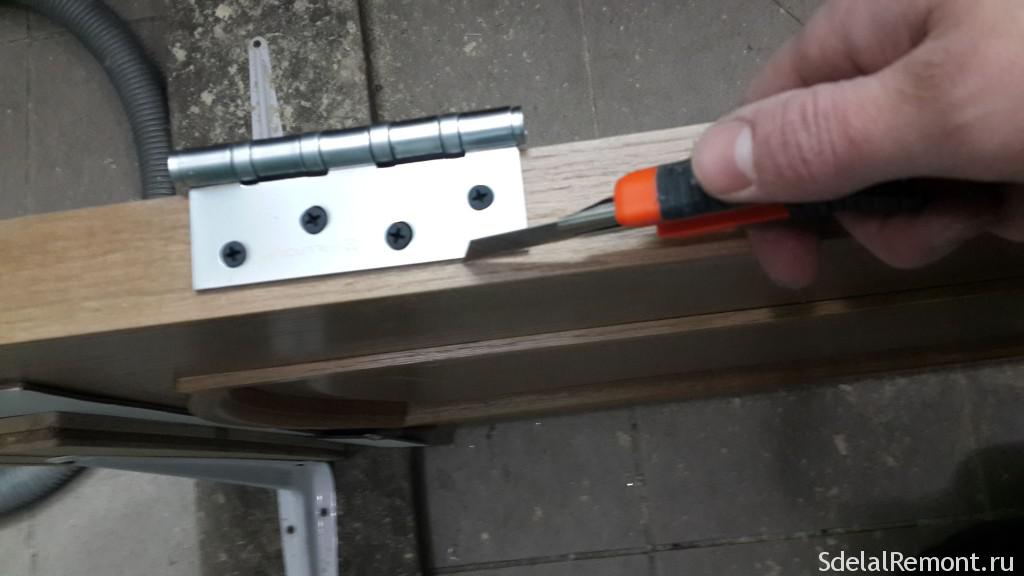
Working with a router on the tie loops
The main thing in the work to be very careful, since the rotation of a collet 30000 speed and, accordingly, it should be well fastened and naturally comply with the safety.
Warning note, that is contact the frame and lock the router with the door surface. And also there is a vibration, and if no action is taken, it is possible to damage the door leaf. To prevent damage to the door leaf to be used at the sliding surface materials for the frame and the abutment, You can certainly make templates, but that requires skills.
And so we begin the sample door hinges, take, We expose the depth of the palm of the router to use this loop set its pressed state between the stop and adjust the height of penetration. Especially not affect, a diameter collet can be used to tie and 12mm. – 18 mm. We are putting the emphasis on the edge of the stopper fix and proceed to the burial. Clearly holding the milling machine, and without going beyond the boundaries of loops. Remains of finalizing a chisel, as a result we get a clear seat and fastens the loop. 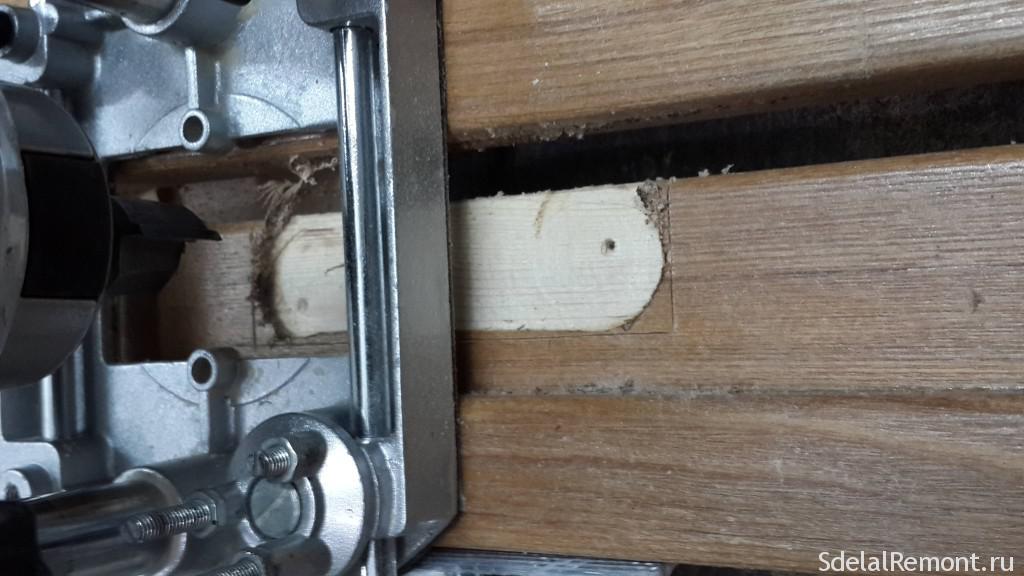
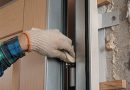
Preparation box and washed down the right loop
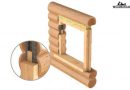
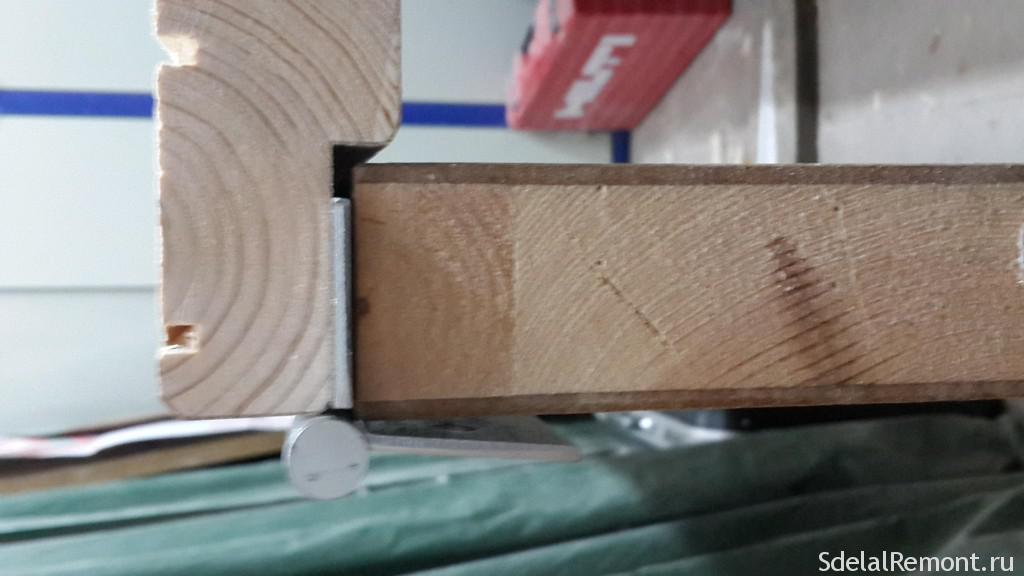
We examine the presence of the rack boxes curvature. Depending on the profile are different kinds washed down, he may be under 45 degrees, but in our, classic case profile with sample. Stabbed straight corners, din rail do 2018 mm ( it's a given clearance from the floor 10 mm or 15 mm and a gap between the door frame and the door about 2 mm ). The best and quickest way to facilitate self-installation of loops. To do this, take the two clamps and twirled them to the door at the ends. put rail, boxes on top of the clamp via gon mete 3 mm or use a loop to define a gap.
It is important to leave a gap between the edge of the box and the door leaf 1-2 mm. This is to ensure that the door is not rubbing and creaking in the process of closing and opening.
Since the depth of the box can be different, here you need to clearly calculate the gap. Usually make a gap from the edge of the loop plus 2 mm. The clearance height, and the lateral distance fasten the box to the loop, check closing, everything is fine circuit loops encircle a knife and remove the rail.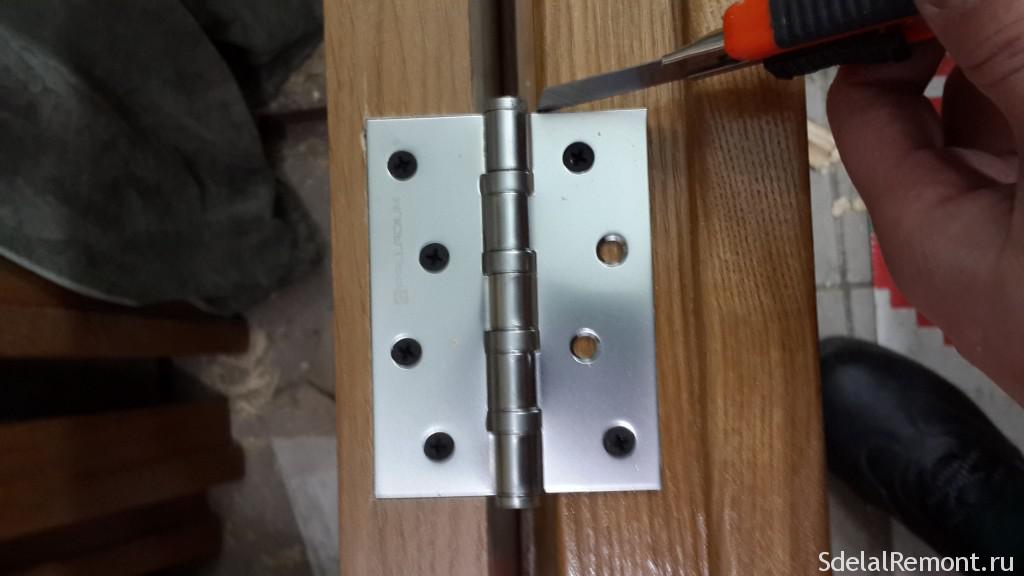
Washed down loops on the box
Take via, chisel make a selection. It is possible to make a router that's because in the photo is the same manipulation, We expose the zero mark plus the depth of the loop. To use the second definition contagion stick box, it will not accidentally bury a sample. Fetches the door a router box, for easy fix clamp. After finalizing the sample chisel. Here and now is ready to our door hinges precisely match.
Box lock and mounting height of the handle
Normal installation standard lock knobs on 900-100 mm depending on the door lock, and ease of use. Locks and latches typically are of different thickness and mock strips can be, both rectangular, and the U-shaped edges. Consider the options sidebar door locks, but the principle they have one. Castle with rectangular edges fasten to the door facing the center, the rate of, what will handle 1 meter from the edge of the door. Draw out circuit construction knife, and we get a loop to tie using a chisel or a milling machine. Method Mortise lock with semicircular edges, These locks are usually designed for installation with a router.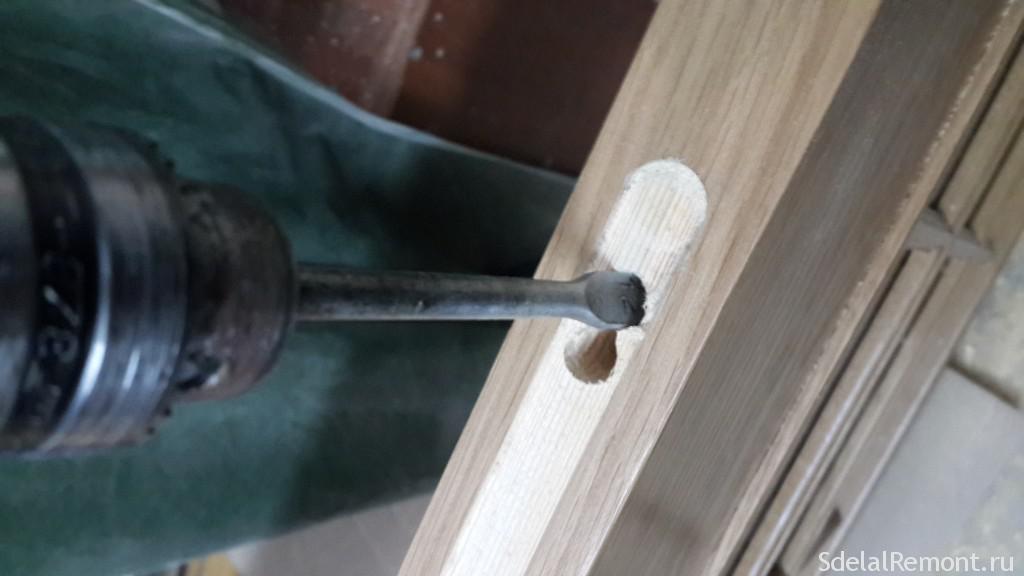
It is important to not need much to deepen the sample under a decorative castle plate, it is better to let a little favor. take, fasten the lock to the door end face in view, the handle will be in the middle of the door handle away from the floor 1 meter: The contour of the castle clearly draw out a pencil; Take the desired diameter cutter; We expose the depth of penetration; Expose abutment milling machine. Now slowly begin first sample, driving along the contour, important not to go over the edge, so as not to spoil the door. We proceed to the second phase lock Mortise, We measure the width of the lock body, We take collet desired diameter and beginning to sample depth. Change an elongated collet and select the full depth of the castle.
Very neat work, firmly hold the machine, because there may be nails, knots, screws. It is important to know, that is vibration milling machine, and coverage of the door leaf can be damaged (especially cheaper models of machines).
Getting the knob, We note pencil pen centers and draw out circuit lock cylinder, for drilling in wood use the feathers of the desired diameter. Be sure to drill holes on both sides of the door, not to snatch a piece of cloth.
Putting box
Since long we have already decided (2018mm). The width of the view with a condition, you need to make the gap between the frame and the door of 2 mm on each side. It is necessary to pay attention to the loop, what's longitudinal gap. all considered, We do gash width. When assembling the boxes are very convenient to use the angular clamp. Put all parts on a flat surface and set clear corners and slopes.
 An important detail that the door is not rubbing can be slightly tilted one way to expand. With the right gaps do not need it. Connect the frame members, screws pre-drilled holes for them, so that the box is not cracked. Box ready for installation.
To bring you the video of the installation of doors, Various mounting options, Tips craftsmen installers doors and ways to tie-door fittings.
Step by step photo instructions sidebar locks


Step by step video instruction and subtleties tie locks
master Guide
work Fraser
installation box
on doors installation errors