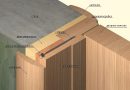
Door frames are installed for one purpose, close the gap, resulting from the installation of the door frame in the doorway.
Before you answer the question, how to install the trim on the door, it is necessary to understand the rules of selection of trims and become familiar with their installation technology.
Where to begin?
 To install the trim on the door, they need to choose the right. For this purpose it is necessary to pick up cashing in width, invoice, color.
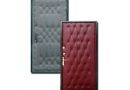
Adjust color trims, give preference to such, which is decorated and the door leaf.
When selecting the width try to choose frames, installation of which harmoniously close all gaps.
by the way, gaps are always formed during installation of the door frame in the doorway. Of them will not leave. It is impossible to make a box, which is set exactly in the doorway. more precisely, you can do and the exact box and vymerenny millimeter aperture, but the costs are quite high. Whether it is necessary?
Cheaper to close the resulting gap architraves.
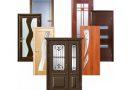
Various materials are used for manufacturing casings.
Trims can be made of wood, MDF, plastic, veneered or laminated.
try to understand, how to properly install the door trim.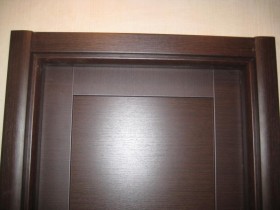 By installing cashing begin after the completion of all repairs.
mounting operation and the finish trims is performed with the installation or after the baseboards. It is like cornices, in the sense, that is performed after the completion of all finishing work.
Installing casings
To install casings process was understood by all, divide it into several stages.
Preparatory stage
You need to check the evenness and flatness adjacent to the doorway walls. When the greater curvature wall should be leveled. And to do so it is necessary to.
Attention! lining the walls, closely monitor their relative positioning. The walls must not only align, but located in one plane on either side of the opening.
Failure to comply with this recommendation leads to a small gap between the casings and the wall.
Architraves can hide the bumps and cracks up 3 mm. But to close the differences over bumps 3 mm no longer be able to use the casings. knowing, like fasten cashing correctly, you can hide all the irregularities and gaps.
The use of casings not only gives the room an aesthetic appearance, but to create a complete room.
architraves installation of importance can be compared with installing baseboards or nailing eaves.
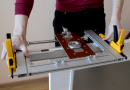
the right tool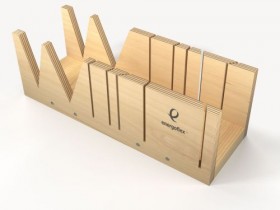
A few words about the instruments used.
When installing trims the main problem is the fit of mating parts to the desired angle. Trims are set either at a right angle, but often at an angle of 45 °. It is best to use a miter box.
For sawing of material applied miter saws. It provides a clean cut casings from any material.
But the cheaper models of machines have a play and so the error is still preferable to set the miter box casings with their handsOf supporting tools you'll need a pencil, ruler, elbow, level, plumb.
The correct choice of material for the casings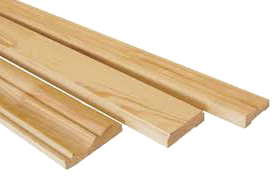
choosing frames, pay attention to the structure of the material.
Appearance casings required to match the pattern on the door. Because different materials are widely used for the manufacture of cashing: wood, plastic, MDF, then choose the trim under the door is not difficult.
Installed outside the casings may be covered by a laminated film, painted, varnished, stuck with veneer.
Casings of different shape are produced, enabling extensive design problem to solve.
When you purchase it is important to check the trim on the curvature and the curvature.
Rules of installation casings
Rules are for those, who wants to learn, how to install trim on the interior doors.
installing trim, should ensure docking an detail without gaps.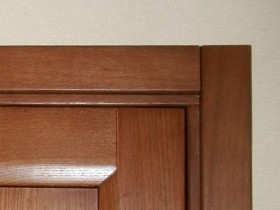
The easiest option, execution of assembly casings simple rectangular shape.
In the end, it is necessary only to ensure the dock at a right angle mating parts.
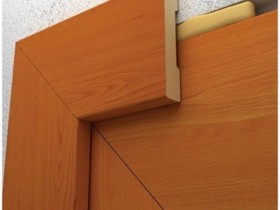
Most casings produced more complex shape and is joined at an angle of 45 °.
Attention! To provide the desired angle is recommended to use a special device, called Miter.
Step by step installation of casings
Below is a step by step guide, like fasten cashing on interior doors.
First trim are installed on the other side, which opens the door.
-
- 1. Take two workpiece side casings, attach them to the box.
-
- 2. Note them bottom gash angle. It is celebrated on 5 mm above the door of the box.
Attention! Do not forget, it is necessary to properly mark the left and right gash.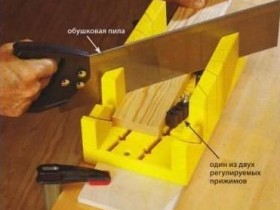
-
- 3. Washed down trim angle of 45º.
-
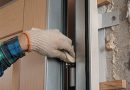
- 4. Install the trim on the door frame. Constantly monitor the distance between the casings. To control the size of the best specially cut length of the strap. The distance of the upper and lower casings nailed must be equal.
-
- 5. Trims are fixed with nails, who have bitten off hats or special hardened nails. Before fitting the trim, apply a markup fixing points in increments of 0.5 m.
Attention! trim prybyvayutsya, stepping back from the edge of the box on 5 mm. 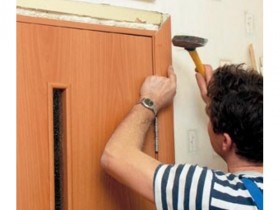
-
- 6. For providing better grip to the door frame platbands, the inner surface of the adhesive should be applied. For these tseleyu perfect transparent silicone sealant.
-
- 7. Now you can proceed to the installation of the upper casing.
Cutting the casing standard blank into two equal parts, washed down from one edge of one workpiece. Attach to the preform nailed architraves and check eclipsing coincidence angle. Note the blank second edge, gash angle between the casing and insert vertical architraves.
-
- 8.It remains to nail the upper casing to the box on the same technology, that side.
-
- 9.Go to the other side of the door and follow the same steps.
Places deepening nails zateraem wax the color of the door.
You are familiar with the material, how to install trim on the interior doors, They understand the principles and the sequence of the installation in more detail will tell Video.
But some helpful tips will not hurt:
- 1. There telescopic frames, mount which is produced using a special slot. The slot is inserted into the groove of the door frame, or transoms.
- 2. there are cases, when the trim of the same size can not be used, as cashing can not be set by width. In this case, the width of saw frames over ¾ not recommended.
- 3. The upper casing is installed after securing two vertical casings.
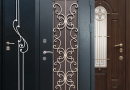
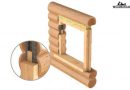
- 4. The construction market offers frames of different shapes: curly, semicircular, carved or teardrop-shaped.
- 5. Casings are manufactured in standard sizes, see:
Ш×Т×В; where W is the width, The thickness T, In-height. 7×1×210.
A few words about the capitals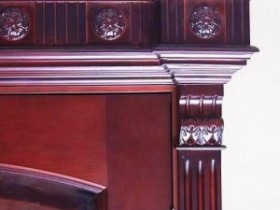
Small caps are called special door trim, the main function of which is decorated doors.
These frames are made of sheets of MDF or wood. Installing doors capitals makes rich, having a finished look.
Once again on the mount casings
above it was told, like fasten cashing on interior doors, using any accompanying materials. But that's not all.
Trims can be mounted not only nails.
For fixing casings used liquid nails, screws. There are also special mounts, known as "beaks".
Using finishing nails allows subsequently removed and replaced trims. At the nails must be narrow flat cap. nails length should be at 1,5 cm longer than the casing thickness, usually, 4 cm. Step fixing with nails is recommended equal to 0.5m.
Liquid Nails adhesive called, for fixing casings. Glue is applied to the casing, which is pressed against the door frame, held for a few seconds. This attachment method eliminates traces fastening.
Fixing screws more securely. In marked casings previously drilled holes, but under the bonnet reams of deepening.
Special fixing, called "beaks", easy to use, create beautiful view.
findings:
- Pick up trims in structure and color, similar to the door leaf;
- the upper casing is installed after securing the side casings;
- for fixing casings use nails, glue, screws.
How to install trim on the interior doors with no nails video
How to install trim on the video door tips