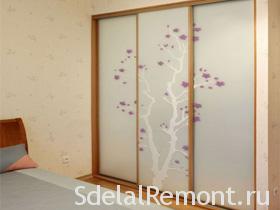
- We produce furniture for the apartment with his hands. Built-in wardrobe - a compartment.
Built-in wardrobe with sliding doors type today can be considered the most relevant and practical solution for storing clothes and other things in any modern apartment. Such built-in wardrobe can be installed in almost any room of the house, because thanks to its design, it can be the best use of all available storage space, from the floor and finishing the ceiling.
Today, many companies are offering to buy them ready-made closets or order individually. Of course, it is much more convenient, but the cost of such cabinets, It should be noted, not small. It is therefore much more practical and economical to make the built-in closet yourself, as the saying goes, their own hands, assembly so as easy, and below is a diagram and figures for clarity. Especially, that the conduct of such a process is not too difficult, if you act, naturally, on certain strictly defined in advance algorithm. Everything, what do you need, in order to create high-quality wardrobe - is the correct instruction, recommendations with the drawings and visual diagrams and a little inspiration, because the construction of something with their hands - it's always art. Site repair of the apartment with his hands, it all tried to bring to life.
Make and assemble sliding wardrobe with his hands on the drawings and diagrams
so, the desire to make a simple walk-in closet there - now you need to pick a place for the installation of the element built-in furniture. Usually, in modern apartments for installation of wardrobe discharged all sorts of niches and other recesses, which can not be used effectively for the area arrangement of other structures. In that case, if the available depth design something not satisfied, it is possible to further, using the tools, cut a niche.
Once a niche, where the wardrobe will be installed in the future, ready, and all the necessary precise measurements conducted, you can start planning drawings. In fact,, appearance, and wardrobe accessories depends on the personal preferences of its owners, but there is a certain standard, "Classic" variation of such a piece of furniture. Drawings exactly this closet and placed in the photo below.
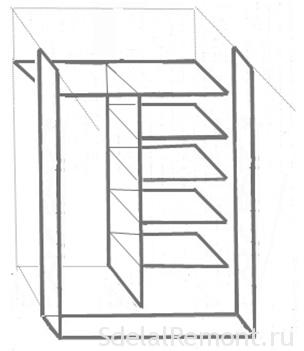
It should be noted, that special attention in the course of preparing wardrobe drawings need to be given to such steps as determining the distance between the shelves, as well as the calculation of the amount of. It is necessary to mention the fact, that since this model has a closet door is not up to the ceiling, the top shelf had to do a little less depth, in order to ensure to things more convenient access.
Construction and assembly wardrobe: beginning of work
After the drawings (or simply sketches) ready, you can safely proceed to carry out the assigned tasks - to embody the, that was painted on paper. It is better to start with the arrangement of the "inner" cabinet, namely the installation of various shelves. Shelf best to use the most common laminate light color (well, or dark, depending on the wishes of the household and the general style of the room decoration).
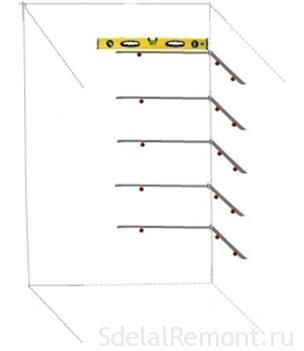
As fasteners, to secure the shelves to the wall, It recommended for metal brackets and screws. Thanks to, that all necessary measurements have been carried out in advance, all sizes are already available under the shelf. Depth bottom shelf, in our case, was 60 cm, But top (as previously stated) 30 cm. Material and sawing can be carried out independently, but it is best to book both on the basis of the most common building - so, will be able to save considerably, because there is no need to buy an expensive tool.
Assembling the closet of the inner frame starts with shelves, which is mounted on the floor (she does and performs the role of sex), then fixed closet wall (sideboards) to the bottom of the board and the wall with dowels. Further, going construction, consisting of two horizontal, one vertical crosspieces and three cross bars mounted vertically. The main fastening element, on which the whole design of the built-in wardrobe, are metal brackets and self-tapping screws, pre-purchased at hardware store.
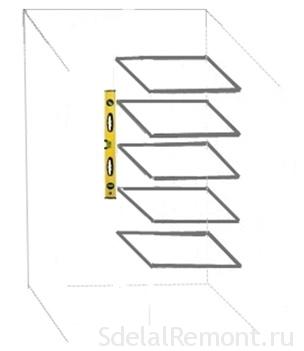
The frame is assembled, it remains immersed inside the niche and fasten the upper shelves on the walls. As a result, It turns two offices specially adapted for storing outerwear (sweaters, dresses, shirts and other things). Besides, on one of the shelves you can store underwear, and the other three shelves can be adjusted to the most different clothes (eg, they can pay for his wife's things). wide shelf, which is located in the cabinet depth, specifically divided into three parts, having a slightly smaller depth. At the very top is made and assembled with their hands wardrobe, set long and narrow shelf, which can be very convenient to place all kinds of boxes of shoes, Christmas decorations, blankets and other trifles and little-used things.
Installing sliding cabinet doors coupé with their hands
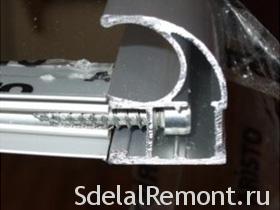 After the frame built-in closet fully assembled and installed in the recess previously prepared, it's time to start the assembly of sliding doors. It should be noted, that the fittings for these doors is different both in value, and quality, and therefore the best option is a strong "srednyachok", ie fittings, which has an average value of. Of accessories for doors need sets of upper and lower rollers, as well as special guides, handles and other elements. To fill the closet door opening, you can use any decorative mirror.
The door itself is assembled, but because you need to install rails. first, on the need to pay special attention - it diagonally, which can deliver a lot of trouble. The best thing, as the saying goes, 7 just measure and cut only once - carefully double-check the location of the track and only after that they set. It should be noted, that in addition to the emergence of the hated diagonals during the installation of the upper and lower guide is very important also not to disturb the level of installation of all structural components. In order to facilitate the installation of the sliding door, a guide can initially set the upper profile, and then simply remove it and install already with the door - this will make it much easier, than if stasis was put the door leaf and guide.
Further, no harm will be to re disassembly and assembly design. such a way, can be determined, exactly what the system needs refinement, and to identify problems and deformation. Besides, a thorough cross-checking of the assembly process will make it possible to eliminate possible bias doors, which is also important for the normal functioning of the cabinet.
If you install door and full cabinet assembly formed ugly crack between the door and the wall, then it needs to be fixed. Make it pretty simple - the reason for this problem could be improper mounting bolts, fixing the lower rollers on the door leaf. Such a bolt not only performs the function of mounting, but using it may also be carried out this kind of adjustment slots.
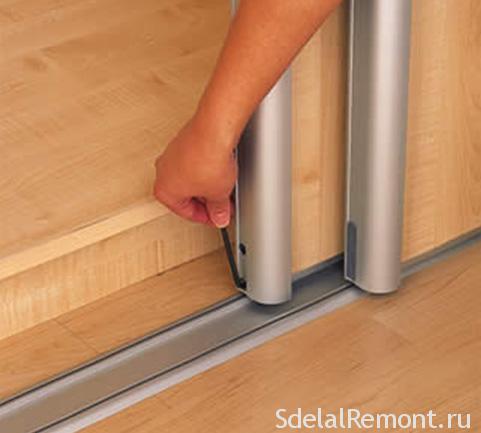
In order to eliminate the defect simply using a standard hex, which is used for wrapping konformatov, make adjustment of this screw in such a way, to slit completely disappeared. Such tool You can be purchased at any hardware store or market. That completed installation.
Make a built-in closet with his hands, as can be seen, It is a fairly simple process, for which you want to have some too special skills and talents. Just enjoy the wit, "Straight arms" and a set of simple tools, which are available for each host, as well as the drawings and diagrams, the intended product. Also, do not forget the inspiration, in fact it is the engine of all kinds of new ideas and processes. We hope, manufacture and build will not be difficult, and the assembly is successful!


how to assemble the shelves all znayut.A about why the door is nothing?And this is the assembly itself slozhnoe.Naprimer otverstiya.i