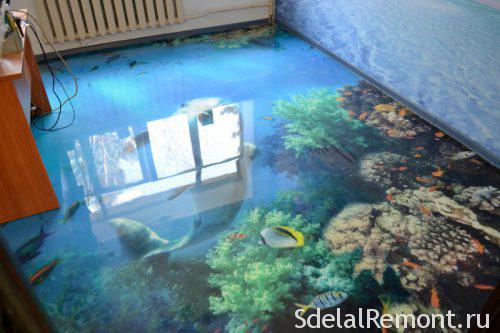
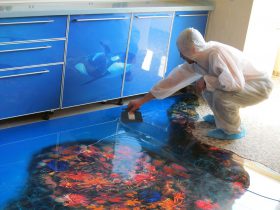
A distinctive feature of modern building technology lies in the fact, that for the most part, much depends not only on a profound knowledge of experts in building technology, but also the accuracy of the, who create unforgettable 3D interior solutions.
Today, self-leveling floor technology has become even closer and more accessible, because the main components of this method materials flooring units have already finished form as gels and mastics, and their use is only a matter of the apartment owner desires to carefully study the, how to apply all of the components. The average cost of starting from 6000 to rub 1 m2. In this way, device self-leveling floor with their hands became a matter of very real.

The main stages of operation of the device bulk floors
The implementation of the work plan for self-leveling floors in a separate small room, eg, one of the rooms of a standard apartment has some of the features and requirements for implementing firmly know and comply with all the technological tricks and strictly observe the sequence of actions.
Conventionally, the entire scope of work on self-leveling floor can be divided:
- the preparatory stage - the preparation of materials, liberation Square, assessment of the rough screed;
- stage of laying communications - assessment of the possibility of laying a "warm floor" system, calculation of the installation and the choice of the type of system;
- milestone - the unit finishing screed, its preparation to application of the polymer coating, patterning or stacking the print, applying a topcoat;
- final step - Treatment of surface layer, varnishing.
This somewhat schematic disclosure of the entire work sequence will allow, how to unlock features of each stage can be more details, and at the same time pay attention to all the details of each stage.
Composition of some components of the compositions contains aggressive substances, effects on the body which causes allergic reactions, that is why before starting work should study carefully the instructions for use and apply skin care products, eyes, and respiratory.
Preparatory stage
Before filling pour approximately half 70% all the effort will have it at the preparatory stage of work. That's because how well done the base will depend on the, what will be the final result.
subfloor, and that, usually, Cement-sand screed on keramzite a bulk layer of thermal insulationand, It has a lot of shortcomings, and very far from ideal:
- surface has numerous cracks;
- level does not correspond to the horizontal position, there are distortions;
- in some places there are nodules, Deflections and Ties.
The best way to once and for all solve the problem - fill in the base polymer coating again
New screed must comply with certain requirements:
- the minimum height - 4 cm mesh reinforcement, 6 see without reinforcement, 10 cm or more at the laying heating pipes;
- horizontal surface must have a slope not exceeding 1 mm 1,5 m;
- The surface must not have depressions, especially when the casting held liquid cement-sand mortar without special additives, increasing the fluidity of the solution;
- composition should be uniform, no foreign inclusions and clusters.
Besides, to continue the work necessary to ensure that the screed has dried, grinding surface allowable humidity should not be superior to 10%, and for applying the base layer and moisture should be less - 4-5%.
Drying tie should occur at the same, without changes in temperature, since the work floor is provided with an oil as a coating polymer, a moisture barrier coating, wherein the excess moisture in the concrete screed simply does not properly adhere to the polymer surface of the concrete.
Grinding and polishing of concrete screed surface provides grout screed abrasive wheel or grinding with a grinding stone in order to obtain almost perfectly smooth surface, without flaws and cracks.
Prior to application of the base layer should not only remove all dust vacuumed, but also handle screed primer deep penetration, in order to create the upper solid layer with a hard surface, providing excellent adhesion.
Application of the base layer polymer coating
Conventionally device 3D floors liquid can be represented as a multilayer cake - the bottom of the concrete screed base polymer layer of mastic. Its role is the formation of a hard and smooth at the same time base. The layer of the decorative motif may be applied in a pattern by using inks, and using painted fabric, where special equipment is a depiction. Top polymer transparent or colored epoxy mastic. Create a hard protective coating pattern or color scheme itself forming the floor. The uppermost layer of the cake acts as a protective polymeric lacquer, one side, protecting image, and the other forming a glossy look, displaying all the glare and rays falling on it.
Check the base ready, for applying the base polymer layer is quite simple, in room, which it is planned to fill the inlet floor to the prepared surface, bonded polyethylene, colorless film size 1 on 1 meter, which edge, pressed tightly with tape. Through 24 hours if the bottom surface is not formed condensate droplets then, can continue to work, if the surface is covered with condensation, it will have to wait.
The base layer is applied over the entire surface with a spatula, and then, to the best possible gluing process was repeatedly spiked roller. The peculiarity of this composition applying mastic polymer is, so that the surface temperature was stable, oscillations within the first 2-3 days not more 5 degrees Celsius. optimal, considered, when the temperature was about 15-20 degrees. The polymeric composition of self-leveling floor covering, like any other part of, whose thickness 2-3 mm should be evenly distributed over the surface. For certain types of formulations, which it recommends the use of additional filler, it is recommended to use only the recommended composition, in the proportions indicated by the manufacturer and formulation.
To improve the adhesion of the concrete screed, Many manufacturers recommend besides preparing the floor by means of a primer is recommended to use a special primer, improving the structure and actually attracts a base polymer composition. Another important point that, how to pour self-leveling floor are the time metrics. For various components formulations recommended certain polymerization time, from 1 hours to 1-2 day.
The final stage of the filling device the floor
Drying the base layer, establish a strong and level base, It makes it possible to continue to work with the image drawing layer. Today, most often for the formation of the most popular 3D figure floors are satin ground, which with the help of wide-format printer is a depiction. The treated primer base coat is applied mastic or special glue, most often it is a top composition, wherein after installation satin cloth covered the entire surface and forming the upper layer thickness 2-3 mm. Like the base layer, it is distributed over the floor surface using a spatula and special roller, Only in this case, rolling is carried out more accurately, so as not to damage the fabric.
In this way, 3D screed thickness of the inlet floor of two layers dostegaet 4-6 mm, This figure is quite enough, to provide rigidity to withstand the pressure and cover the furniture in the room.
After the final drying, a top layer of the polymer composition is required you must close all windows, and to prevent the ingress of dust into the room, such precautions associated, first of all, so as, that the varnish does not tolerate dusty room.
After the varnish has dried completely, before starting to use self-leveling floor is recommended according to the recommendations of individual producers to process half the recommended special antistatic composition.
The main disadvantages of 3D self-leveling floor is that the operation of the floors are highly susceptible to scratches and it is impossible to walk in the shoes of another will scratch. Paul is quite slippery to use in the bathroom and the apartment.
There are reliable coating technology 3d floor, but the cost becomes several times more expensive.


