Sometimes there is a need to restore the bath, and the most popular, and at the same time setting becomes effective option acrylic liner. It should be noted, that bathroom renovation with the help of the liner is held as soon as possible and allow you to return to her original appearance. But for this kind of events need to know some features of the process.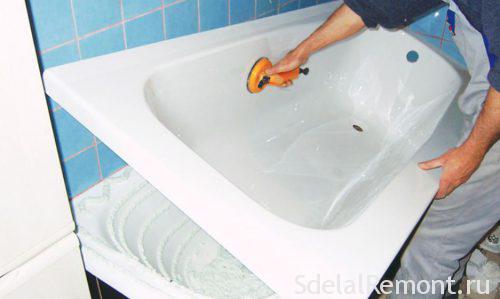
The advantages of self-restoration
It is worth saying, that the acrylic liner installation technology demonstrated recently, but not looking at it enjoys enough popular. Over time, she swiftly displace other repair options, such as filler or coating bath new enamel.
Let us analyze the advantages of technology, that contribute to its popularity:
- Firstly, as mentioned, the whole process takes a little time. for restoration, usually, it takes about three hours, after which the container is filled with cold water. After one day, everything will be completely ready for operation.
- The second course becomes the, that the whole process can be carried out independently. The probability of success is high enough (in comparison with the self-enamelling).
- Life time this insert is not less than five years under normal use.
- The system is endowed with a beautiful appearance and a smooth surface, and perfectly keeps the water temperature, ie. after the "equipment" acrylic, Water cools much more slowly, than steel or cast iron.
- Also worth noting, acrylic that is resistant to rust.
However, for all its virtues can be easily scratched or damaged, so care it is necessary to use a soft sponge and soap, or special for washing agents. It is not recommended to use when cleaning abrasive detergents. detail about caring for acrylic bath.
And of course, it is very important to protect the acrylic surface of the bath by the fall of heavy objects. If the acrylic tub will be minor defects, then in the future they can be polished.
In this way, When choosing a method of restoration bathroom, acrylic liner becomes a priority for this, to which you should pay attention in the first place.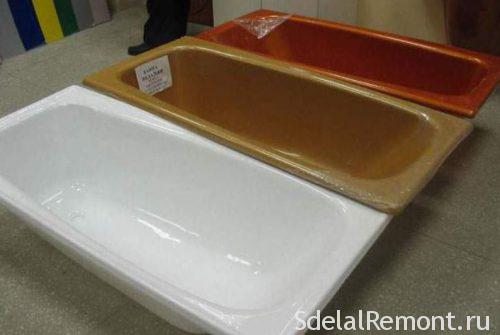
It should be noted, that this method is only applicable to cast iron bathtubs in the majority. This can be explained by the fact, that standard steel variants, which remained since the Soviet Union or already completely out of order, or can not be restored.
At the same time cast iron products do not lose their strength and ready to be restored. Further, The advantages of options, step by step we will talk about, how to carry out the repairs with their own hands the bathroom. And the process will immediately divided into several stages:
- The choice of liner.
- Preparing the bath.
- Installation of the liner with their hands.
And now proceed directly to a step by step analysis of.
The choice of liner
The first installation of the acrylic liner in the bathroom requires careful preparation, including direct selection of the liner. It was from him and depends on the, how well the work will be done, and how long it will last plumbing.
note, that many baths, which remained the last century have the same shape and size in accordance with the national standards of the time. This greatly simplifies the selection process, the only thing required of us, perform height measurements, length and width, for him to pick up the acrylic.
It should be taken into account only places, in which measurements were taken. In particular, width and length is measured on the bathroom circuit (top). Depth of the lowest point, for greater ease can be put on the level of the bath, omitted from it plumb to the bottom drain port, after which the thread height vymeryat.
Knowing these dimensions will easily pick up the sack, what can be done in hardware store. Sellers will help you with the choice and give necessary recommendations.
Immediately it is necessary to purchase special foam, which will be held assembly.
Prepare a bath
The next step, which involves the installation of the liner to the bathroom becomes a base preparation. Here it is necessary to perform certain complex works, which will greatly facilitate the installation and extend the service life.
In total, perform the following steps:
- Completely clean the bath, and in addition to dismantle all the adjacent decorative elements (tiles, plastic and so on.). This is necessary to gain access to the edges of bathtub.
- The next step is to clear the coating from the old enamel layer. To perform a task well suited coarse sandpaper, or metal brush. This process is performed to obtain the maximum level of adhesion between the liner and the base.
- After careful treatment of enamel, so, that there was not a large piece, which is not grazed, should wash tub of dirt and dust, and enamel splinters.
- And the last step is the dismantling of the siphon.
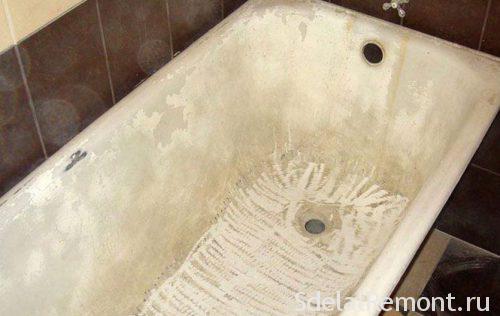
Now the preparation is complete and you are ready for installation.
Installing the acrylic liner in the bath with his hands
Now, after careful preparation of the substrate can proceed to the installation. For, all carried out correctly, should take into account the advice and recommendations, that we continue.
- first, we have to do, it fit the liner under the required size. For this, he fits into the bath, and then with a pencil marked edge of the bath, on presentation of the liner.
- Further it is necessary to remove it and to help jigsaw grinder or cut by labeling.
- The next step is worth noting all the holes, which are available at the base, after the mark in the same way their cut.
- It is important as accurately as possible to make notes. To do this, the most tightly pressed insert, while they themselves applied a simple pencil mark on the outside.
Now, when everything is ready for installation, We proceed to the last phase, and it is carried out as follows::
- We will need a special sealant and foam.
- The contour of the drain and overflow inflict sealed structure. Thanks to him, as much as possible reduces the risk of leaks in the future.
- Besides, Apply as a sealant layer on the bathroom circuit, in places of joining with liner. This will create the most intimate contact between the elements.
- The next step for the rest of the bath surface is covered with foam. It is mandatory to its application should be carried out with a continuous layer. Otherwise, in areas where the voids are formed will flex liner, which will lead to its destruction.
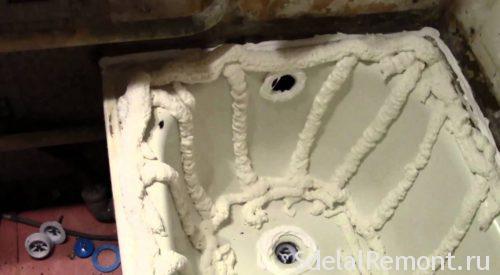
- Next install directly the liner and pressed tightly against him.
- It is recommended to perform additional fixation by means of clamps. But in this case it is necessary to provide the board or rack, To avoid damage to the surface.
- Immediately after the installation of acrylic, necessary to connect the siphon, which will provide a complete seal seat olive water.
- The next step immediately recruit a full bath of cold water. In particular, the level should be below the overflow hole in the 2-3 cm. The weight of water will help maximize press tightly against the insert and to provide a reliable fixation of his.
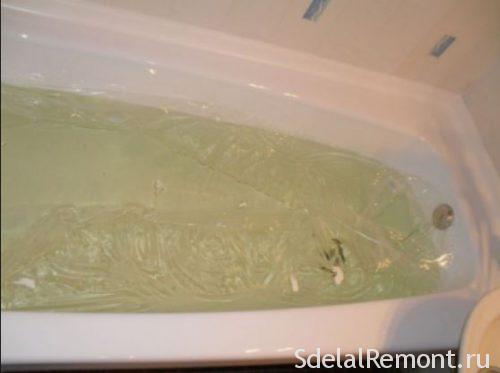
- In this work has been completed, and in this condition it is necessary to leave everything about day. According to their expiration will be the usual way to operate plumbing.
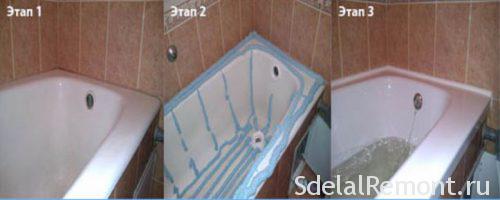
note, that the technology of the work is incredibly easy, and therefore to cope with it even a novice. All that is needed - is to carry out all the tips presented earlier, and of course only use specially designed formulations.
Find out how, how to seal the joints between the bath and the wall.
conclusion
In conclusion, it is worth saying, if you decide to carry out the restoration of the bathroom independently, then this method is for you. And for complete confidence, We invite you to watch some videos, which clearly show, how to perform the installation of the liner in the bath.


Inserts in demand, until the appearance of filling the bath technology, method is much more economical, he used the materials ekovanna