Over time, in every house there is a need to replace the plumbing. And for the most part, all processes are carried out independently. One of the tasks is installing the toilet with their own hands, it is actually quite simple. Enough to know a number of features, and fully comply with the algorithm of work. But first of all you need to know what are the toilets, to choose the right mount technology.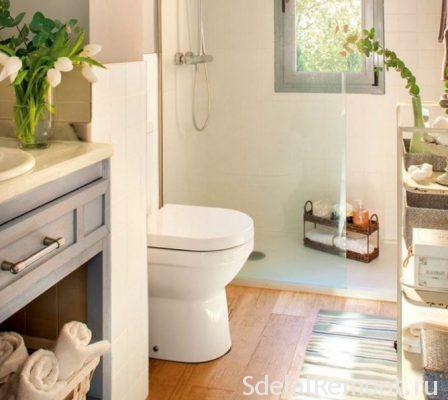
types of toilets
First of all, we should consider variety of designs and shapes this type of plumbing, not to make a mistake when installing.
To begin, consider the classification of toilets and their features. All four types of notes, namely:
- mounted. This type is not in contact with the floor covering, and is mounted directly to the wall, using special fasteners. Made wall construction, which provides all the necessary communications. Thus the whole system looks pretty good. But this kind is quite rare, due to installation complexity and relatively high cost.
- Extension. A second embodiment of the system becomes addl, which involves the installation of a toilet on the floor, but all communications, and bachek, hidden behind wall. only, that remains visible, this button to drain. Rather attractive option, But at the same time, in the event of any problems, manifested a large number of deficiencies.
- underfloor system. Such a system is known to all by the example of public toilets. It means an installation directly in the floor recess. ie. the usual hole in the floor, which is quite inconvenient. Because consider this kind of details does not make sense, because installing such a miracle home appliances are unlikely someone will.
- Floor. And the last type of system - Outdoor. It is remarkable, and the usual bowls, which are attached directly to the floor. The very design of inexpensive, and its installation is quite simple. It is an example of such a standard toilet and we will consider the installation process.
With kinds of systems completed, and now you can proceed directly to the consideration of the algorithm.
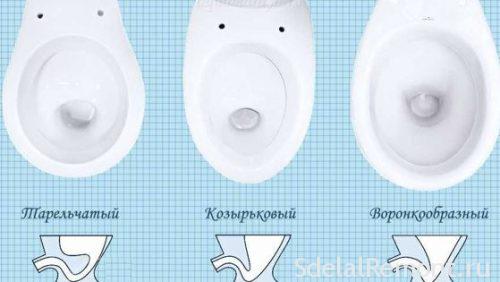
Self-assembly of a toilet bowl
To choose for themselves the toilet, you can proceed to its installation, the process is divided into several stages, among which:
- Dismantling of the old plumbing (if available).
- Surface preparation and markup.
- Self installing a toilet and connection.
Each of these items must be dismantled as much detail, to avoid mistakes at work.
required tools
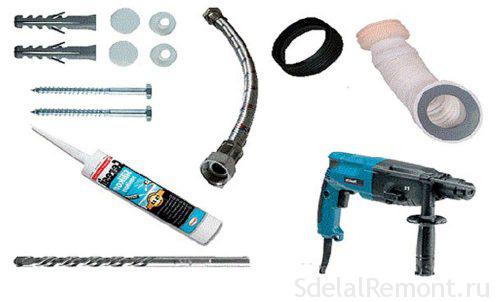
When installing the toilet with their own hands, You will need the following tools:
- monkey wrench;
- electric drill with drill bits for concrete;
- thread seal - tape "fum";
- Screwdriver with nozzles;
- core;
- hammer;
- corrugated pipe for connection with sewers;
- silicone sealant.
With the tool sorted proceed to examine each milestone.
plumbing dismantling
Now get to work, and the first thing becomes dismantling of the old plumbing, if there is one. It is worth to know, that there are several options for fixing the toilet bowl, and in each case the dismantling of equipment will be slightly differ.
In particular, types of fasteners are divided into the following:
- taffeta.
- adhesive sealant.
- established mounting.
And now look at, what constitutes each of the types and how to dismantle them.
taffeta
The first embodiment is marked taffeta. It is a walled floor board, which becomes a kind of pedestal and at the same time bracing for plumbers.
Self mounting in this case is carried out by means of special screws and washers, made of rubber. Immediately dismantling process is carried out as follows::
- The first step is to shut off the water, ie. tank valve.
- The next step is to disconnect the liner.
- Next, unscrew the screws.
- Quite often, the issue is sealed with cement, if you're going to throw out the old toilet, it can be divided cement punch, if you want to save the entire plumbing, then use this to hammer and chisel.
- You can also just have a good punch in the bowl (in that case, If the toilet is no longer needed). In this case the tube is broken and can eliminate remaining parts.
At this this type of equipment is considered to be dismantled.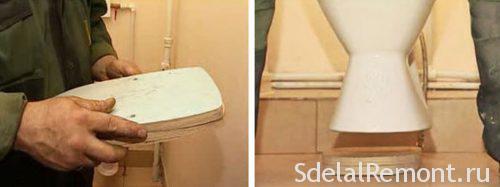
The adhesive mastic
This embodiment provides a bonding toilet using special mastics. It is quite rare and in cases, when repairmen want to do everything as quickly as possible, while forgetting about the quality of work.
Dismantling of construction in this case is quite simple, quite a few times well hit his hand on the toilet bowl, with the result that the adhesive will depart. The only thing, that will make you, so this issue of disconnect.
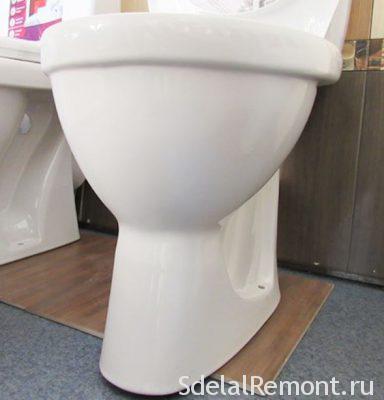
staffing mount
It means an external prekruchivanie the toilet to the floor with screws. It found itself quite rare, although it is the most correct.
Dismounting is carried out as follows::
- We shut off the water and disconnect from the toilet bachek.
- disconnect the drain.
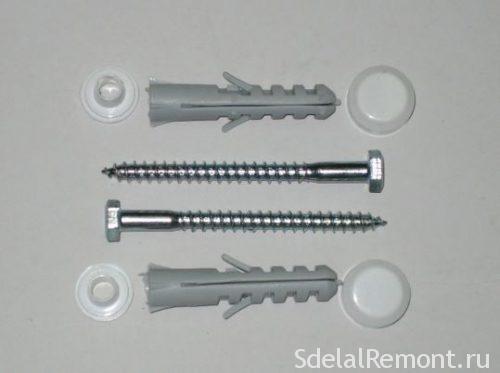
- unscrew the bolts, which are hidden behind the decorative plugs at the bottom of the toilet bowl.
- AND, respectively, remove the toilet itself.
Preparing for installation
disassembly step can be regarded as completed, now it stands pre-prepare the surface, before, begins installing the toilet with their own hands.
And there are a number of factors, to be observed:
- The floor must be smooth, if appropriate further floor is required to conduct alignment (screed or tile).
- If the new toilet is just as bracing as the old, you can install it on the old place. In this case, the old anchors necessary to drill and install in their place a new.
- If the old toilet was concreted, and deepening left after removing it in the floor, it is better to make a tie. Screed drying on 1 to 3 days (depending on the components).
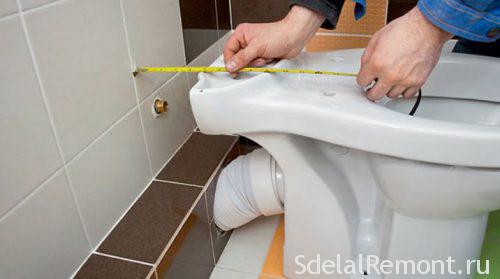
Next, you need to understand, what type of toilet set, to understand, what technology to use, as they are slightly different.
In total there are three types, namely:
- Vertical.
- Horizontal.
- oblique.
And then we will look at installing technology of each of these species.
Mounting vertical toilet
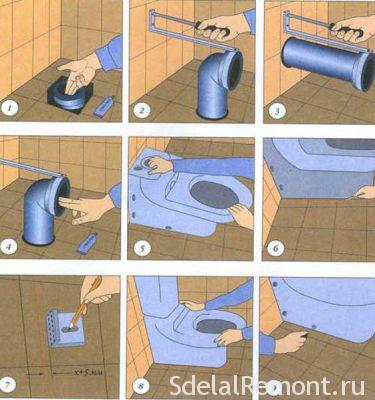
This involves plumbing arrangement of the vertical supply sewerage, its installation is carried out as follows:
- The first is to clean the sewer mouth, remove it from the garbage and put things in order.
- Next to the bell attached special cuff, which is fixed sealant.
- The sleeve is inserted into the same release, but at this stage it is not sealed, it is used at the moment for the application of marks.
- On the floor, you need to make a layout under the seat and a toilet bowl under his mount. Now we have to prepare the necessary holes, which uses a drill or a screwdriver,.
- You will certainly need to consider all the properties of the floor covering. If it is made of tiles, you first have to drill a special tile drill, and after already concrete, using a punch.
- that drill do not walk on the tiles can be punch to make small chips in the drilling field, then get a neat drill hole. For more details about, such as drilling tiles can be found in a separate article.
- The resulting holes become clogged dowels. note, that anchors must sit tight, It depends on the stability of the toilet.
- Next fixture is screwed to the floor by special bolts.
- Now we apply the sealant to the issue and fix it in the cuff with screws.
- The actual problem is the damaged tiles, because the installation should be carried out as carefully as possible. The bolts must be tightened alternately and uniformly, which eliminates the risk of buckling and damage to the plumbing.
- Besides, tighten all the way, you should not. Screwed toilet until, until no wobble or hang.
- To improve anchoring recommended to lubricate all the cracks further cement-sand mortar or sealant.
Directly the toilet set, but remains its connection:
- To connect the cold water, you can use a copper pipe or a flexible hose made of metal. If the cold water pipe has an internal thread, the required adapter.
- The adapter is placed with tow. Tube or hose is connected to the cold water supply.
- Then you need to open the tap and pour a little water, so all the trash out of the tube. Close the tap, the other end of the slag (tube) attach to a tank.
- Required condition, when being installed toilet with his hands - the lack of contact with the ceramic nuts and other metal fasteners. It is therefore necessary to use a rubber or plastic lining.
At this end of the work and plumbing ready for use.
horizontal installation
With vertical outlet understood, and now move on to the horizontal.
In cases, when drainage provides connection is horizontal toilet All work will be carried out similarly to the previous instructions.
When the toilet is not suitable, It noted several features:
- Just install the toilet itself will be conducted as, It becomes the hallmark of his connection to the sewer.
- Carried out by a corrugated hoses and eksentrika.
- These elements are mounted by means of the sealant on the one hand to release the toilet, the other cuff to the sewer.
- A very important factor is stretching the corrugations. Namely, it is worth saying, that it should not be stretched too far, because the risk of fecal deposits will exist in the future, respectively, clogging sewers and breakout.

How to install a conventional toilet system with a scythe
oblique mounting method is used in cases, when the level of output is above the toilet, or below, than the bell. And in this case there are two options to solve the problem:
- The use of corrugations, as in the previous case,. Or the use of hundreds of sewage. In this case it is necessary to measure the desired distance, and between the socket and the toilet so arrange fragment. Fixing it carried out by a sealant.
- And a second embodiment there is use of special tubes in the form of the letter S. In such a case it is necessary additionally to shift position on the toilet bowl 15-20 centimeters. For the most part, such a possibility exists.
In the case of, if the use of these two options can not be, it is necessary to lower the toilet or (equip it to a small recess) or on the contrary to build a pedestal, for, to directly connect it to the socket.
In this work will be completed, you can operate the system, after checking for leaks or malfunctions.
The most reliable (grandfather's) way of, this anchorage for toilet grout. To do this, knead the cement with sand 1/3 and fall asleep under vacuum toilet. The excess is removed and allowed to stand for 2 day.
conclusion
As you can see, installing a toilet is not such a complicated task, as it might seem at first glance. So do not be afraid to take on such tasks independently, especially, to any item of sanitary ware includes installation instructions, that helps to better understand the process.
Certainly it can not work in some cases to carry out the work, due to lack of time, wish, any tool and then refer to the specialist. But anyway, try to do everything on their own worth, and finally we offer you some of videoinstruky, how to install the toilet yourself.


