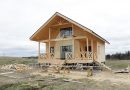
When choosing a fence of a country house, a good option is a metal fence made of euro shtaketnik.
This design will cost the owner a little cheaper., than a solid fence made of profiled sheets. The more attractive appearance is also a positive point., and alone eurostacker will last at least 20 years and will not require additional costs for its operation.
The concept of Euroshtaketnik
A metal picket fence is made for the fence, made of galvanized steel sheet. After the device of a certain profile, sheets are cut into separate elements. Then the pickets are covered with protective layers and painted. Long picket strips are available up to 2000 mm.
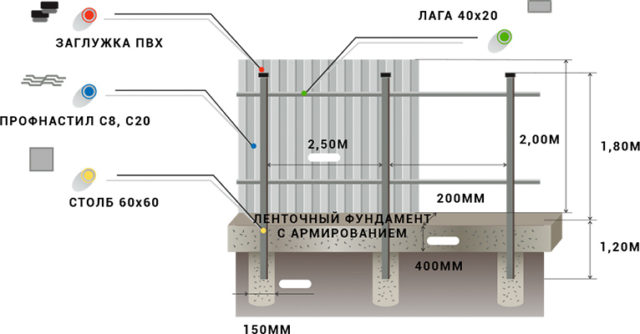
To complete the structure of the entire fence, supports from a metal profile with a cross-section are required 60*60*2 (60*80*2), veins between supports cross-section 40*60*2 (40*40*2). The number of veins between the supports will depend on the height of the fence. 2 or 3 PC. You will need special fasteners for the installation of elements of the euro shtaketnik.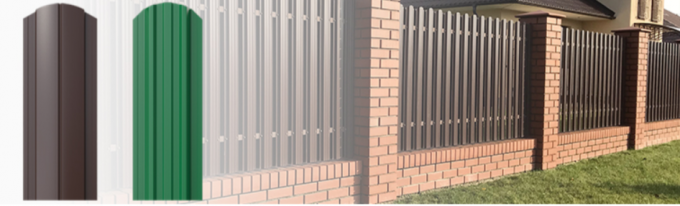
The choice of euroshtaketnik
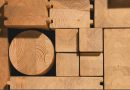
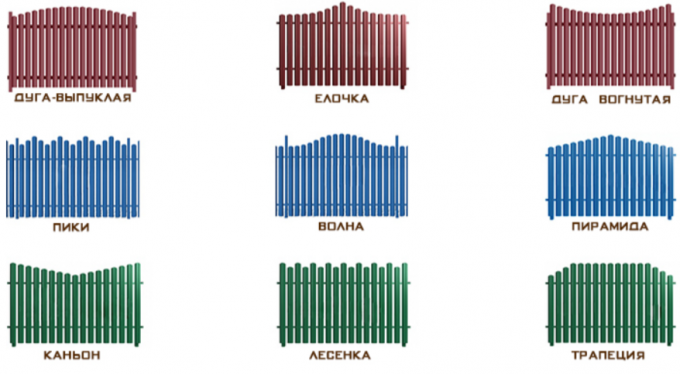
Several types of picket elements are produced:
- semicircular;
- U-shaped;
- M-shaped.
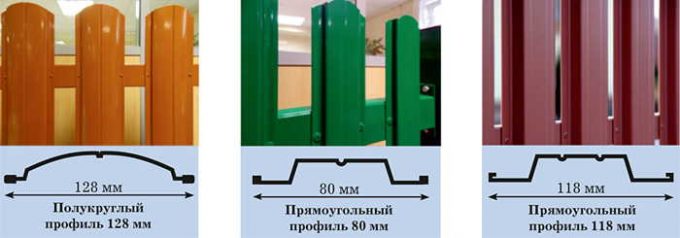
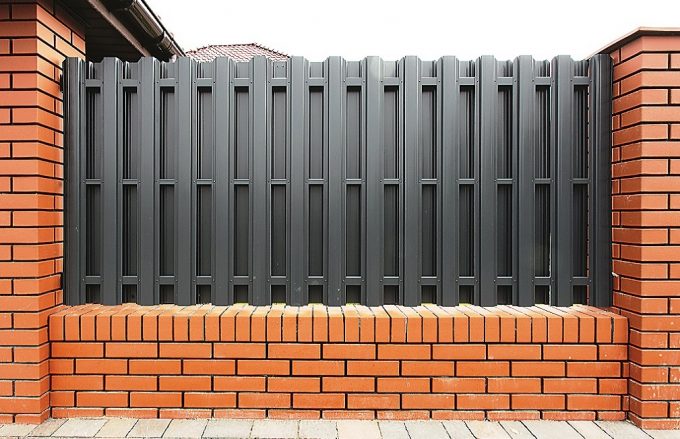
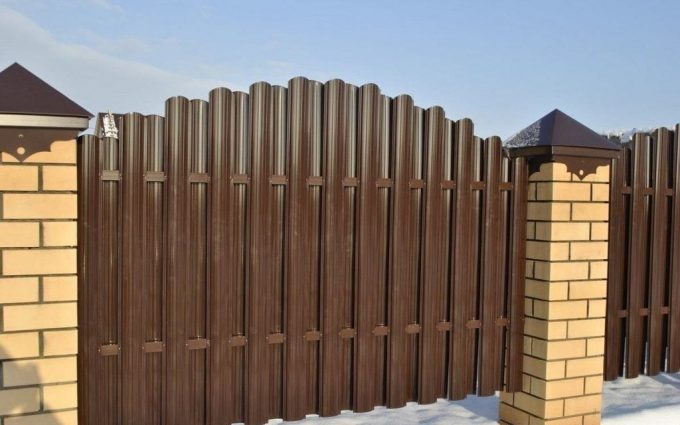
Semicircular and M-shaped plates are considered more rigid and reliable. Semicircular pickets are more expensive.
The material is made from sheets with a thickness 0,4-1,5 mm, the most popular picket fence 0,5 mm.
Item Width: 80-128 mm. Length up to 2000 mm.
When choosing a picket fence, you should pay attention to the number of stiffeners, the more ribs, the more difficult the elements are to bend. This should be the starting point when choosing a Euroshtaketnik.
There are varieties;
unilateral,
Double-sided,
Polymer coated,
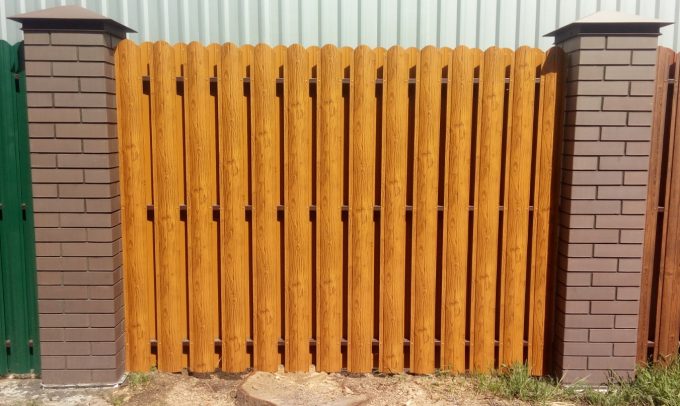
Printech ( metal picket fence for wood.)
another important the criterion for choosing a material is its thickness. Sometimes the shtaketine from one batch may be slightly less than the declared one., this can be bent with one finger.
The best choice is to purchase a picket fence with rolled edges - better appearance, high element rigidity, installation safety (does not cut fingers). true, the cost of such a picket fence will be slightly higher.
The best manufacturers of Euroshtaketnik - "Unix", "New", Grand Line, “FinFold”.
I purchased a euroshtaketnik, it turned out to be the most cost effective "Plant Profile", sales office is located;
Moscow region, Krasnogorsk district, Novorizhskoe highway, 10 km from the Moscow Ring Road, TC "Baltia" Pavilion P-13. Phone
+7 (495) 644-40-44
+7 (926) 665-40-44
You can choose euro shtaketnik with one-sided and double-sided painting. One-sided painting with gray primer on the inside.
You should consult about the method of painting the picket fence, there are two types of them:
- powder;
- polymer.
Polymer coating is a better option, as with minor mechanical damage, the picket fence will not rust, what can not be said about the powder method of painting the material.
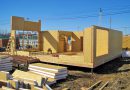
Installation of a eurofence
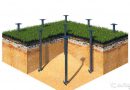
The fence device can be carried out on a strip foundation, on strip foundations with brick pillars and without foundation.
Consider the most economical, a simple and quick way - a fencing made of euro shtaketnik without a foundation.
Work begins with marking the points for mounting the supports. The extreme points of the fence supports are determined, pegs are hammered, a cord is pulled over them.
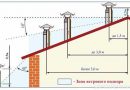
Then the location of the gate and wicket is marked (their width), pegs are hammered. After that, the intermediate supports are marked. The step of the supports should be taken no more than 2000-2500 mm, it is better to install extra supports, but no need to increase the step between them.
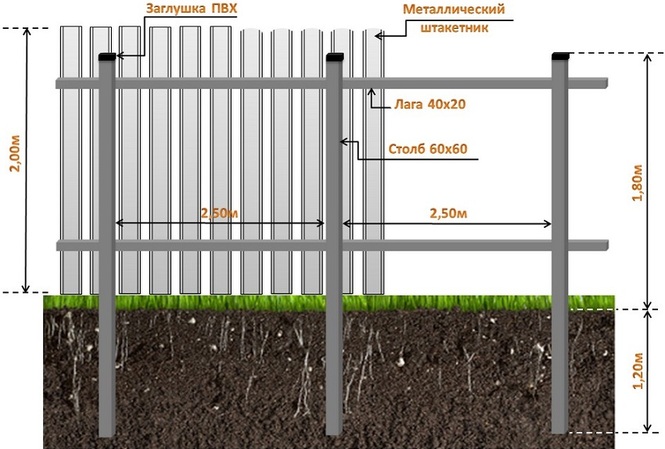
At the obtained points with a hole (shovel) holes are made, depth to 1100-1300 mm.
The profiles for the supports are being prepared, are welded to their lower parts "mustache" of reinforcement with a diameter of up to 10 mm. Whiskers are required for better adhesion to concrete. The lower part of the supports, which will be in concrete, processed with mastic.
Installation of supports begins from the corner points of the fence. Supports are poured with concrete, brand not lower than М100. The concrete is carefully compacted, at this stage, a building level is used to check the verticality of the elements. After installing the corner supports, work should be stopped on 2-3 day. Concrete will gain a little strength, after that you can carry out the installation of the remaining supports.
Should pay attention, that the supports of the gates and wickets, it is better to make from profiles of a larger section, than conventional supports.
There are different options for the design of the openings of the fence and the use of a metal euro shtaketnik . for example with brickwork.
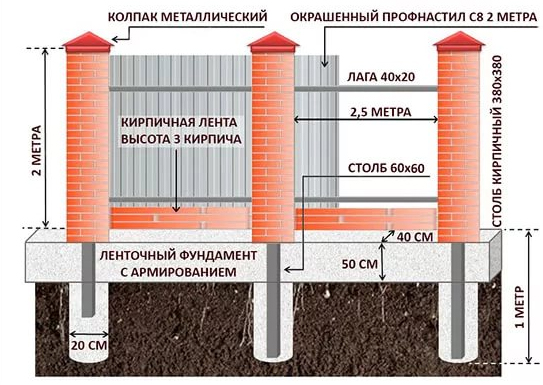
It is possible to produce for the base and strip foundations.
After that, the installation and concreting of the remaining supports along the cord is carried out. The work is again "slowed down" for several days to set the concrete, you shouldn't rush, since when welding veins, can lead a few pillars. Install each support using a building level for a thorough check of verticality.
The next step is installation (welding) veined. With a fence height up to 1500 mm, just mount the veins (crossbars) in two rows, at a higher height, you will have to perform them in three rows.
The veins should be welded at the rate of about 300 mm from the top and bottom of the picket fences. In this work, check for the horizontal arrangement of elements with a level.
After finishing welding, clean the welded seams from slag and cover the supports in two layers with a primer or paint in the selected color with paint.
Then, the installation of the Euroshtaketnik itself is carried out.. Fastening elements can be made in two ways - with self-tapping screws, rivets.
Rivet fastening is considered more reliable. Fastening is done in places of veins with a self-tapping screw (rivet) on each side of the metal fence. With two veins - 4 samoreza, at three - 6 screws.
The elements can be mounted when filling openings in a straightforward manner., and in one or two waves. The undulating method of installation is more laborious, since you will have to cut almost every picket bar. With the direct mounting method, no cutting of the picket fences is required, and the upper part of the fence can be fixed with a U-shaped element. Such a fence turns out to be more durable and durable..
Perhaps more interesting , two-way method.