ceiling plaster is applied as a separate type of finish and by further staining or whitewash. We have already told how to perform plaster the walls with his own hands with the video example and process description, look. To start, It is required to prepare the ceiling to the. To do this, you must clear it of old paint or plaster. Now it is necessary to assess the state of the ceiling. To this end, it imposes a building level. Gap size should be no more 25 mm, if this is not the case - it is worth thinking about, to sew up the ceiling plasterboard. It is also recommended in such cases to use reinforcing mesh, metal or of synthetic material. If unevenness does not exceed 5 mm - you can do without plastering, and deal directly with putty. Some irregularities can be removed with the perforator.
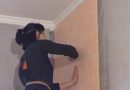
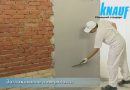
Consider the option of plastering. Dilute the ready-mixed according to the manufacturer instructions. Take two spatula - big and small. A small spatula plaster is applied uniformly on a large, and great - directly on the ceiling. Remember - the smaller the angle between the spatula and the ceiling, the greater the plaster layer may be applied. After the end of this stage should be completely dry plaster. Usually it does not take more than a day. Now we should wipe out imperfections with a mesh or abrasive polishers. On the surface prepared in this manner is carried out just finishing luting. If it was possible to do without plastering, then on the surface of the ceiling should apply a special primer of deep penetration. This will protect the roof from the mold and will facilitate better adhesion material. In the video, the examples below, the following steps are well demonstrated.
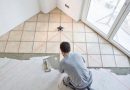
Proceed directly to the putty ceiling plasterboard or plastered with his own hands. At a dilution of the dry mixture should be considered, if it is composed of gypsum, the drying time is reduced to 40 minutes. The mixture should be stirred carefully, that there are no lumps and stones. For starting filler is not critical, but for the final - is strictly necessary. For applying it on the ceiling is also used two spatula. Avoid sagging. Removing the excess mixture, spatula must be held vertically. It recommended that you start from the walls. After the end also have to wait for the complete drying - about 6 – 8 hours.
Now we plant putties. For areas of high humidity using a mixture based on cement, for the rest - on the basis of plaster. It must be applied a thin layer, literally just to cover the remaining irregularities. After drying, the ceiling will be overwritten by the abrasive mesh. To protect sure to use goggles and a respirator.
ceiling plaster and tool selection tips, for fast work
Super system shows as they do plaster and plaster ceiling with his hands.
Especially for site repair of the apartment.