undoubtedly, ceramic tile has been and remains one of the most popular types of finishes. Due to a number of its advantages. Such material is strong, beautiful and durable. But there are a number of features, who need to know, before, what will be done laying tiles on the floor with their hands. Among them, and especially the choice of tiles, and immediately all the nuances of laying.
What tile to choose for the floor
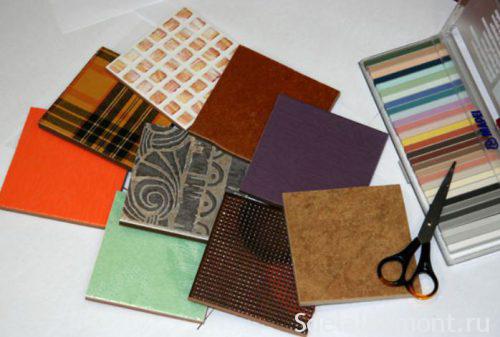
To begin, consider some guidelines for choosing.
- In the case of the bathroom, where permeability is low enough, you can select a tile with a slight abrasion class. The main requirements for the tile in the room are high levels of resistance to moisture and household chemicals. Besides, coating must not be slippery.
- Speaking of the kitchen, It is a large cross, and it is recommended to take the tiles with the class of abrasion of not less than a third. Besides, due to the high risk of objects falling on the floor, the material should be resistant to impact loads. It is also necessary to eliminate falling and, because tiles must not be slippery.
- Hallway the coating must be chosen with the highest level of durability and strength. Since there is a high permeability, and in addition a large mechanical impact shoe (heels and so on.)
More detail about, how to choose the right tile for hall, food and bathroom can be found in some resource materials.
Self-laying tiles on the floor
We now proceed directly to the process of work. The first thing to consider, that we need for work.
First, prepare the tools and materials. First need:
- tile;
- tile adhesive;
- glue bucket;
- grout tile;
- toothed and soft rubber spatula;
- building level;
- Bulgarian;
- Tile;
- with a pencil line;
- roulette;
- tic plastic;
- Drill with a nozzle for mixing glue;
- kneecap.
Then you can start to prepare floor for laying.
surface preparation
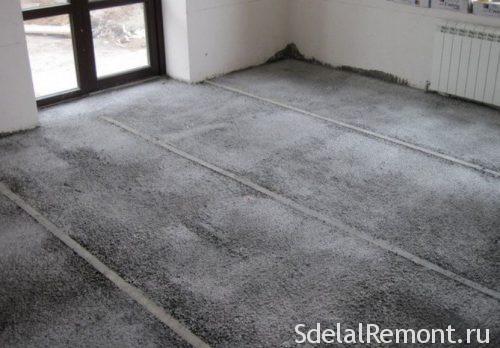
Preparation of the base becomes the first, and at the same time the most important stage of work. This is due to the fact, that in order to provide ideal coverage, We need an ideal base.
Before starting work on the tiling is required Line floor. If the level difference between the top and bottom points of the floor more 2 cm, it is necessary to make a screed. If less than, the height can be adjusted by the thickness of the adhesive layer tiles.
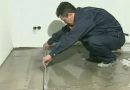
When, It must be used when aligning liquid or floor screed. Training is carried out as follows::
- The surface is fully cleaned of debris and dust.
- Close all openings, that there was no draft.
- The room temperature during operation should be less than 5 degrees.
- The spirit level differences determine gender, and note the tie level.
- Further on fill level and align its composition.
- We reserve flooded at least on the surface 12 hours, to dry.
For more information on holding tie in a separate article.
Step by step instructions for laying tiles
When the preparation is finished floor, you can proceed directly to the laying, but before it is to determine the direction of the tile pattern, the presence of borders, paving way - directly or diagonally. Also worth in advance to pick up the color of grout. See full article, where painted with photo examples technology ceramic tiles sex.
All of these processes in individual materials, and now consider fully, how to lay tiles on the floor with their hands.
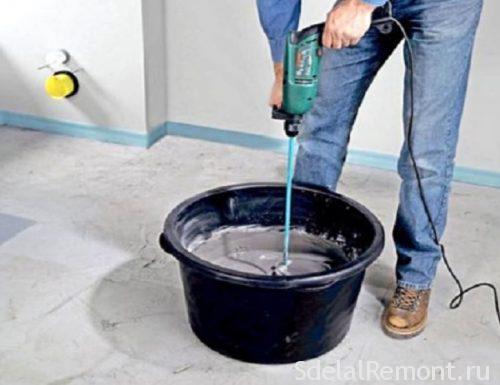
- Dilute the glue in the bucket according to the manufacturer's instructions. It is important not to mix just a lot of glue mixture, because it pretty quickly grasped. One batch should be consumed within a maximum of hours (depending on the adhesive itself).
- When it carried out tiling on the floor, best place to start parallel to the window, starting from the corner, which is likely to be in sight.
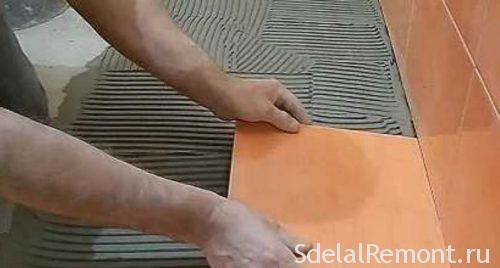
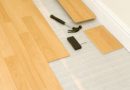
- Apply the adhesive with a notched trowel on tiles or floor.
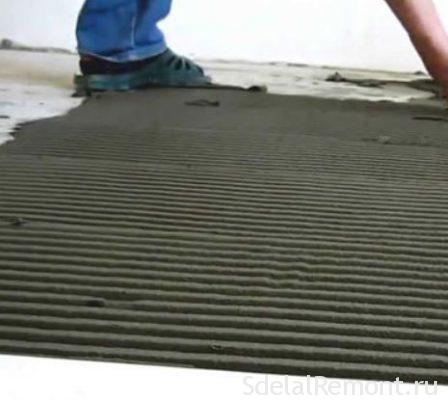
- If the tile is placed on a wooden floor, the adhesive is applied to the floor and, and plitku. Thus on the floor covering to be applied on the adhesive area, which will be processed over the next 20-30 minutes.
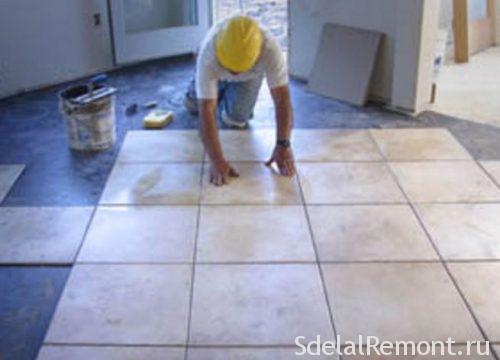
- We put the tiles on the floor, tightly clutching her hands.
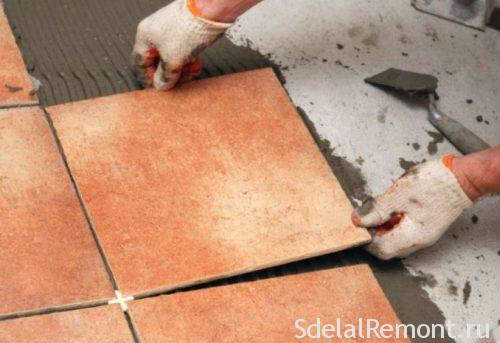
- Then repeat the procedure with the next tile. First, it presses tightly to the first tile, wipe speaking solution and inserted between two plastic cross.
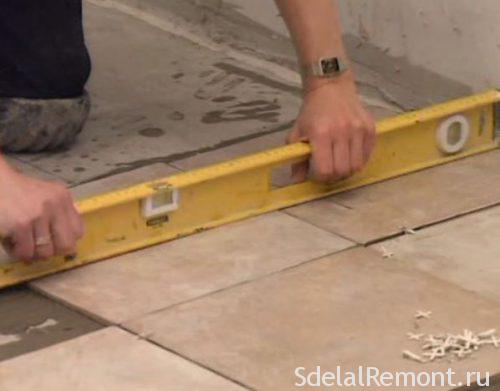
- To check the level of putting a horizontal stacking.
- If necessary, trimming tiles level by tapping on it with a rubber mallet.
- We put up a number of walls. If the extreme tiles will not fit, then trim it or grinder Tile (look how to cut tile Tilehere).
 First carry out laying whole tiles, but in the last moment of the circumcision.
 - Grinder in the future will be cut all non-standard angles. Since the trimmed tile does not look aesthetically pleasing, it is precisely on this side are going to install furniture.
- We begin to lay succeeding courses from the first position to the tiles.
- Between adjacent rows of tiles must also crosses Paste.
- After that, as the last row has been laid, leave the tiles on the day - two. During this time, the glue must be completely dry.
In this packing can be directly considered ended, but it remains the last stage of work - grout. tile Grout
Now can be installed on the grout joints. Often, that is what will determine the final form of the whole work. Work on the grouting is done as follows:
- Grout sold already diluted or in dry form. If it is dry - a divorce according to instructions until smooth.
- To reduce the amount of cleaning work in the future, on the edges of the tiles pasted strips of adhesive tape, they will not allow to contaminate grouting tile.
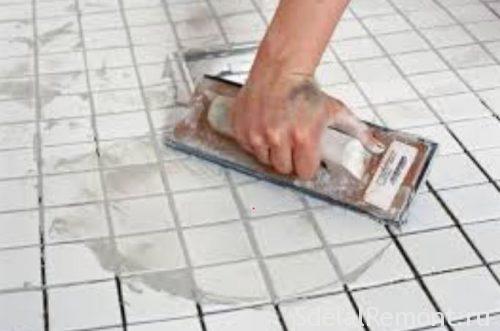
- Put the grout in the tile joints with a rubber trowel, and dent its.
- Take the plastic tube, diameter slightly exceeding the width of the seams, and dent her grout on the floor.
- Distribute grout must be uniform at the seams.
- After that, how the grout dries, eliminate tape from the surface to remove the excess with a damp cloth tiles.
- Then carefully my floor.
In this whole process of laying tile with your own hands is completed. But in the end we recommend that you get acquainted with a number of tips and tricks, that will not make mistakes. detail, about tile grout.
Hints and tips for tiling
some tips, which will help to avoid mistakes during installation:
- Immediately before, conduct a preliminary tile layout, to choose the best layout.
- Cut off pieces of tile to lay it recommended in places where it will be installed furniture, or hide in the corners.
- For more even stacking can be used floor leveling system.
- Choose a spatula, depending on tile size and the desired layer of glue mixture, more layer, the more teeth a spatula.
- If you plan to laying tiles on floor heating, Pick up a special heat-resistant adhesives
- Always check the level of the tiles, after each new laid. In the case of irregularities, immediately remove them.
- Laying begins 10-15 minutes after mixing adhesive.
- Remember, that fully coating dries and gaining strength through at least day, and some adhesives require and 3 day, it is not recommended at this time going to cover, which can lead to distortion of masonry.
conclusion
If you decide to lay the tiles yourself, be sure to consider all the recommendations provided, and carefully follow the instructions. Besides, necessarily familiar with materials optionally adhesive mixture, grouting, selection of adhesive layer and selection tool.
At the end of the same, We offer a look at some videos about, how to lay the tiles yourself.
https://www.youtube.com/watch?time_continue=1&v = cD02Q1Ei2sM
On the topic of the video look how to cut tile, all set.
Watch the video how to overwrite the seams between the tiles.
#t=71
At a reprint of the article materials "Laying tiles on the floor video" link to site repair of the apartment with his hands obligatory.


Tile laying open to the entire area to wait a couple of days, and close up the seams grouts. Immediately load such floor is not necessary. Wait a few days, until the solution has dried, and then you can safely walk.