One factor, which provide extra warmth and shumoizolyaiyu the room becomes the right glazing balconies with their hands. Besides, By providing the glazing, you will get an additional usable space, which can be converted into a separate room, or simply be used as additional storage items.
Why it is necessary to carry out self-glazing
To date, a large number of companies engaged in the production and installation of glazing, but it is worth noting, that the cost of the work of specialists is quite high.
Of course, the installation of conventional windows can be included in the construction cost, but for a full glass balconies and loggias have good pay. That is why a large number of people, and think about the fact, to carry out all the work yourself.
And further,, we will consider the nuances, which should be taken into account during the work and preparation for them.
Independent balcony glazing and loggias
Glazings enough, but at the same installation technology is virtually identical, and it has only some features. Next, let us consider the example of, how to perform the glazed balcony.
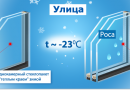
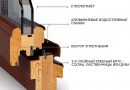
The first step we propose to consider the scheme design arrangement of elements: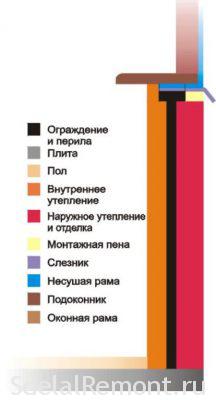
Now let's look at the stages of work, then move on to an analysis of their:
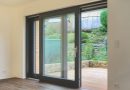
- The first notes directly system selection. Most commonly used aluminum, metal and plastic or wooden casement and frame. They can be sliding, and opening. Naturally, the choice of material depends on the service life and quality of glazing. for example, wooden frames will last not so long, others, but it is easier to work with them. Besides, they can glaze a balcony with conventional carpentry tools.
- The second step is measurement of the balcony and custom designs.
- Further preparatory work. As part of, which is necessary not only to clean the balcony, but also to verify its integrity. Make, that the railings and parapets are reliable. railing, if nessesary, should be reinforced masonry, metallic area or welding.
- The next step in the installation notes of the frame structure.
- After that you need to install the ebb.
- The last step is to install the valves and their adjustment.
And now proceed directly to an examination of each stage of work.
Measurements and order
This step is carried out after selecting the type of glazing, To learn more about what they are and that you can choose in a separate article.
- When the choice is made, be ordered structure, but you need to know all the dimensions of the system.
- Conducting measurements imply a complete dismantling of the old glazing, if any. Remove all necessary frame, attachment and release of the balcony parapet to ceiling of old parts.
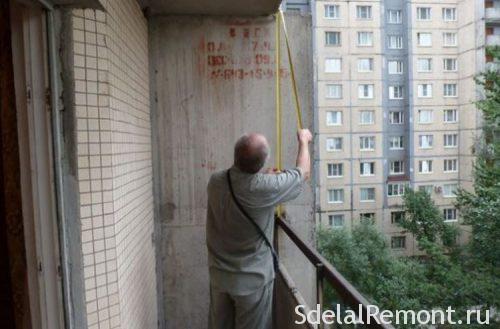
- Now we need to carry out measurements of the balcony, this will be enough to use a roulette.
- Measure the height of the structure from the ceiling to the parapet. From the resulting values necessary to subtract the thickness of the sill, level difference. The result is taken into account in the amount of construction.
- When measuring the length of the structure are not captured ligth and gussets.
- Visor should exceed the length of the finished design on 20-30 cm, and the length of the sill will be more on 15-30 cm. Transfer the measurements to the firm, manufactures frames.
- All measurements must be made with millimeter precision, because any mistake can lead to global problems during installation and after.
- Next, draw a diagram window. When you're done drawing, consider, the width of the hinged flaps must be greater than or the same as the width of the balcony. Make leafs on 10-20 see less, than the depth of the balcony, that they freely opens and closes.
It is worth noting, most companies do not trust their own measurements of the customers, and because you will be sent zamerschika, which additionally removes all the necessary measurements, and help you to choose the best combination of wings.
It will also give advice on the performance of work (the need to strengthen the balcony, or did his erection again). In any case, this measure is necessary, because you may not even know about, that you can not osteklyat balcony, the deplorable state of the parapet, and his need to redo.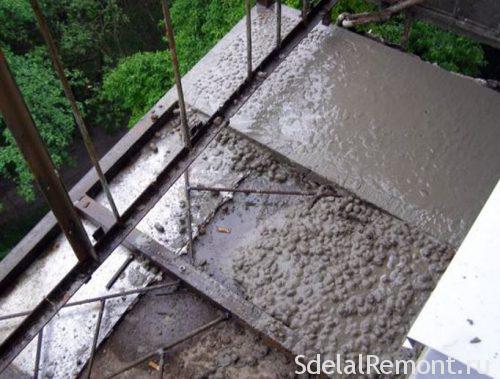
After the measurements, and approval of the project in place zamerschika you can discuss the price and terms of delivery structures.
Preparation of the balcony glazing
Now, when the order is made, and you are waiting for the delivery window system, you can start preparing the balcony to the beginning of work.
first, what should be done, check the status of the parapet, in the presence of any defects (cracks, slots) they need to be addressed.
sealing the gaps can be carried out via, galvanized steel. Suffice it to cut from the sheet piece of the desired size and attach screws to the outer side railing. To perform the task quite difficult, therefore it is recommended to get an assistant.
When, if the parapet is in poor condition and not suitable for glazing, you need to build a new. Standard parapet computation is carried out on a single brick sand-grout.
It required during the construction necessary to control the level and plumb parapet. At the end of the metal strip is fixed on the perimeter, which further serve for fastening the glazing.
preparation of design
After the delivery of the finished frames proceed with the preparation of the windows. Before, how to start the installation, perform the following processes:
- initially, you must remove windows. It is very important, because there is a great risk of damage during installation, Besides, rather heavy design, and will hinder the process.
- In the manufacture of the majority of companies do not fully capture shtapiki, which hold the glazing, what is done is to retrieve it before installing.
- Immediately necessary to extract and remove the hook beadings. This is done uniformly from the center to the edges. Their removal is carried out in the following order: first side, further lower, and the last is removed the top.
- Then gently extracted himself glazing.
- Glass should put on clean floor, which must be cleaned of debris and dust, moreover aligned.
- The next step removed the sash. For dismantling the top there is a special rod in the loop, want to push, on after extended.
- Thus one loop will remain fixed, and the flap can be easily removed, He bent over and pulling.

Installation of the frame structure
Now begin immediately installation of glass with their hands. He performed as follows:
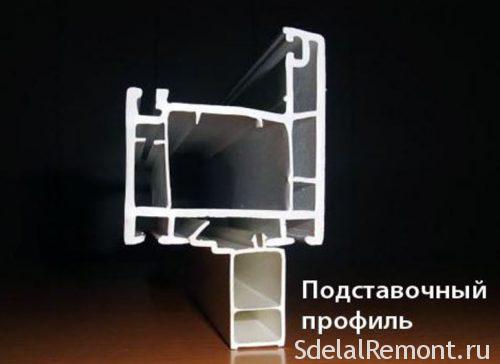
- The complete system has a special profile (Podstavochny), it is set in the first place. This kind of plastic strip, which is fixed at the bottom of the design. With mallet pound it into the frame grooves.
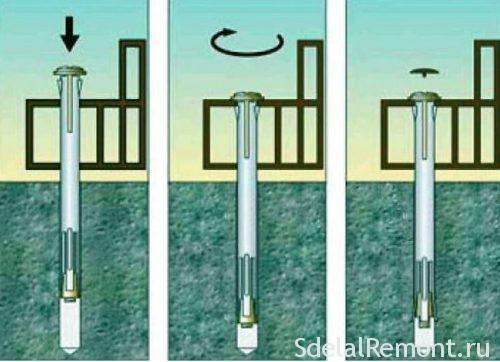
- Now you need to install the mount for the frame. Perform layout layout window system frame, and then pull back on 15 centimeters from each end and set the mount. For them, it is necessary to perform the special holes in the parapet of the balcony window.
- Next, set at the fixing frame. Perform this one can not be, for this job you need to 3 man. Set the frame in its place, then using the level and plumb expose its strictly vertical and horizontal.
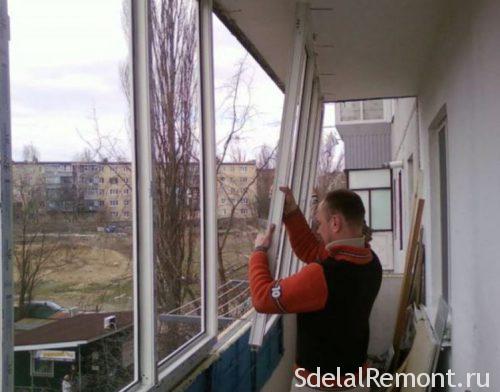
- Once frame alignment lock via supports.
- Attach it to the parapet, walls and ceiling. All you need to mount to drive for at least six centimeters.
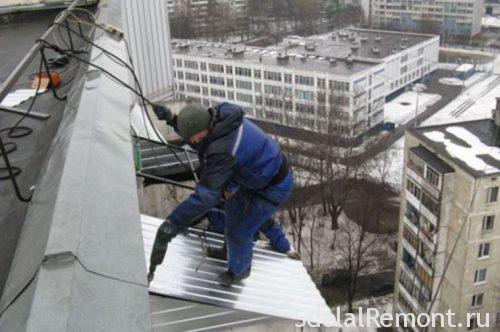
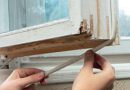
- After that, is set as the frame must be secured visor, which will serve as a drainage. Its installation is performed with screws on top of the outer part.
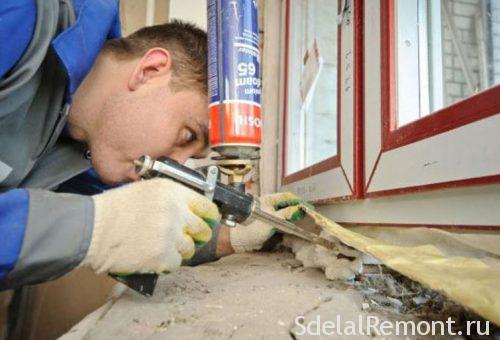
- Component foam seal the seams and hide visible foam sealant.
- In the dead leaf frame set windows, in the same manner as their shooting.
- Now you can set yourself sash. This case, it is desirable to professionals, otherwise there is a risk, that your windows after some time "to lead" and they just stop interlock.
- Next, install the remaining sash windows.
- The last step of installation becomes adjustable shutters PVC windows, then check the tightness of the system and the correctness of the design work.
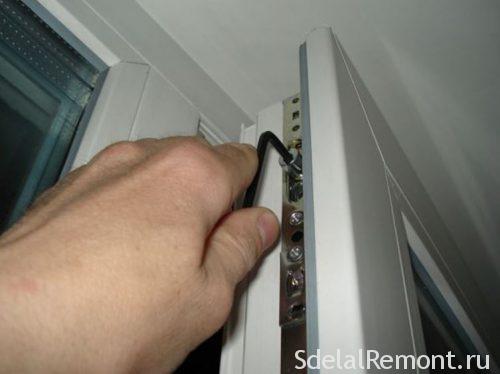
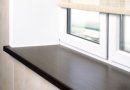
On this balcony glazing directly mount technology with their hands over PVC. The only thing, need to install a window sill.
Features and recommendations
Before starting the installation of the glazing should carefully consider the entire system and the variation of opening the valves design. This step becomes necessary, because ignoring them you run the risk in the future to face the challenges in the care system and its operation.
The most popular option for many years opening arrangement remains flaps through one of the blind.
Also an important point to hidden joints parapet and window system. It is done at the expense of additional hardware, you want to buy (as supplied to the windows it is not included).
Also, upon completion of the work, all gaps must be sealed with foam and sealant, to protect against the passage of moisture and cold. It is only when all work is completed, and nothing else is planned is necessary to remove the protective film with frames and double glazing.
conclusion
As you can see, independent balcony glazing (Company assistant course) It is not very difficult. Main fully follow all instructions, and you will be able to well save money on installation of glazing. But if you are not confident in their abilities, better to entrust this work to professionals, because any error during installation can result in the need for complete replacement of the glazing to the new, and vice versa if the cost will increase several times.
In conclusion, offer watch a video about, how to perform the glazed balcony or loggia to.


good advice, but my deep conviction, it should be installed by professionals, but I do not. Then get it additional space, whether veranda, whether the bedroom, etc.. Check for yourself. Me Windows business growth, and the neighbor himself. I drink tea on the balcony, admiring the view (he's a good-looking, all white winter, summer – green), and a neighbor may say barn, because it began to make itself, so all and not finish it.
Even in the spring began to notice, that the window in the bedroom once tightly closed. And the drafts tortured. And then found a reason - the younger brother of ventilation modes for testing 10 time. Naturally, and closer and pen flew.. We decided to change the window. At the same time I decided to put plastic in the kitchen, there stood an old wooden. The quality of questions asked, even the garbage is removed for.