After installation of beacons for plaster of galvanized metal (however, as well as other materials) speed finishing work grows, and the wall surface is a more level. This fully justifies all costs of purchase profiles, of construction for the guide, fasteners and special hardware (or solution) for them. And, installation of plaster beacons of metal provides a number of advantages compared to other options. Although they do have certain disadvantages and.
Beacons called guides to the rules in carrying out plastering work. Their use allows to obtain the solution of the economy 20 to 30% and approximately the same reduction in terms of wall decoration, floors or ceilings. Lighthouses are fixed in different ways - and in the plaster, and mount beacons such as "Cremmer», and «Ushastik», and even on plastic clip. However, one of relatively simple and is often used for this may be mentioned the use of mortar. Although with the merits of such installation plaster beacons You can find a number of shortcomings.
Pros and cons of using metal beacons
Selection for the installation of beacons plastering walls metallic guide, Firstly, It provides acceleration of the process.
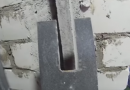
Metallic guides carefully removed from the solution, to protect the finish from rust performance. Otherwise, in a few months and at high humidity and sudden temperature changes may rust lighthouse, that will be quite noticeable on a light background decoration.
Although, if the room is well heated, zinc-coated profile is not scratched , allowed to remain inside the only beacon of good quality such as Knauf.
Other advantages compared with other materials can include the following features:
- installation of metal lighthouses much faster time than the guide device from the solution;
- profiles are not deformed during plastering, Unlike mortar and wooden constructions, and strings. Even strong pressure generally does not damage the metal;
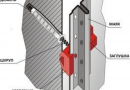
- beacons for mounting under plaster, metal can select a standard height of the flashing profiles 6 and 10 mm. In this way, selecting a suitable guide, You can control the thickness of the plaster layer.
Cons in this embodiment, relatively few. These can be attributed perhaps that the cost profiles as compared to other types of. Another noteworthy disadvantage - a disadvantage of exhibiting lighthouses on the entire surface of the wall at the same time. According beacons attached instructions using screws and special metal fasteners such as "Cremmer" and "Ushastik". BUT, if you select a different installation option without metal beacons in solution, It needs more fixing material.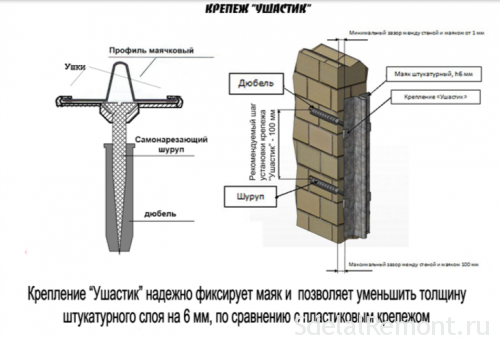
Methods of mounting rails of metal
Each of the ways, enabling secure and correctly expose beacons for plaster walls, It has the following advantages. for example, plastic clips allow much easier to fix guides. Plastic clips for fixing rails, relatively inexpensive and fairly reliably fix profiles. While the installation guide on the plaster is different from the other some features:
- solution for the installation of beacons requires less installation costs - no need to buy any attachments, or dowels, no guides;
- for installation requires a minimum of tools - at least, We do not need a screwdriver, no drill;
- speed of installation above - for the installation of each of the guide will be enough 1-2 minutes;
- beacons are retrieved from the faster solution, wherein a minimum probability of damage (like when mounting on metal fasteners).
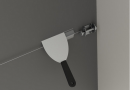
Among the disadvantages of this method, how to install beacons plaster, It can be called a work experience, which is required by their artist. Lay people should choose other options. for example, metal fasteners "Cremmer", which are easy to install yourself.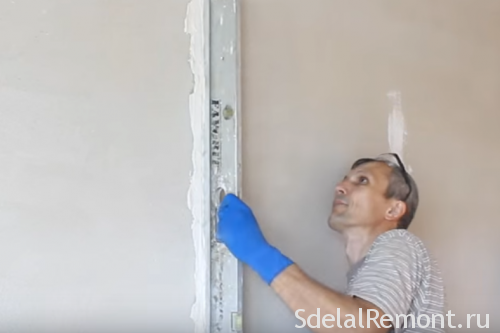
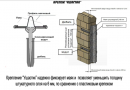
Mounting rails on plaster "Rotband"
A properly executed installation of plaster beacons should consist of the following stages:
- Alignment wall surfaces;
- Markup walling, taking into account the "zero point";
- Mounting basic guide on the plaster "Rotʙand»;
- Installation of additional lighthouses.
surface preparation
Before, setting off beacons to plaster mortar, should be carried out preparatory work. These include the calculation required to perform the work of metal profiles, and their purchase. In defining this parameter, the distance between the guides guided, equal to 1000-1500 mm. (or 200 mm less than the length of the rules).
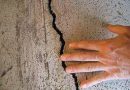
The next stage of metal beacons for plaster It includes cleaning the walls of the dirt and residue of the previous qualitative finishing and primer. This will prevent flaking plaster layer and the appearance of cracks on the wall. Dry primer solution indicates the possibility of transition to be applied to the surface of the walls of the vertical lines, but, thereafter, adhering to guides on solution.
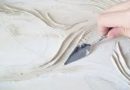
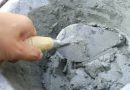
Of all the materials, answering the question, on that mount beacons, ideal option is "Rotband" - material, having increased adhesion due to gypsum binders and additives. High quality allows it to perform virtually any internal plastering. However, the best result is obtained, If the treated surface is completely flat. The same condition applies to the setting to "Rotband" beacons. should know, that the way, how to put beacons plaster walls, It provides for the preparation of plaster in an amount, which will be sufficient only for bonding rails (with a small margin). A solution for plastering of the entire wall surface, even if the same material was chosen, made later, when the dry blend under the rails.
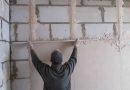
Installation of plaster beacons
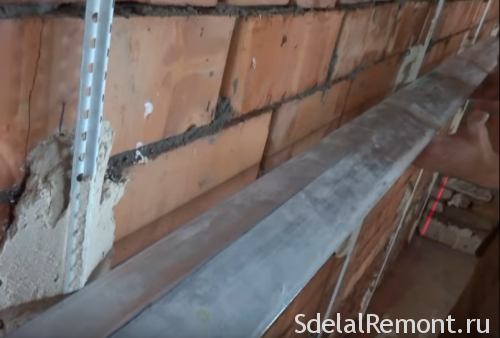
Mounting rails at the solution begins with installing and aligning extreme strips, the distance from which is taken equal to the corners 250-300 mm. After profiles are set to be double-check plumb their bias and secure intermediate beacons. For a perfectly flat surface enclosing structure additional guides set in the biggest drops or projections.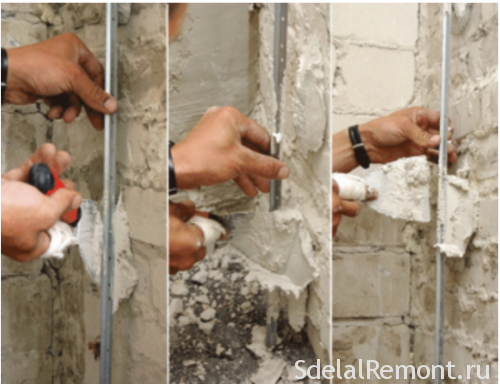
For material saving method, how to put beacons plaster, It provides installation guide is not on a continuous strip of material, and the "cake" from the solution. The distance between points - from 40 to 50 cm. And to reduce the time on the device intermediate the guides in the upper and lower points of the two outer metal sheets is set nails. They are cords or monofilament, representing one of the basic devices, providing beacon exhibiting plaster in one plane with the basic profiles.
After closure alignment nails intermediate metal sheets are removed. And work continues - a wall plastered with the same, it was decided to mount beacons for plaster, ie "Rotband". Wherein, performing finish the other walls, should pay attention not only to its vertical position and slope, but also on the perpendicular to the previous enclosing structure. To fulfill these conditions it is necessary to use a special square, applied to the lower walls of the points in order to cause immediately beacons on adjacent walls.
results
knowing, how to install beacons for plaster walls, you can simplify your work on time. A mounting quality solution from the company Knauf provides cost savings and more. sum, which will cost plastering, It will be significantly lower - in fact,, Mortar mount after removing guide comes off the total composition of the plaster layer. Although it is desirable to use this option only for professionals - the installation of beacons plaster walls without the usual fixings require greater accuracy and precision.