Any base until the flooring plank must be aligned and receive a perfect surface, corresponding to the horizontal level. For this purpose, arranged cement through a series of events. Any unevenness of the floor slabs and other foundation will be eliminated. But for this you should know, how to set the beacons floor screed. They allow to make leveling of the surface of the solution. In addition, the beacons for floor screed can significantly reduce labor costs. For their installation, there are certain requirements, from which it is impossible to depart, if you want to get the perfect option.
Material for beacons
Beacons for floor screed can be made of completely different materials, which can be purchased at the hardware store or run independently. The main of them - a rack options. They have their own classification:
- wooden. It is one of the earliest ways of beacons device. The wooden block is allocated as a main component, having a cross section 3 cm. Further it is possible to regulate its own distance by placing wedges of different size. The same is achieved by screwing the screws of different lengths. That they did not get moisture from floor screed, bars pre-wetted in water for a certain time. But they have their drawbacks. The main of them - must be removed from the tie after casting. Otherwise, they will start to degrade over time.
- Metallic profile. It is popular at the moment and are suitable primarily for premises with a small area. They can also twist the screws to adjust the height. fit screed a layer thickness in 3 cm. if it is greater, the profile will begin to bend under a layer of concrete. All the work will come to nothing.
- Steel pipe. Rational use of such structures in large-area buildings (warehouses). They have properties to maintain pristine condition, even in the presence of severe external loads. With regard to section, they can not only be round or square, but rectangular.
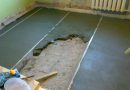
- Solution. Occurs screwing screws equidistant from each other, at the head of which is wound a steel wire. Thereafter, the solution is placed under the stretched wire so, to obtain design, performing subsequent after drying as a guide.
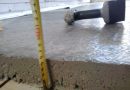
- Gorki solution. Laid a solution on the perimeter of the room to fit the zero level, previously exposed.
Any of these options will provide the answer to, billed as beacons for pouring the floor. Select the most suitable option needed, which is suitable for premises, grounds, such as ties and other factors.
General rules of installation
Installation for floor screed lighthouses It requires attention and accuracy. There are some very important requirements and regulations thereto, overriding of which are:
- Identification and tracing of zero.
- Equal distance between neighboring guide.

Proper installation of beacons for floor screed will be carried out only in the event, when in use all the necessary tools and knowledge base. Observance of technology will provide the desired result.
preliminaries
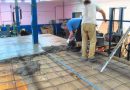
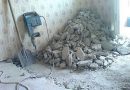
Before any work on the installation of beacons for floor screed should prepare the base. At this stage, measures are taken to cleanse the floor of the old ties, any other type of topcoat. Available baseboards removed. They are unnecessary and interfere with the work in the future by pouring.
On the surface of the dirt can be, oil stains, paint, caresses and other materials. From them should also get rid of. All speakers fragments are ground as possible. If they have a considerable size, it is best to shoot them immediately.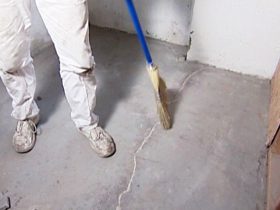
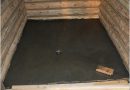
Are sealed a crack on the surface of the working solution. Where necessary renovations floor screed. When all done, you can begin priming base. Follow-up Action - the creation of a waterproofing layer. For this purpose, special materials in rolls, liquid or an ordinary polyethylene film. In any case, apart from the floor waterproofing material must also go further and on the walls around 10-15 cm, whichever, how to put the zero level. It is to this effect and should go after, both carried all kinds of work to prepare the base for further activities. Including mounted beacons from a solution for floor screed.
zero level
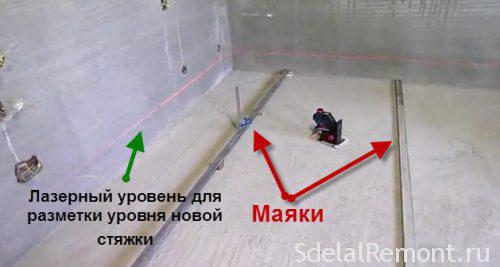
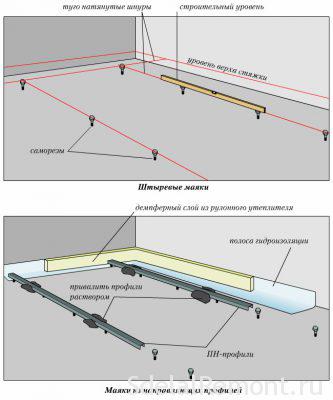
Before, how to install beacons to floor screed, should think about the marks on the perimeter walls of the room. The work is actively taking part tools such as laser level or building. Each of them has its own characteristics and positive traits. More frequent mark will provide the most accurate results. All these lines are connected then a straight horizontal line. I.e, originally plotted horizon, which is located at a distance 100 cm from the subfloor. This line will be called the reference level (a basic level of).
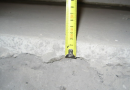
After that determined the highest and lowest points in the room. From the highest point outlines a distance equal to the thickness of future ties. Further there is a length measurement from a reference mark to a thickness of screed. A similar distance from the sample is marked around the perimeter of the room. If we combine these points with each other, we get the zero level. It will serve as a reference for subsequent installation of beacons for filling floor screed.
During Inscription layout should pay attention to the presence of the exposed door. If they are absent, the tie layer is so, that it is not above the threshold of the future. Consequently, beginning batted zero and the fill level of the solution - the doorway.
No one should think about, how to set the level of the floor to fill. This is all done in the shortest possible time. The main thing to use an appropriate tool for the job, have accurate results.
installation options
To level the subfloor for the future of the deck flooring of any kind, you need to know about, how to set the beacons under the floor fill. For this purpose, in some variants of lighthouses:
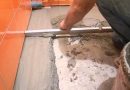
- Profile of solution. Typically used profile plasterboard. turned, it is attached to the wooden supports. You can also alternatively use bricks, solutions hills and other means. To the profile is properly secured, use a strong cement-mortar. Replacing him - gypsum based. All recommend to do without cement-sand mortar, as it is a long time, sets and dries. To continue the work will have to wait about 2-3 day. Instead Profile suitable pipe. They later still removed from the tie.
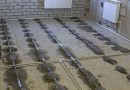
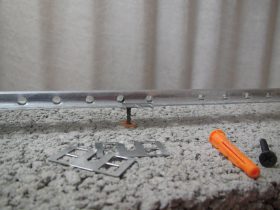
- Profiles on the screws. On the basis of the future sex hammer initially dowels at a distance 0.2-0.3 m different from other. They then screwed screws, which fix the flashing special profiles. By screwing or unscrewing screws, you can adjust the distance for the future of lighthouses. This allows without too much trouble to set the level and horizontal. Not everyone knows, how to put a beacon floor fill in the presence of subgrade. Here it is necessary to begin to beat around the perimeter of the wooden bars, and already they are screwed screws.
- combined option. You can also use self-tapping screws, but combined with a solution. The base anchors are hammered, in which screws are screwed. Subsequently, the solution is poured over them and lifted to the level of the cap. After drying, the slides serve as a basis for subsequent floor leveling. Almost the same way to perform the installation mortar beacons.
- The oldest variant - laying wooden beams on the surface of the old ties. They are adjusted to zero using podkladyvaniem under these various elements (can be wooden wedges). But for cement screed bars moistened in water, that they could not absorb the liquid from the cast solution. Later on they should get rid, since in operation they will start to lose its quality, rot and crack.

More options will be beacons for other options screed floorbut (semi-dry, filling method). Each of them is individually and with the appropriate materials, equipment for work. If there are doubts about the quality when performing the installation of beacons in a room for floor leveling for the subsequent flooring flooring or finishing, it is best to seek professional help.
Tips
One should know the intricacies, allowing to give an answer to the, how to install beacons for pouring the floor quickly and efficiently.
Solution for lighthouses will dry quickly, If its members add a certain amount of alabaster. Process readiness reduced to about half, and it will be possible to start filling and leveling floor base.
solution may appear on the surface of beacons during casting. It should be immediately removed, because it can cause an increase in the level of the floor of the future. This immediately will cause surface defects, which will have to spend time and energy to eliminate.
these cities, where beacons are arranged for floor screed must be pre-wetted prior to pouring. Such action will better grab prepared solution.
After pouring the solution until complete setting screws must be removed, wooden blocks, other types of beacons. Movements are possible only on the wooden flooring. These areas are sealed immediately with a solution. It is better to carry out work in a team, each responsible for a specific scope of work and the site. So it will be much faster and better conducted fill. Floor Leveling realized as soon as possible.
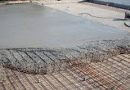
The thickness of the screed can be as high 100 mm. In this case the reinforcement layer further arranged, or dumping of expanded clay. Some of the lighthouses of the profiles can thus bend due to the load. To avoid this, approximately one and a half to two hours before the start of filling all the voids beneath them to be filled with a solution of. By the time of alignment, he grips and will even keep the entire load.
Exhibiting lighthouses will take some time for the filling process. But it is very important, if you need the result. On them it is much easier to produce leveling solution in strict compliance with horizontal lines.
Video of the quickest way to install beacons