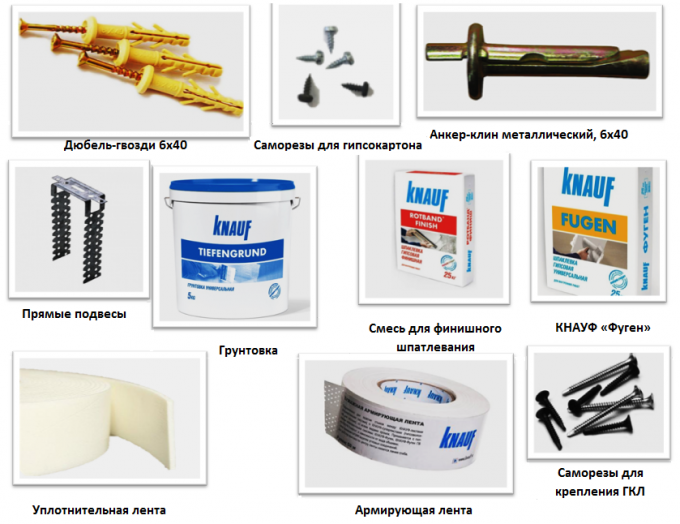
- Instruments
- materials
- Plasterboard (gkl)
- What is the profile for the ceiling of plasterboard needed
- connectors
- Phasing with ceiling
- Preparatory work
- Chertёzh. Removing measurements
- Road marking surface
- The markup for lighting
- Installation of single-level ceiling frame
- First step. Installation guide ceiling drywall ceiling under profilyana
- The second step. Fixing hangers.
- The third step. How to fix the ceiling plasterboard ceiling profile
- fourth step. jumpers
- Electrical wiring
- fifth step. Installation of gypsum boards
- Last step. finishing
To create a plasterboard ceiling in the room to do a metal frame. This article painted the detailed steps how to do the work frame of the profile for plasterboard ceiling. Job requires accuracy, accuracy. The algorithm should be performed in stages to obtain a lasting base frame and beautiful ceiling plasterboard.
Every stage of the work on the installation of the frame includes a number of rules, and also has nuances of work.
Instruments
For creating a metal frame a sibling plasterboard ceiling will require a set of tools, without which the work would be impossible or difficult.
need the following:
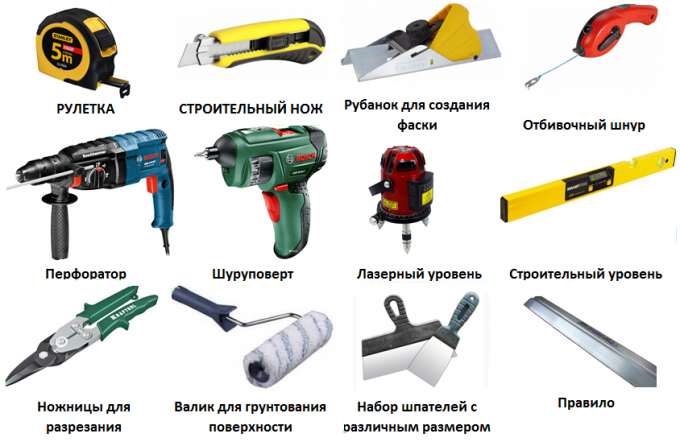
Tools should be in a pure form, serviceable. All gauges, otbivochnogo cord into the proper form.
materials
It is important to purchase materials known manufacturers, let's, KNAUF. Unlike other companies - the quality of products. To create a lasting, rigid framework should buy all of one firm with quality assurance certificate because there is often a fake.
Plasterboard (gkl)
Depending on the room, its humidity, temperature selected type plasterboard. In the construction market has 3 species: 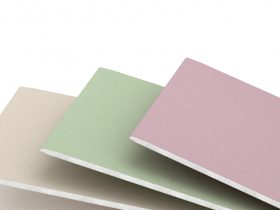
- An ordinary sheet of drywall is denoted GCR, Gray - is used in dry rooms, without sharp changes in temperature.
- Moisture resistant material designated GOLS - suitable for balcony, bleaching attic, in the bathroom, in the kitchen and other wet areas.
- Refractory sheet GKLO or GKVLO - is applicable in the field of fire dangerous. he rose (reddish) colors. Does not burn.
Each leaf has its own size: length 2.5 meters and more, width 1.2 m, thickness of 9.5 to 12.5 cm.
What is the profile for the ceiling of plasterboard needed
To create the metal framework for single-level ceiling required profiles: 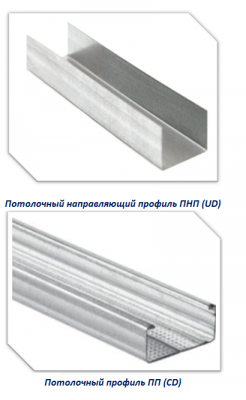
- Ceiling guide profile TNG (OUT). It measures: thickness 0.4-0.6 mm., width 28 mm., height - 27 mm., length - 3 m.
- Ceiling profile PP (CD) - sizes: the thickness of the case 0.4-0.6 mm., width - 60 mm., height 27 mm., length 3 m.
Profiles for plasterboard ceilings should be qualitative, torsionally stiff. Knauf profiles of different thickness of metal(0.6mm) and are considered the best on the market. Other manufacturers save and make the profile of a thin metal(0.4mm) that makes the design softer. On this depends the strength and durability of the produced ceiling.
connectors
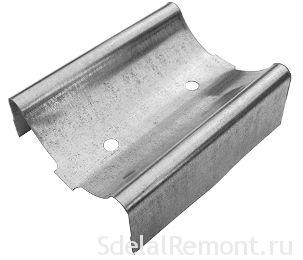
In order to achieve uniform strength and stiffness of the frame should be used extensions, If the wall is longer than a ceiling profile a length dimension. to TNG (CD) 60*27 used special insert, ideal for building. It strengthens the connection border, making it more durable.
For compounds EOR (CD) and jumpers from PP single layer applied connector. Here, too, it is important to pay attention to the thickness of the metal to the selected material was not soft.
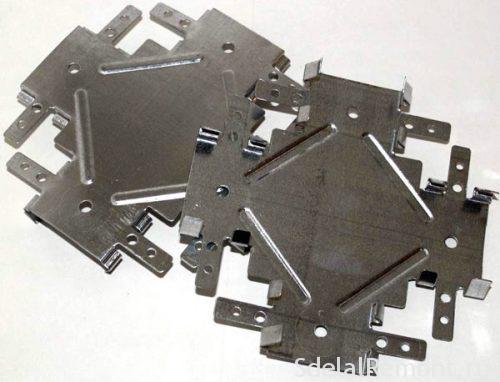
To connect cross sections in one plane applied crab. They are the same, there are different, better to choose a thickness 0.6 mm. This compound has a latch for quick fastening. For durability is fixed with screws on the metal.
Materials are purchased at the rate of the removed measurements for drawing. Not to be mistaken in the number of, should be used online calculator.
It requires the purchase when buying all the materials 10% greater amounts obtained.
Phasing with ceiling
All single-level ceiling plasterboard manufacturing process is divided into stages. The strength of single layer plasterboard ceiling depends on each action performed.
Preparatory work
For the installation of gypsum ceiling frame should, first of all, prepare a room and surface. The room shall be made furniture, cleaned and home furnishings, hindering mounting process. Thereafter it is room to place a sheet of plasterboard to adapt ambient environment - temperature, humidity.
In order to prepare the surface should result in a rough ceiling in the proper form:
- Surface is inspected for cracks, holes, provysayuschey plaster. Old plaster showered removed kotororaya (it expiration time may fall on drywall and thereby create extra weight gypsum structure). It is desirable to close up all the holes.
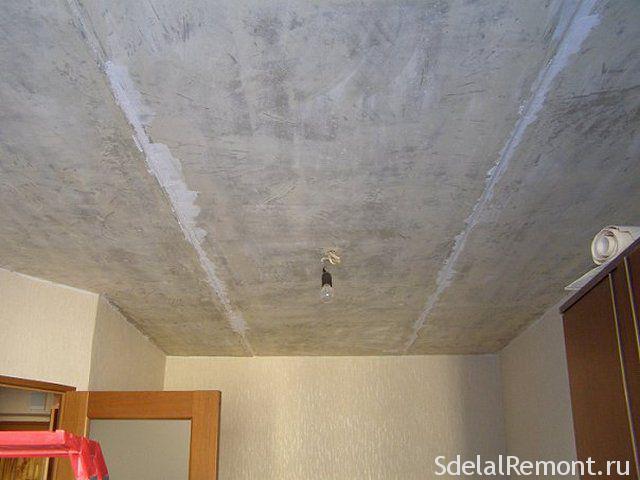
prepared for ceiling mounting of the metal frame profiles - If the ceiling has traces Tsvil, then room preparations treated and dried.
Preparatory work should always be carried out, because the fungus easily transferred to the GCR, disappeared gypsum plaster structure otyazhelev, that threatens to strain, cracks.
Chertёzh. Removing measurements
Following the preparatory work should take a sheet of paper, better yet 2. In the first step the sheet is drawn from the ceiling surface of the projecting corners (if any). Next meter, a tape measure the perimeter of the ceiling. The obtained data are recorded on each wall drawing.
should not be neglected in millimeters, do rounding. In the process of mounting the metal frame is playing its role. Size is required to write down exactly, let's, 2.156 m.
Further, It needs to measure the height of each corner of the room. We need to find the lowest position of the rough ceiling. In the figure, there is a low point. Then markings on paper notes, on which are mounted Profile.
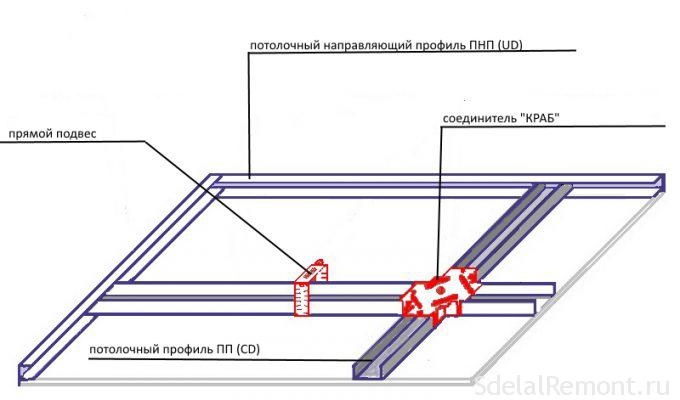
there is 2 kind of framework for a single-level ceiling. In the first form of mounted ceiling profiles - cross frame. The second type includes jumper - mesh metal base.
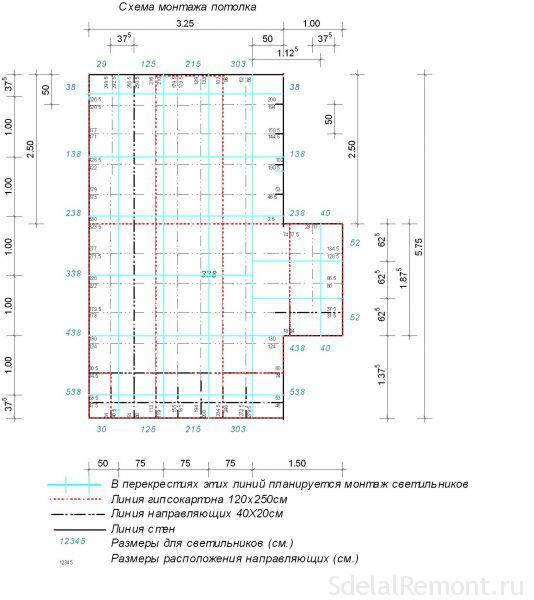
Transverse frame involves the installation of a ceiling profile PP (CD) through every 40 cm. with the jumper, as well as crabs do not need. Drywall in this case is applied perpendicular to the ceiling profile.
Porous frame is a metal lath ceiling profile of cells. Here CD inserted every 60 cm., and each bridge through 50 cm.
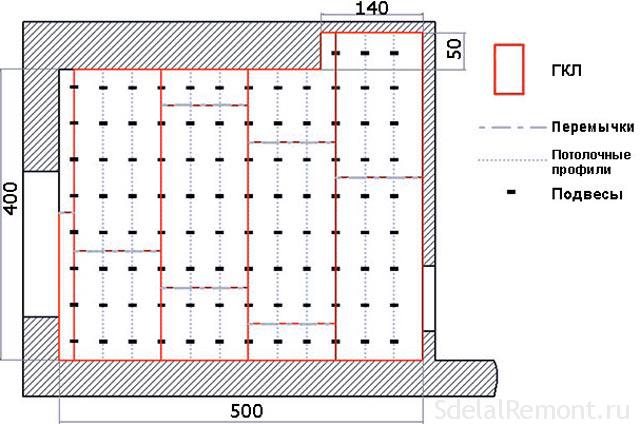
In the drawing, marked places a ceiling profile, depending on the choice of the type of frame bases. Also note the place for suspensions. Basically, they are mounted on the PP line at a distance 40 cm. another other. Suspension should not coincide with a jumper and a profile crossing point. There will be a crab-connector.
The drawing should be exactly display border joints GCR sheet. From this it will be seen in more detail, a distance between hangers and jumpers, crabs should be kept.
On the second sheet of paper is drawn wiring for lighting. Depending on the selected lighting fixture is selected type of electric circuit (parallel, series connection).
Road marking surface
layout application - an important process responsible. This will depend on the structural strength, single ceiling plane (in two-dimensional space).
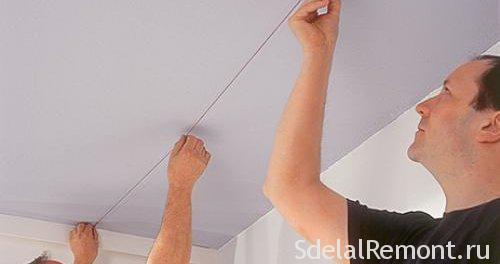
Partitioning starts with a straight horizontal line on the wall. To do this, take the lowest point on the ceiling (it marked on the drawing) and mark this point around the perimeter. To achieve perfect evenness used laser level.
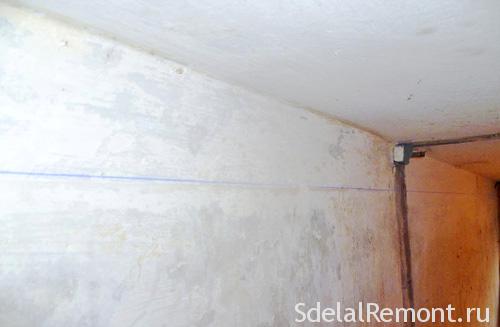
If it is not, then the water level. on the perimeter line made upholstery cord. If it is not, then pencil and ruler (meter).
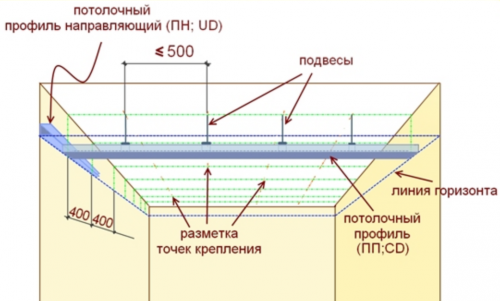
Further, lines, terms applied to the rough surface. The first line on the ceiling from wall to ceiling profile is drawn at a distance 0.25 m. After a departure 40-60 cm. (it depends on the type of frame: for cross - 40 cm.). And so on to the opposite wall. On these lines marked the place for suspensions. The distance between the hangers 40-60 cm. it depends on the material, material of the active element. If the suspension is thin and soft, then it is necessary to strengthen them more often.
For cellular framework should make a layout for the jumpers. Since the ceiling profile is located at a distance from each other 60 cm., then a jumper placed at the same distance apart. 25cm from the wall is indented.
There is one caveat - the suspensions should not fall into place crab mounting (Compound profiles cruciform).
The markup for lighting
Markup for making profiles, should immediately designate a point lighting arrangement. This is required to ensure that wiring and fixtures did not touch metal profiles, to avoid, subsequently, Electrical circuit network.

Marks on the ceiling is an important stage of work. In the process of applying lines of every detail. In this drawing should be at hand, to know the measurements (Steps) between profiles, suspensions.
Installation of single-level ceiling frame
To create a basis for framing gypsum ceiling should be observed sequence of actions. Ideally, the first mount hangers, and after the guide profiles.
so:
First step. Installation guide ceiling drywall ceiling under profilyana
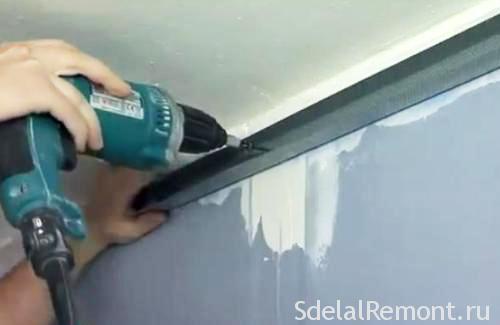
First thing ceiling mounted guiding profile (OUT). To this end, the rear of the profile on the back glued tape. After which it begins attachment to markup. Required to drawn by line ran along the edge of the profile (from inside or outside - it depends on the height of the mounted skeleton), but not in the middle of profile. Through the PPP made through holes for dowel-nails. The first hole should be from the edge 5-10 cm. each subsequent anchor will be located at a distance 25- 40 cm. The guide profiles are placed in a "joint" to each other in the case of, if the room is longer 3 m. In the corner of the profile is inserted in the fixed and fixed plug-nail.
The second step. Fixing hangers.
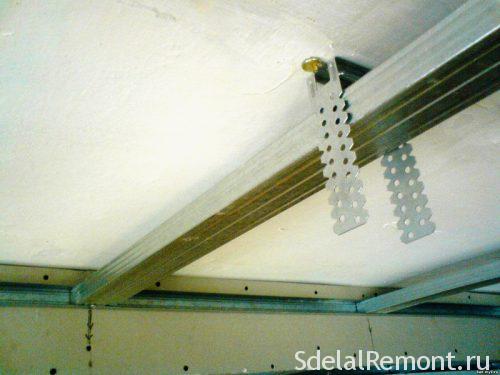
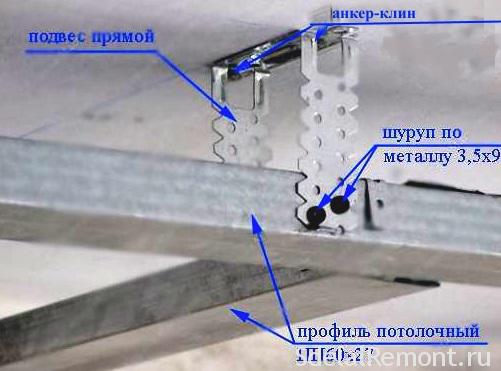
Suspensions are fixed according to the markup Wedge Anchor. This frame member takes over much of the load of all the ceiling. For a reliable fixation is required for marks on the basis of the roughing make the hole diameter - 6 mm., Depth - 40mm. Further, It is applied to these holes suspension. The tabs are inserted into the frame element and the dowel-wedges are hammered.
The third step. How to fix the ceiling plasterboard ceiling profile
Ceiling profile PP (CD) for gypsum board is inserted into the guide with the 2 sides, and fixed by small screws (sunflower seeds). Ideally use Prosekatel.
Step Profile for plasterboard ceiling specified in the layout of the base is rough 60 cm. Further, you need to pull the thread through the whole formed by the plane and using it to fix the profile suspensions. The edges of the elements are bent in different directions.
In addition to the thread used rule. it will show, in what place arose deflection or profile has been highly tightened to the Draft base.
fourth step. jumpers
Lintel cut PP (aka CD) Profile of this size, to become exactly on the marked spots. They are fixed to the ceiling profile crabs.
Frame profile for gypsum board ceiling is assembled. The last stage is a control check on the evenness of the plane created, rigidity. To check the evenness best rule. They checked the single plane in all directions. Rigidity verified "stagger" elements. All parts of the metal frame must be firmly fixed. To anywhere that does not creak, it move not.
Electrical wiring
Route the cables must be ripple. This is in order to avoid contact with metal profile elements. In place of the luminaire mounting wire must be left free 15-20 cm. After placing all the wires to insulate wires Kona. And do not connect the power supply, until all installation work will be completed.
fifth step. Installation of gypsum boards
Plasterboard sheets begin to be laid aside, based on the type of frame bases. The first plasterboard sheet is fixed in the corner without cutoffs. Fastening drywall to the ceiling is held on the profiles screws (the screw length is dependent on the thickness of the plasterboard). From the edge of the sheet need to retreat 2 cm. and the screwdriver at low speed screw screw. Step between mounts up 15 cm. Cap the screw a little "pritaplivaetsya" in the sheet material. Too deeply screwed fastening element is not necessary. This will damage the GCR.
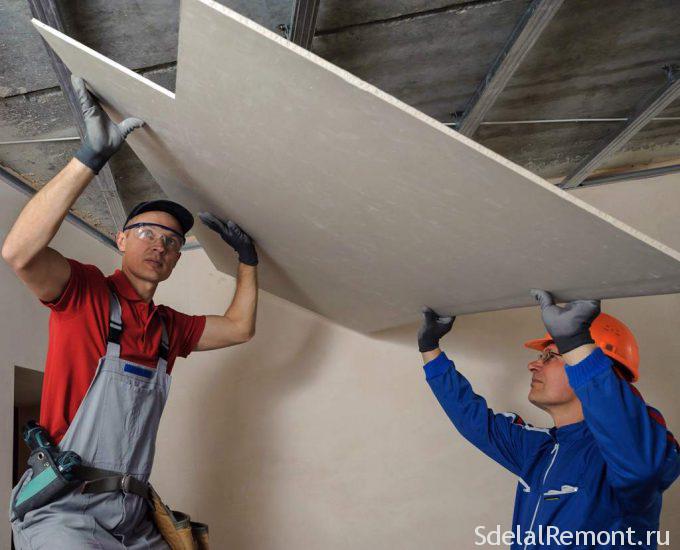
The sheets must be fixed staggered, to horizontal boundaries do not coincide. In this way, Another factor is achieved structural strength. If necessary, the sheet is cut plasterboard.
On the front side cut creates a chamfer. Screws from homemade chamfer is screwed on 5 cm. from the end. On-site installation of luminaires in plasterboard in advance is a hole with a diameter equal to the lamp (a point). Frame base clad with plasterboard.
Last step. finishing
All joints in the drywall surface must be covered reinforcing tape. But, to begin ground surface. The joints drywall should be primed with special care, without gaps.
Reinforcement is done using special tapes and fillings. The same mixture of putty closed all places of fasteners. After that carried complete surface for further finishing Shpatlevanie.
Installation of metal frame to the ceiling of one level of the FCL is not complexity. The main factor is the step by step instructions, to be followed, as well as to get acquainted with all the rules and nuances, To avoid errors and deformation of the ceiling structure further.

