- What is a floating line?
- Ready solutions unit soaring lines
- Plexiglas
- LED strip and its components
- additional elements
- Setting the floating line with professional equipment
- Installation of light bars in the ceiling without the profile-holder
- Floating line on the ceiling with his hands
- Installation of LED ribbon
- Installation of Plexiglas in the niche for the light line
To create an individual design there is a lot of innovation, which will create a unique atmosphere of the room. It was originally drywall. Working with him could only master, who knew, how to strengthen it. After, violent fantasy masters, designers and owners of the premises led to the idea to bend the drywall and cut off his fancy shapes. Each, make repairs to this day creates this material unique curved design.

Further exquisite chandelier have been widely used Spotlights, there were also bands of light on the ceiling and walls. And also on the construction markets and shops appeared LED - bar. It consumes little power and it is very bright. Due to the variety of colors, its use has increased at times. Lighting cabinets coupe, wall, niches, boxes made of plasterboard. And this is not the limit. Now ceiling, plasterboard walls decorated with "soaring lines". What it is? maybe, I make a plaster surface with a "floating" elements of the backlight?

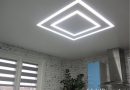
What is a floating line?
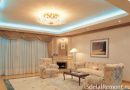
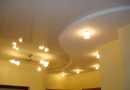
Floating lines are created on the ceiling and walls of the room for zoning, increase its size, allocation of certain elements of the interior. LED strip to the ceiling creates a unique design and interesting lighting. In addition to these features, this coverage has a number of advantages:
- In perfect harmony with the interior and the corridor length of the room.
- LED strip on the ceiling, shared one large room on the side for tea and rest.
- Adjustable power does highlight the main or additional.
Installation of light bands in the plasterboard ceiling shall be subject to, in the room there are no sharp changes in temperature, and moisture. These lighting tape mounted not only in the flats, but also in public places.
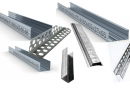
Ready solutions unit soaring lines
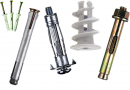
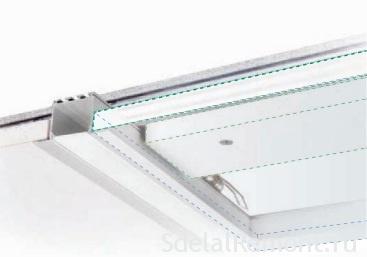
Lighting profile box (LED strip)It is mounted on the ceiling, wall.
This item is made of aluminum. Is light in weight, which is very important when installing plasterboard ceiling. Mainly for light floating line is used the profile of the brand PLS,which is mounted on the profile-holder TEK, having a thickness 12.5, 13, 16 mm.
Compatibility Profile PLS with TEK:
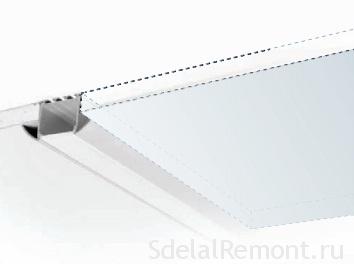
As well there is the option of the holder, without the use of profile. a brand 019409 PLS-LOCK-H25-F-HIDE-2000. It is mounted in the ceiling without additional elements.
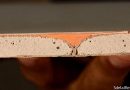
Plexiglas
It is made from special materials, can withstand temperature conditions, as well as to dissipate the direction of light rays. It is durable screen. Glass is easily assembled and disassembled for repair LED tape.

LED strip and its components
Great choice of lighting strips, both in color, and by other parameters (the number of diodes 1 sq.m.). For LED strips in the ceiling apply various LED-tape, connected to a dimmer and controller. As a result, it is possible to change the color scheme, as well as the lighting power.

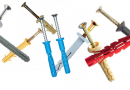
additional elements
Additional detail is:
- End parts - are required for the installation of a harpoon. Basically applicable for suspended ceilings. This part comprises slots for fixing to the profile.

- Swivel detal.Sozdana for attaching two profiles at a right angle (Slight). By turning part designed plexiglass 2 species: matt spraying and crushed ice.

turning parts - welded corner. Used for mounting a random connection of two profiles in a plane. Using this angle is reproduced figures of individual areas. It is used as the transition from the wall to the ceiling.
- Welds cross. When mounting the unit on the ceiling soaring lines, appear figure bizarre, refracted at an acute angle.
- ternary compounds. Applicable for connecting the three profiles in a single plane.
- curved elements. Basically made to order at the enterprise.

Without additional elements the creation of LED strips in the ceiling possible, but it leads to cost extra time and patience.
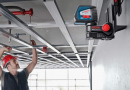
Setting the floating line with professional equipment
Installation of the floating line is made in plasterboard ceiling with profile-holder, which provides additional rigidity of the whole structure. This profile is set at the time the metal frame to the ceiling plasterboard.

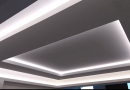
Installation of light bars in the ceiling without the profile-holder
It is a budget option, but less durable. In the process of creating a metal frame plasterboard ceiling, advance provided a venue for the light line. The data set collected grooves soaring lines of the system and are fastened to the plasterboard springs.
mounting options:
- Profile PLS-LOCK-Y25_FM-2000 is mounted in a metal frame, thus it protrudes slightly beyond a single plane plasterboard structure.
- Profile PLS separate element fixed (using hangers), no borders with metal frame and creates a single plane of the ceiling.
- Fixing profile for gypsum boards with glue. To do this, cut a groove in the plasterboard ceiling established 30 mm. on the protruding "wings" profile is applied the adhesive and the profile is glued to the drywall surface. After drying, the adhesive tape should be applied, and cover all serpyanku putty. Concealed installation creates the effect of soaring lines in plasterboard ceilings.
- Overhead structure to create light lines. These types of lighting strips on the ceiling mounted on top of the drywall. Have a different cross-section (round, angular, rectangular) and caps on the sides. These lights are easy to install, and to carry out repairs.

Which installation method is more suitable - it depends on the structural features of the ceiling plasterboard (sibling, multilevel), as well as the individual owner requests.
Floating line on the ceiling with his hands
This is not a standard console with LED ribbon. To create it will need plaster niche in the ceiling or in the wall.

To create a floating line in this method does not apply the special profile holder, and aluminum profile for light line.
Before installation niche must make markup. Using a laser level, line, pencil on the ceiling (wall) applied under the line guide profiles and cross.

Niche width can be selected individually, Depending on what should be a light line. Advance should consider, to house the switch, as will be made to connect LED strip.
On line, made on the wall and on the ceiling, limiting niche, dowel-nails mounted guide ceiling profile TNG (OUT).

On the back of the niche of the future must be to fix the cut-out portion of drywall. Mounting is made to PNP screws "seeds" through every 15 cm. on plasterboard otbivochnogo cord bottom line is scheduled for a profile.

By guiding the PNP on the ceiling, down down cut from the rack profiles, recess depth equal to a height - to otbivochnogo cord line to the lower profile. Front cut so, that one side, adjacent to the drywall is longer by 5 cm. than the entire edge. Step rack mount 25-30 cm.

At the bottom of the GCR, along the marked line on the side cover and struts attached to the guide profile length UD. excess plasterboard, protruding beyond the lower-profile niche trimmed. UD from the guide on the wall to the guide on the fixed bridge niche carved out of a ceiling profile PP (CD). If the distance is large (more 30 cm.) it is advisable to apply the hangers, fixed to the ceiling Wedge Anchor 6/60. Jumpers are fixed increments 30 cm. Along the edges of the niche on the back side (the front side of the drywall) are mounted in a vertical position rack. This will create rigidity, as well as convenience in fixing plasterboard an end recess.

The niche should be created at the top, departing from the ceiling 5 cm. PNP lock for securing the same jumpers.

The entire structure is sheathed with plasterboard. Inside the niche necessarily reinforced, shpaklyuetsya.
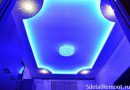
Installation of LED ribbon
For floating lines apply LED Strip LED with different power and brightness. To change the brightness, colors, tape connected to the controller, dimmer.

At the bottom of the niche created can not sew plasterboard. On the lintel fixed ceiling profile CD. It is glued in the middle LEDlenta and connected to the mains, controller.

To increase the brightness, and providing fire inside the niche is covered by a foil.
Installation of Plexiglas in the niche for the light line
Using this method, various designs are possible fees: direct, klinovidnыe, crossing, round. And also it is possible to create lines not only flush with the ceiling, but on any reasonable height.

To assemble the luminous band will need the following details:
- Plastic corner 2 types: wide - 40x40, small - with a minimum width of the shelves.
- Glue universal polymer.
- Screws with countersunk head of minimum sizes.
- Falha-Adhesive.
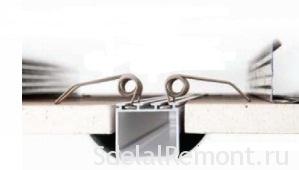
The first step is to cut the plastic bracket 40x40 bokovinki so, To get the band. It is fixed with adhesive to the inner sides of the niche in length. This is done in such a way: notched portion looking up strip, and exactly flush with the ceiling plane. In order to strip firmly locks into drywall or "slipped" in the direction, used stops. plastic edge should not be displaced below the ceiling. The strips have to be glued to either side of the alcove.

Further, should be to the plastic strips to fasten screws corners. Side part should look inside the box. obtained slots. For fixing brackets should be taken screw and a small screwdriver to screw the screw speed is not up to the end (half). After unscrew it and empty bat screwdriver at this point to make a slight indentation. In this way, with screw vvynchyvanyy, head completely hide in plastic.

These shelves are collapsible by. It is necessary to install the diode tape. On the shelves stacked plexiglas. Gap, to stay down, between the plastic and the gypsum board is sealed with a mixture of reinforcement joints "Knauf Fugen".

LED strips in the ceiling, the walls are popular not only in long corridors, large rooms. They are used in the kitchen, the balcony, attic. For this type of lighting does not have borders in a spacious room. In creating a soaring ceiling applies light line around the perimeter of the room with plexiglass. At the same time in the ceiling creates an additional illumination in drywall.