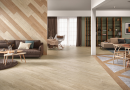
Today, a variety of materials, which are used to cover the floor there is a large number of. Among them, You can find gaining popularity in recent years granite. That's about it today and will be discussed, and in particular that, How is laying porcelain tiles on the floor? What does that require? How to choose the right glue, surface preparation and other matters.
Let's start, perhaps, stacking options with this material.
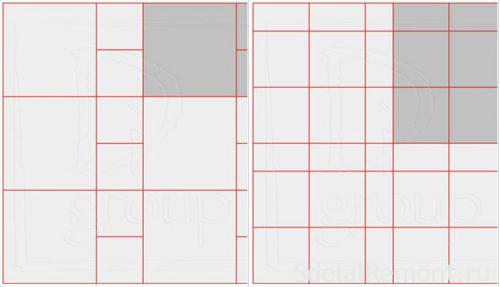
Variations laying porcelain tiles
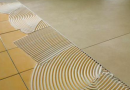
Considering, that such a board for warm floor has a large variety of colors, shapes and sizes, there is a huge amount of such material layout options, some of them are shown in the pictures below:
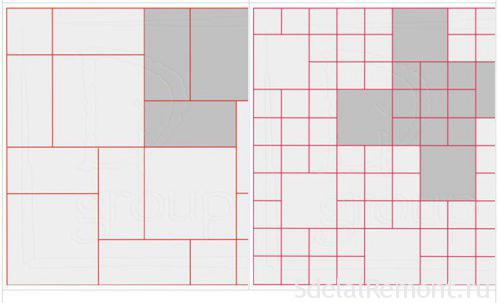
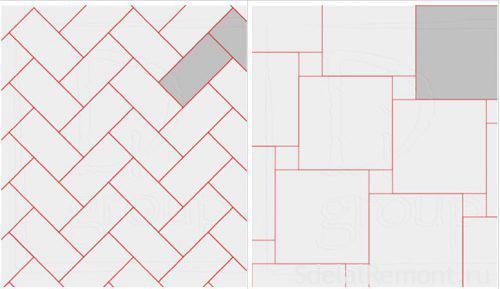
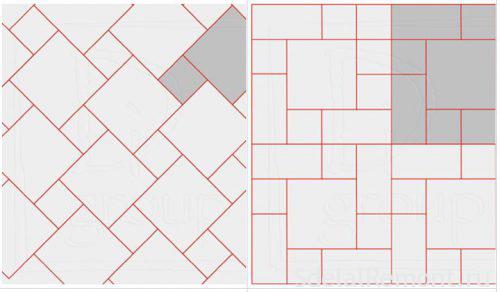
Wherein, in any of the options allowed the use of single-color tiles, and create a whole variety of designs and patterns. So you can get an incredibly beautiful image. But it is necessary to take into account the fact, that does not always have a strictly rectangular flat shape, and because in some cases, need to know the layout of the premises Irregular, that will look something like this:
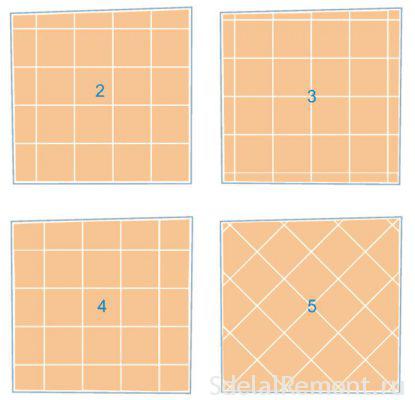
And finally,, before, we begin to disassemble the direct algorithm for laying stoneware tiles on the floor, you need to consider some of the nuances, related. In particular, we will focus on the image of the pattern perception:
- It is important to bear in mind, the tile has a significant impact on visual perception of space. More specifically,, then using a large-sized tiles, you will achieve the effect of reducing the space, and the opposite perception when installing small tiles.
- Also with the help of a pattern can visually enlarge the room length or width. In this way, you need to lay out pattern along or across, for a corresponding increase in.
- Another becomes the division into zones and their union. here, for connecting several zones should combine them a through pattern, for zoning, Conversely use individual figures.
- And the last visual effect, It becomes light colors, which also help to visually increase the space.
That's all, and it's time to go directly to the question of how to put stoneware tiles. Nachnem in order, with the tool list, which is required for operation. Porcelain stoneware tiles stronger usual so it is best to use electric tile, This will significantly speed up the work easier.
required tools
To carry out works on laying tile granite on the floor heating we need the following tools:
- instrumentation (ruler or tape measure) as well as the building level.
- Bulgarian and Tile .
- Water tank, and kneading adhesive.
- rubber trowel.
- Spatulas set to work with tiles.
- marker.
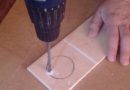
- Building mixer or a drill with corresponding nozzle.
Materials used
The following graphs are materials, which will be used during the work.
- Adhesives for floor heating.
- sealant, Silicone is desirable.
- stoneware tiles.
- Zatirka.
- Primer.
- crosses, or means for aligning tiles.
- water.
Getting started
Before, as will be started the preparation and laying porcelain tiles on floor heating is necessary in total to prepare the layout plan. Run sketch drawings, calculate the thickness of the adhesive layer mixture, and accordingly consumption the most tiles. Also consider the possibility of laying stoneware tiles on the floor without seams. Given a number of drawbacks of such a method, from it often refuse, but consider, as an option, sometimes costs.
Among the advantages of this variation may be mentioned obtaining a full uniform surface, as well as material savings. But considering along with these shortcomings, which are shown in the following:
- You can use the tile is strictly the same size.
- Lack of possibility to provide the same length seam, fill uniformity.
- Besides, difficult to ensure uniform distribution of adhesive mixture.
Because laying tile on the underfloor heating is better to resort to the standard version, and conduct folding with seams. Also, should be prepared and the tiles, in hot weather, the tiles can be wetted with water.
Substrate preparation
And proceed directly to the very progress of work can be noticed in the first place the preparation of the coating. The first thing to check the evenness of coverage, and in the event of any defects, they need to be addressed.
Besides, The surface must be free of oil stains, dried, and purified from dust and dirt. When laying porcelain tiles on the floor with their hands requires of ties, you must take into account the carrying capacity of the structure, including overlap. Because it can not withstand the loads.
Also note the fact, that all work is carried out at room temperature. It can also be carried out at an average temperature of 5 degrees to 25-30. The heated rooms, with heating switched on, or heat activated field, laying conduct strictly prohibited.
Choosing tile adhesive
Among the features of such material, as the granite may be noted the complete absence of water absorption, that plays an important role in the selection of tile adhesive for floor heating. Due to this particular adhesive selected should provide an increased level of adhesion. In connection with a standard cement composition is highly undesirable to use.
Besides, before selecting adhesive for floor heating should be familiar with its characteristics, Besides, thoroughly analyze the future operating conditions. Respectively, in the presence of heavy loads, We need a structure with a high level of stability. It is also necessary to take into account the temperature conditions, which is valid for certain types of glue.
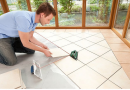
And now proceed directly to the, how to put on a granite or tile floor.
Floor technology
An important factor when laying ceramic granite tiles on the floor is the right choice of instrument. It depends on the quality of the coating and finishing works. In particular, most main instrument becomes a spatula with teeth, it is important to choose it depending on the size of the tile. In this way, The more tiles, the greater must be the teeth spatula.
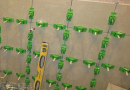
Directly before the laying need to find a center of the room, ie. middle of the floor. Accordingly, the need to perform layout of its location, what pulled the cord, in particular, held the room diagonal, as well as from the middle of the intersection of each of the walls.
Masonry itself thus begins, to guide through the intersection of yarn held or center of the first tile, or the intersection seams. Masonry itself held symmetrically, because it begins with a clear center of the room, thus unable to perform the full symmetry of the room. In consequence of that edge of the cover, every wall, same finish or a single piece or cut.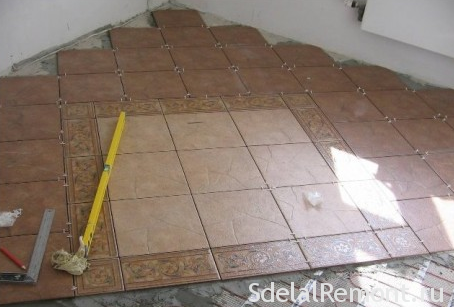
There is also a second option of laying, which involves finding the symmetric trimmed pieces in the center of the room, but note, that such a clutch requires extremely precise calculations on the entire room materials and plates.
Do not operate the electric floor heating after laying tile, necessarily give a week to dry.
Step-by-step instruction
so, start directly laying itself.
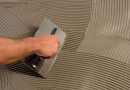
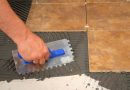
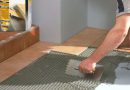
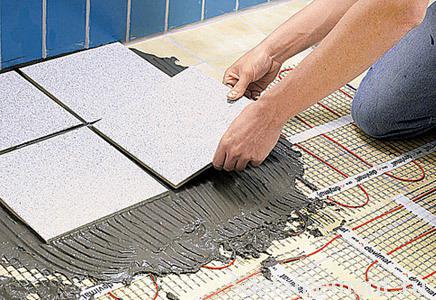
- Primarily knead adhesive mixture, and then apply it to the surface. First flatten flat spatula, then gear.

- Next, the tiles should be laid on edge, and is aligned with the level of. note, that you must check in all positions.
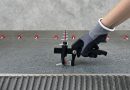
- The next step, also adapt subsequent tiles. But they already needed a little push from the previous, leaving a small gap. This is usually used or special crosses Systems for laying tiles.
- each new, laid tiles need to check the level. Over the next 10 minutes after laying it is still possible to correct and adjust the position.
Important! If you make a break between laying, it should be borne in mind, that several previously laid material is deposited upon drying the adhesive mixture. That is why, when further stacking the level of the first portion of the coating, eventually obtain an uneven surface with a level discrepancy.
Besides, rather important factor is the control of the voids between the seams, because it can lead to cracking of the most tiles. Speaking of timing control, we can say, that the adhesive dries itself is usually a day, though, full strength of the coating occurs only after three days.
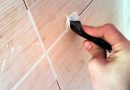
Grouting
After that, as an adhesive mixture solidified, must perform grouting. It uses a standard grout desired color according to the color of the tiles. but there, of course, and nuances, but in particular, it is more concerned with the decorative part.
Council! If you want to emphasize and highlight drawing, This well help contrasting grout. Otherwise, floating in the tone of coverage will make a more neutral.
so, immediately prior to grouting joints, check the cleanliness, if they have any dirt, dust and so forth., it is necessary to clean them. Standard weld size, typically up to 5 millimeters, because you will need a standard rubber spatula.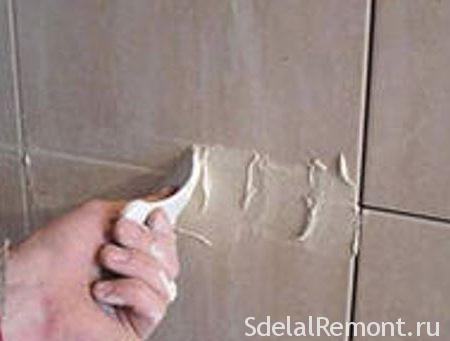
With his help, plot the diluted solution pasty diagonally relative seams, thereby filling them. After drying grout is necessary to remove the excess from the tile, what is being done by a conventional sponge. Directly to the stable cleaning tiles can be started only after two or three weeks. more detail about the choice of grouting and its performance can be found in a separate article.
To calculate the right amount of mixture will help online calculator tile grout.
So we figured out how to put granite tiles on the floor, which can now make every, because the stacking process is quite simple. For those, who could not understand all the nuances offer watch a few videos with step by step instructions for installation.