Compulsory, tiling is carried out on the prepared base. In his role is a floor or wall, which are subject to pre-equalization. It should be noted, What a way to align the date pretty much, and one such installation is plywood. Thus the pressing question becomes tiling on plywood, and honesty, technology of the process.
Advantages and disadvantages of coating
Firstly, before, embarking on the technology tile on plywood, disassemble the advantages and disadvantages of such a coating, compared with the more labor-intensive and costly methods floor leveling, for example, screed (We recommend that you read more about conduct leveling floor screed).
Let's start, perhaps, with benefits:
- It becomes the first low cost of such coverage.
- You can also celebrate and fast installation. Which requires less time and effort.
- The next advantage of the absence of construction waste becomes.
- Significantly reduces the load on the floor as opposed to the screed.
- The very pretty durable plywood boards, strong.
But do not forget about the shortcomings:
- First, you choose the right kind of material, sometimes quite difficult. In this way, need to work veneer sheets at least 2,2 cm.
- For areas with very high humidity levels will be necessary to provide additional waterproofing, respectively, this increases the cost of coverage.
- And the latter becomes a strict ban on arrangement of "warm floor" system.
That is why this technology is used quite rarely. While it may quite well be suitable for arrangement of floor in the kitchen or hallway. In general, in those rooms, where it is required to perform the repair as quickly as possible, and desirable, as little as possible to litter.
Features tiling
The first question, which frequencies arises, is it possible to put the tiles on the plywood. And it all professionals are responsible only yes. Of course, as well as at any other installation, in this case, there are a number of difficulties. Because you can immediately notice, such that the process of laying tiles on the plywood is quite time consuming and you need to approach it responsibly.
It should be remembered, that plywood is subdivided into ordinary water-resistant and that is not suitable for wet work.
Firstly, need surface preparation. This is largely due to the peculiarities of tiles, and in particular those, that its weight is much larger, than other types of coverage. It is because the surface should be checked for strength. The very same plywood in any case can not have a low strength.
An ideal variant of course it will be laying tiles on sheets GOLS, which have a water-resistant properties and lesser mobility
maybe even the use of OSB sheets tiling which are best suited in view of its structure will serve as a solid foundation.
Detailed information on OSB floor leveling on logs https://sdelalremont.ru/vyravnivanie-pola-osb-plitoj.html
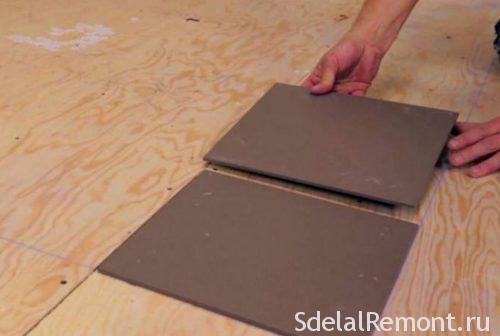
Besides, as I mentioned earlier, sheet thickness shall be at least 22 millimeters.
Each of the sheets must be securely fastened and pinned to the ground. Otherwise, if they observed any deflections or distortions, the coating will last quite a bit.
When installing plywood on the joists is necessary to provide a step no more 30 centimeters. At a higher value to alter a design.
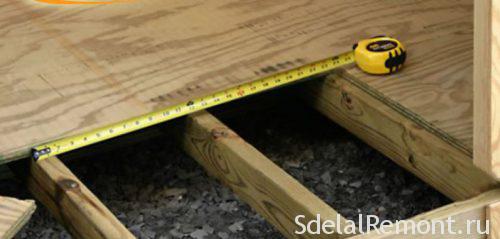
And with regard to lag, it should be noted, that in this situation the thickness of the sheet should not be less than three centimeters.
Getting Started
Before starting work, you must carefully prepare, check that all the necessary materials and tools.
Also to calculate the glue mixture and the number of tiles. In the case of tiles need to be considered flat area, the size of the joints and the size of the tiles. Besides, presence pattern and a method for styling. For the calculation can use calculator tile adhesive on our website.
Speaking of the glue mixture, that its amount should be calculated on the basis of consumption, which is indicated on the packaging, o tom, how to pick up the glue mixture and calculate the amount of it can be found in a separate article.
Immediately following tools and materials needed for work:
- Grinder for working with plywood.
- waterproofing material (mainly film).
- Primer.
- If necessary, special glue.
- Also, for marking, ruler, pencil and tape measure.
- Screws.
- Tile.
- Adhesive mixture for the tile.
- Grout and crosses.
Next, the surface is polished and cleaned. Checked snug fit. If necessary, provide additional fastening screws. Strictly must be free of any gaps or troughs sheets.

When completed must be primed surface. Typically, the primer is applied in several layers (2-3). Each of them must be completely dry, for what, depending on the type of primer goes on 5 to 12 hours.
Laying tiles on the plywood with their hands
Let us dwell a little on the recommendations on the choice of adhesive, then go directly to the question of, how to put the tiles on the plywood.
In this case it is recommended the use of adhesive mixtures, which have higher flexibility as the tree movable material. It is in this situation, such a mixture is optimal, as plywood may be slightly transformed under a load of tiles. Besides such material does not tolerate moisture and temperature extremes.
The best option would be a polyurethane adhesive, which is often used when laying parquet. It is such a mixture would be most effective.

Another advantage would be the, that after an hour of this coating will be walking. That due to the small setting time.
Another good option are mixtures based silane. This adhesive is recommended to use in wet areas, since it is easily grasped even when exposed to moisture. At the same time this also removes moisture from the surface.

Through the use of this type of mixture tiles will fall as well as possible, and the joints are obtained flexible and elastic, It is very important.
The working process
When finished with the preparation can go directly to the question, how to put the tiles on the plywood on the floor. This process is performed on the following technology:
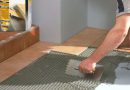
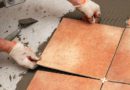
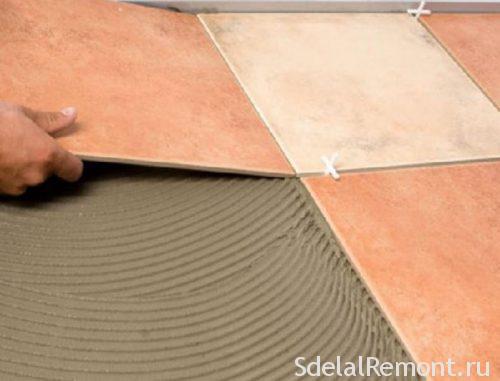
- Laying tiles on the plywood floor begins at the corner of the room. The first tile is placed whole, adhesive mixture is applied as a uniform layer on the surface of the base, and on the tiles.
- As with a conventional installation, first laid out whole segments, and the last thing sliced pieces (more detail about, how to put the tiles on the floor).
- note, the maximum coverage area at one time should not exceed one square meter.
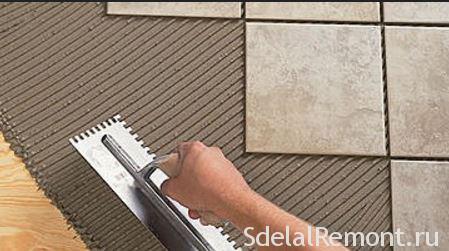
- Gluing is carried out with a notched trowel. After that tile pressed tightly against the base. Further, aligned on the level and adheres to in a few minutes, setting up a solution.
- Also performed the installation of the following elements when laying tiles on the plywood on the floor.
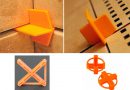
- specific crosses are used to create seams, which helps make them the same (We recommend that you read more in detail with the question of Crosses and seam thickness).
- Upon completion of the laying of entire segments held cutting and stacking the remaining pieces.
- the following process, in the case of passing tubes, or consideration of how to put the tiles on the plywood wall, prepares the holes for communication systems, switches, etc.. (More detail about, such as drilling tile).
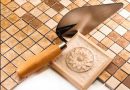
- And the last thing is held grouting. And here it becomes an important issue choice of grouting and its application.
In this installation is over, and you can admire the results of their labors.
What you need to know about laying tiles on the plywood
And finally,, consider a number of tips and tricks, which will be good helpers, especially for novice tilers:
- For, to be able to put the tiles on the plywood, its thickness should be at least 2,2 cm, you can use several layers, otherwise the coating does not withstand the weight of the tile.
- recommended, for a better fit cover provide additional fixation with self-tapping screws.
- Before laying the tiles need to use a strong base primer that will help ensure the stability of plywood.
- At work necessary to use builder's level. Besides, laying itself it is recommended to start from the far corner of the door.
- It is necessary to closely monitor the, all seams were made the same size. For this purpose, noughts or special Systems for laying tiles.
- The completion, important factor is the selection of the grout and its implementation, because that it has the greatest effect on the coating appearance.
On this question of, how to put the floor tiles on the plywood can be considered closed. Strictly follow the instructions and recommendations, you will be able to perform the laying. For more understanding of the topic, We recommend to get acquainted with video, presented below.
Article written specifically for the site https://sdelalremont.ru
https://www.youtube.com/watch?time_continue=10&v = l3xlTwtkBjs