
Let us consider a two-level ceiling installation option with a semicircular down on 10 centimeters by one of the walls. Earlier, we looked at how to make sibling plasterboard with their hands with photo examples. The first step is to make the frame for the first level of the ceiling, and then sheathe his plasterboard. So you need to sheathe, so that later we could easily get to the inner surface of the drywall. After assembly of the first frame, We proceed to the assembly of second frame, needed for the second ceiling level. The second tier of the ceiling will be lowered. but, all in order and photo examples.
Installation of the two-level ceiling of plasterboard with photo instructions
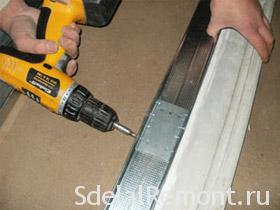
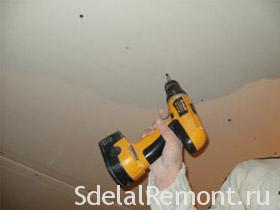
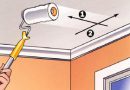
so, We collect the first level of the ceiling plasterboard. Water level in the corners need to repel the horizontal eye level. Now find the lowest point on the ceiling, back down from the ceiling 4 cm and put a label. Measure the distance between the two marks. Then drag the label to the ceiling, keeping the distance between them. Putting corner label lines, using the upholstery cord. Getting profile installation (marked UD) received over line, Using a length of dowels 40 to 60 millimeters in diameter 6 millimeters.
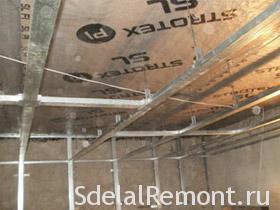
The next step - assembling the frame of the profiles (CD labeling). every 600 millimeters along the space you need to install CD profile. Profile mounted on the suspension attachment. In this case, the spokes (U-shaped mounting).

First, using the upholstery cord do lines along the ceiling every 60 centimeters. Along this line, and will keep our fasteners (through 50 centimeters). Fasten with dowels 6 on 40 millimeters. In our case, the spokes are mounted on screws for wood, Since the foundation - wood. If the cap screws and wall plugs will fall into the spokes loop, apply washers or small pieces of the U-shaped attachment or a profile.
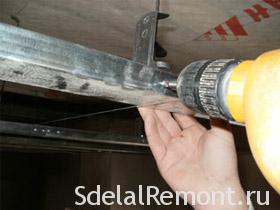
Cut out with their hands profile CD size you want, enter it into UD Profile (right on line). If the profile length is not sufficient, connect the two profiles using a special attachment. Put the two profiles on a smooth surface. We set up and fixed to the connector 4 samoreza 3.5*9 millimeter on each side. To obtain flat profiles, it is recommended to use a rule.
Once all the CD Profile Head - need to pull a thread (opposite mounts) and screw mount CD to our, while leaving a gap of 1-2 millimeters between the CD and profile thread.
The next step - assembling embedded profiles for short sheet joints. The first thing we cut out small pieces of UD Profile (by 10 centimeters) and fasten them with screws 3.5*9 millimeters in the side of the profile of CD. The plant in the prepared slices profile UD profile length CD 53.5 cm. One of the sheets will be kept in one part of the profile, and another list for another.
If you have a chandelier on the ceiling (look how to install and connect the chandelier or how install spotlights right), you need to make mortgages Profile. First, cut out the pieces of UD Profile (20 centimeters) and by means of screws 3.5*9 millimeters fasten them to the side part of the profile CD. Cut two CD Profile, paste them into the profile UD, but leave 1 centimeter gap to the wire, as shown in the photo below.
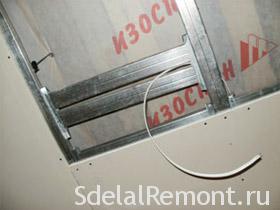
Sheets should be installed in a staggered manner. The first series of sheets starts with the whole leaf from one side wall, and the next row with the entire sheet from the other side of the wall. Be sure to consider this. Sheets are attached with screws on the metal (25 millimeters).
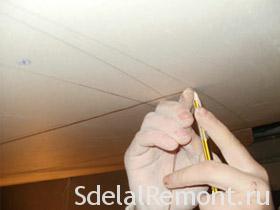
Before proceeding with the installation of sheets, it should be noted at the profiles of our circle border. This is done, not to fasten sheets there, where will be located the second level. For this screw the screw profile using a power screwdriver, and not with your hands and wrap a wire. Having measured the desired radius, bend the wire at this point, and otchertite pencil line. Sheets should go beyond the radius at 6-7 centimeters.

Now, again with the help of wire is necessary to draw a semicircle line in our radius. And then another line, but longer than the radius at the 5 centimeters.
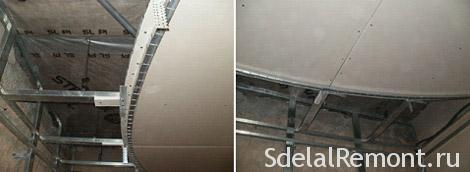
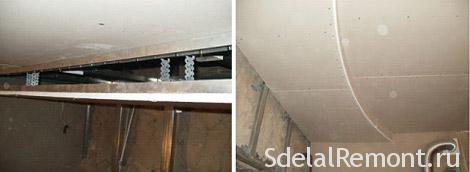
According to the second line must be accurately cut drywall, using a saw blade for metal. This is necessary in order, to the mortgage of the CD Profile get exactly radially. Edge of the sheet must coincide with the edge profile.
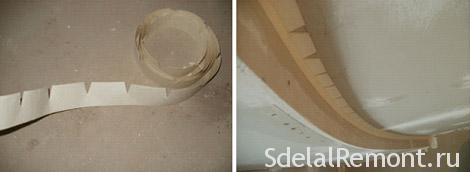
Next, we make the mortgage profile. It is necessary for durable fixing the lower profile of the radius. The drywall hold nothing will, so the screws need to be fixed to the iron. Cut perforated profile CD and install the necessary size between the guide profiles. Bottom fixed with screws for metal. Since there is no perforated profiles, You can use a simple profile, cut it with scissors or a turbine on metal. In order to freely bend profile, must cut end and one of the lateral sides through each 5 centimeters, as shown in the photo below.

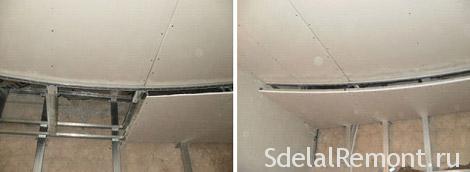
Then it is necessary to install perforated UD profile radius on line. Strengthen the need to self-tapping screws for metal length 25 millimeters, end to drywall.
The next step is the installation of two-level ceiling of plasterboard with their hands - frame assembly for the second level of the ceiling plasterboard. UD fasten the profile to the wall, but on 10 centimeters lower, than the ceiling of the first storey frame. One end of the CD is inserted in the profile UD profile, and a second end screwed to a U-shaped mounting. If the profile length is large enough, it is necessary to establish n-scapular every 50 centimeters. Profile second frame profiles are fixed exactly under the first carcass. Profile length should be at 4 centimeters lower, than the distance to the semi-circle.
After cutting the sheets of plasterboard (long profile on the CD 5-6 centimeters), fasten them to the frame. Again, use a wire, to draw a semi-circle on the second level of the ceiling on the initial radius. Surplus giproskartona to delete a hacksaw blade.
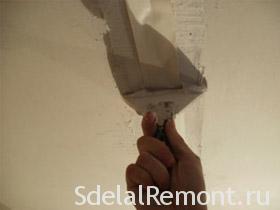
Then, end to the inner surface of the lower tier of the sheet, UD fasten the profile of the edge of the sheet. Cut out a strip of drywall the required size, Leaky her nail or a needle roller on the inner side, moisten with water. After an hour, can be attached to the slope strip.
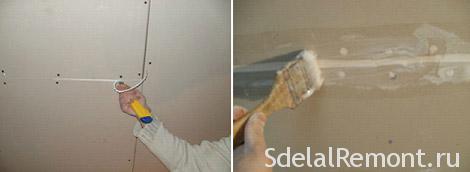
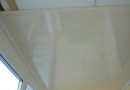
There are very few. Drywall seams are sealed. We treat joint primer, shpaklyuem joints special putty. Cut the corner tape required size, moistened in water. The tape is then applied to the putty and get rid of the excess with a rubber spatula. After that we put putty on the entire joint and get rid of excess, Using the edge of a wide spatula, as shown in the photo below.

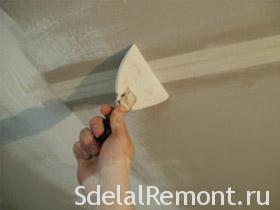
Transverse joints suspended two-level ceiling of plasterboard with a knife on the need to embroider 0.5 centimeter width. Then they need to putty the ceiling of the plane with their hands. Once the joints are dry, they need to be sanded and glued corner ribbon on PVA (presoaked in water). remove excess adhesive with a rubber trowel.
Between the second and the first level of the ceiling has an inner angle of repose, which must also be sized with corner ribbon. Prepare the tape is necessary in accordance with the example of the photo at the bottom.
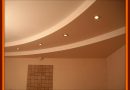
Major work has been completed and the installation of a two-level ceiling of plasterboard finished. Now watch how an article plaster the walls with his own hands with the video example and detailed instruction and plaster ceiling drywall from video.


Their services we do not provide, this is just a guide to action.
Not the easiest ceiling you. In general, because it is difficult to force myself to take off all the stages :-)