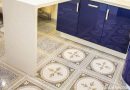
Quite popular option bathroom decoration is laying ceramic mosaic. It becomes an important issue because, like putting mosaic tiles. In particular, an important factor is laying on an incline, which is especially necessary in the regeneration of the coating in the shower, as well as for, to avoid the accumulation of water in confined spaces.
Preparatory work
Before you start laying tiles directly should hold a series of preparatory work.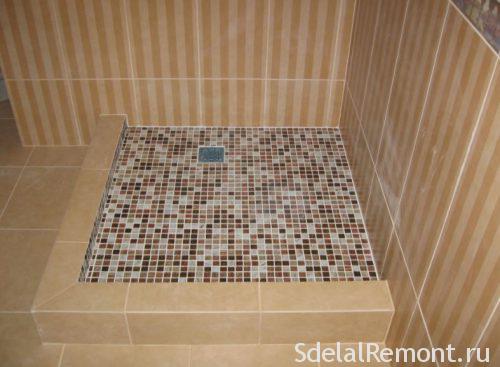
Of course, necessary to remove the old coating, garbage collection, and the most important thing becomes the floor leveling, namely - screed tilted. That it will condition the slope of the tiles. Let's take a little bit more about this:
- In the case of filling the entire bathroom slope running or to one wall, respectively, made in the same direction. Or runs to the bathroom center, respectively determines the slope in four directions from each wall.
- Similarly performed and coupler for shower, but here the slope direction is caused by the ramp arrangement for draining water.
- The difference between the floor height must be performed at least 1 centimeter at a distance of 1 meter. Respectively, the more the tilt angle, the faster the drain water. But at the same time should not make it too big, because the floor will be uncomfortable, and in addition there is the risk of slips and falls.
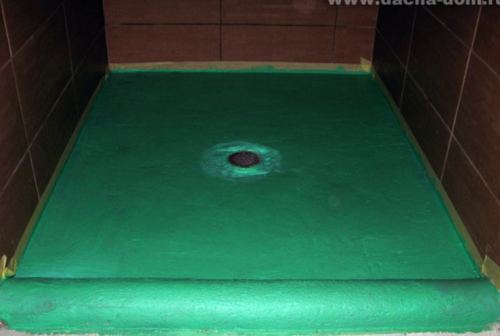
- And last. An equally important step in the preparatory work becomes floor waterproofing in the bathroom. It is executed in the majority with the use of two-component formulations, In addition to the multiple layers.
Important! Waterproofing is carried out not only on the surface of the floor, but also goes on at the height of the walls is not less than 10-15 centimeters.
On this basic preparatory work is finished. After drying, the waterproofing material is carried out further finishing preparation, which is the final alignment and primer. Alignment in this case is performed by means of tile adhesive, respectively, after drying, the surface is primed.
Laying tile mosaic
Now, respectively, can go directly to the laying work. First we need to be determined, what type of tiles used. In particular, Mosaic is of several types:
- In the first case, the tile elements are pasted on the wrong side of a synthetic mesh.
- In the second held face down on a paper basis.
To correctly paste material important factor is to correctly identify its type.

required tools
Now consider, what do you need, to put the tiles. For laying mosaic we need the following tools:
- Brush or roller to the surface of the primer.
- A set of spatulas, including ordinary, Tooth and silicone. spatula teeth size should be at least 2,5 millimeters, that will help to lay the tiles without unnecessary pollution.
- Capacity for glue.
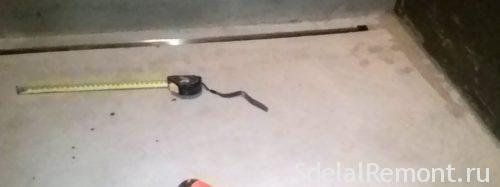
- Measuring tape and pencil.
- Cushion rubber.
- Building level.
Once the tools are prepared, You can proceed to the next step of laying.
Marking surface
To perform markup will need a tape measure and a pencil. Directly layout mosaic tiles runs from the back wall to the door. Conduct a preliminary layout, and pencil marks the spot, where each sheet has to be laid.
In some cases, considering, how to put the tiles with their hands, it becomes necessary to trim sheets. They cut a paint knife, since the sheet itself consists of many small parts, sufficient to cut the material layer, on which they are mounted, to divide it into the necessary parts.
Layout should be carried out in such a way, to the elements, requiring trimming directly by the tiles were missing. In an extreme case,, It should be possible to reduce their number.
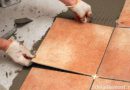
The process of laying tile
Now it's time to consider, how to put the tiles on the adhesive. Consider the whole process as a step by step guide.
- In order to put the tiles under the bias conditions are fulfilled, because the very process of installation is very similar to the standard trim tiles. Clay breed in containers according to package directions, then begin its application.
- note, that is used in this case, a special white glue (especially, if laid glass mosaic, For more information about this a glue can be found in a separate article).
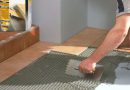
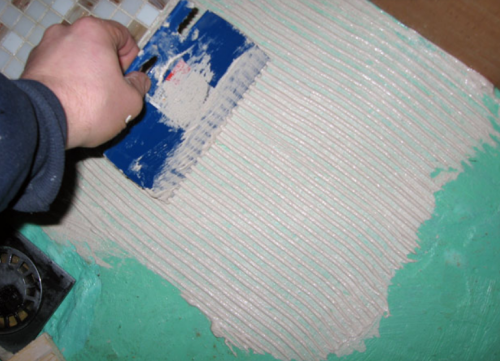
- Using the standard paint spatula Equips adhesive layer 3 millimeter, then distribute and flatten it with a notched trowel. This helps to create the necessary relief layer, that helps to better put mosaic tiles.
- Apply glue mixture strictly on a small area of a little more, than the tile sheet (if you spend laying is not the first time, and are confident that you can perform the operation quickly, it is possible to envisage applying to the area three or four sheets).
- Now laid on a sheet of mosaic distributed adhesive and press down with his hands, that would better distribute the glue.
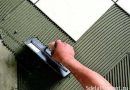
- Further mosaic unroll once with a rubber roller (Do not exert strong pressure on the tiles when rolling out, as much you can get her to the glue, which will require in the future to lay the sheet on the new). It is also possible for this purpose to use a device as shown in the photo.
- Same, gradually the remaining stacked sheets and: Apply glue, prykladыvaem letter tiles, roll out roller.
Now you know, how to put a tile mosaic with your own hands, but this is not the end. Though she and complete piling, there are still some processes.
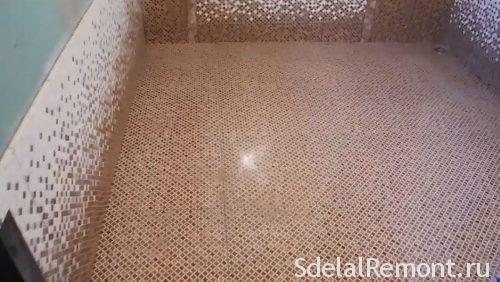
Grout and seal
Now we come to the last stage, considering how to put the mosaic tiles in the bathroom. Namely, this stage involves grouting, and sealing.
Just do the work of this phase are carried out after, as the tiles to dry completely. Grout itself can be carried out by several kinds of mixtures, in particular, it epoxies and cement. When considering the choice of a mixture of, should take into account some factors:
- The cement composition is quite durable, it can be done completely in any color, and in addition to eventually replace or update, that in the case of epoxy compounds is not available.
- Among the disadvantages of the cement mixture may be noted, it absorbs dirt and rust, which contributes to its darkening and soiling with time, it is therefore undesirable to use a mixture of white.
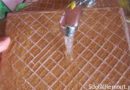
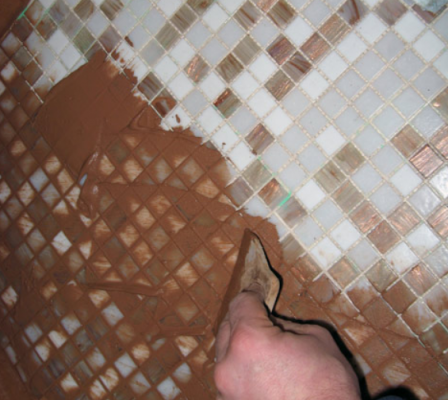
Application of the cement composition is performed using a silicone spatula across the surface of the mosaic. It is necessary to carefully fill in all joints, and after, how the grout dries (what is usually required 10-20 minutes), are rinsed with a damp sponge. Washed tiles to complete the composition of the cleaning residues. At the end of the cotton cloth is wiped.
Considering the epoxy, its application more complicated, and not every specialist knows how to handle it. There are also a number of features:
- It should perfectly observe all mixing ratios grout components.
- Application method similar to the cement, but do you need much faster and almost immediately wash away the remnants of the composition with tiles, since its rate of hardening is much longer.
- In no case can not give the composition of the freeze, as to remove residues from the surface of the dried grout is almost impossible.
And another important factor is the sealing of joints, which necessarily carried out on the tile joints with the walls and in the corners. Also, possibly, It can be carried out sealing of tile joints of the coating.
impregnation CT 10 used for processing filled with grouting tile facings, to make them water-repellent and antifungal properties, inside and outside buildings. It applied to the liner, subject to periodic or continuous hydration - in bathrooms, shower, toilets, kitchens, on balconies.
In the case of cement grout it will ensure its durability and protects from contamination, which are noted above.
conclusion
Now you know, how to put a sloped tile on the floor, and that this requires. Now you only have the time and tools will arm, to carry out independent repair. But, Besides, This knowledge will help you when working with the hired specialist. In particular, thanks to knowledges you can specify an employee mistakes. And in the end we suggest you review a few videos, which clearly shows each step of stacking and also provided additional recommendations.