One of the most important stages of finishing a bathroom is floor arrangement, It is mostly done using ceramics. That is why the main, that will need, a technology laying tiles in the bathroom, More specifically and, its thorough study.
note, that there are a number of different schemes, upon which the coating is prepared and laid, and then we will look to fully laying the floor in the bathroom, starting from the choice of materials, and ending completes the process.
Substrate preparation
All work on laying the tile in the bathroom starts with surface preparation. Calibration is done in the following way:
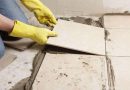
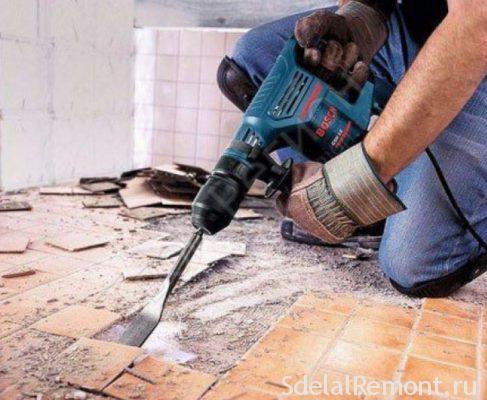
- First performed dismantling of old coatings. need for him drill, or (a simplified) screwdriver, a chisel and a hammer. With their help remove the entire coating to the subfloor.
- Next, you need to clean the surface of debris, in the presence seal the cracks and crevices of.
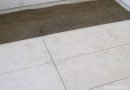
- The next step is to check floor level, in particular, ego Rovnosti. If deviations exceed 1 centimeter, will have to carry out the alignment, which may be represented as a screed, underfloor heating or other options.
- In some cases, the old coating can not be dismantled, is permissible only if it is of high strength and absence of defects.
The main task is to ensure strength and durability grounds. Because tiles can be laid on any type of surface, as concrete, so at the brick or wood.
waterproofing
The next stage is floor waterproofing, which is required in accordance with the tiling technology in the bathroom. In some cases, this step can be skipped, but this is not recommended. Any expert will tell, that waterproofing of buildings with the presence of running water is a must. At least this is due to protect the floor from water penetration, respectively that will protect against flooding neighbors or basement when flowing.
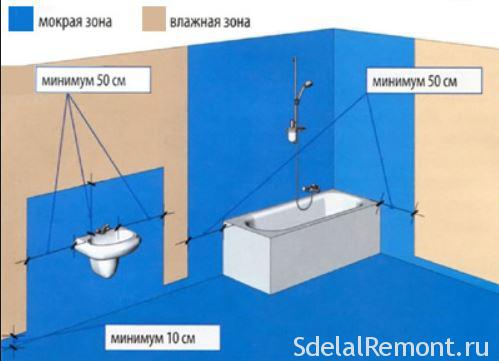
Just can distinguish themselves kinds of waterproofing materials more. In particular the following were separated:
- obmazochnye, which are used in cases, when it is necessary to secure only half.
- adhesive, representing a roll-type materials.
should say, that before applying the waterproofing surface must be pre-primed, and only then proceed to the application of the protective layer. Let's look at the way the application of each of these types of.
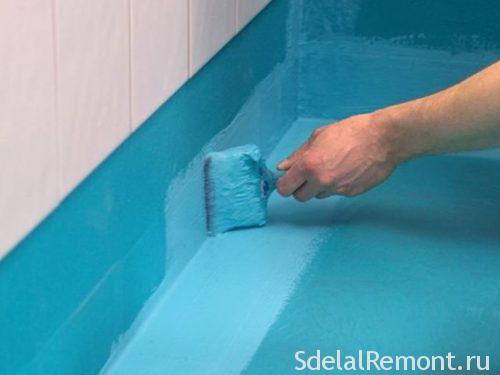
Obmazochnaya
- When the purchase is a dry mixture, which should be diluted with water in accordance with an instruction. Thereafter, the mixture is applied with a roller on the floor in multiple layers.
- On the ground, joining plates, in the corners and the walls additionally recommended to apply waterproof tape, which will improve the quality of waterproofing.
- Also mandatory need a little bit to go to the wall, depending on floor height. In this way, waterproofing layer must exceed the planned height of the coating on 10-15 centimeters.
- The interval between application of layers of material is 5-7 hours.
Paint
It is a kind of alternative to the previous embodiment. The distinction becomes, that the material is somewhat lighter, it is more convenient to apply. but note, that such a decision a few short-lived, since the term of operation of this type of emulsions is 5-6 years old.
Leveling the floor
When is floor tiling in the bathroom, It becomes mandatory execution quality screed or the use of other alignment method. This factor determines the performance of the product, its strength and durability.
Besides, should say, it is almost impossible to be carried out at an uneven coating work, because, flat surface becomes the basis for all repairs. The easiest and fastest version of the work becomes self-leveling floor, which is performed with use of special blends.
note, that the mandatory alignment is carried out strictly according to the technology, Technical provided with slope. This helps to avoid water accumulation in tight spaces.
How to perform a coupler you can find in our separate articles.
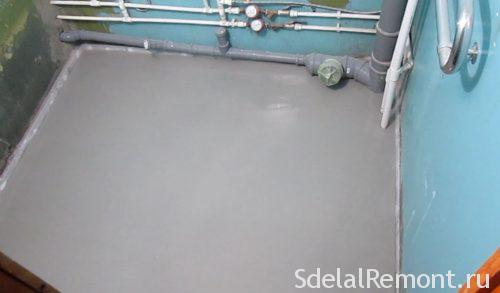
Also, after the screed, apply primer to the concrete, which will help increase the level of adhesion material.
The cost of work
The first question, coming directly to the laying of tiles, It becomes the cost of works. In particular, the cost of the master services. And in order, to count, How much will such a pleasure it is necessary to calculate the tiling, ie. calculate quadrature.
This is because, that the payment is carried out for 1 square meter. Depending on, how much she tile, what type it, and actually, where under renovation, prices can differ significantly.
Considering the standard ceramic tiles, the cost of laying will be approximately 600-900 rub. Speaking of the mosaic, it will be almost twice as much, namely 1500 rub.
That is why it is desirable to calculate the pre-laying tiles. You can use the calculator on our website, or just count the floor space, that would be a ballpark figure. In this way, and you can learn, how much it costs to put tile, but it's just the cost of the master, apart about the same cost of the tiles (the average price for 1 meter - 600 rubles)
Laying the tiles with their hands
And now is to understand your tiling technology alone. First, let's consider some of the nuances, which have a major role. Among them, we note the following:
- The choice of adhesive.
- laying instructions.
- layer stacking
- marking
And little by little start. Firstly, to put tile tile adhesive is a must. Without it, no work will not. You can of course use a grout, but directly with specialized adhesive mixture it does not match. you need to know a number of specific factors to choose the glue. for example, tile view, its size, especially base. For a more detailed study of the subject offer to get acquainted with as a separate item on the selecting an adhesive.
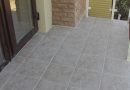
The second becomes a method of laying. The most popular option is the diagonal laying, or standard seam in a seam, and in Extension. But at the same time it is fairly common, and laying tile with inserts, or prefer to put a tile herringbone. For studying laying methods also we propose to consider a separate article on the subject.
Next is to determine with adhesive layer. In compulsorily carried laying tiles on a layer of a certain thickness. The selection of this layer is becoming one of the main objectives of the preparatory phase, and even more important, what choice seam thickness.
And last, but no less important is the floor layout before laying tiles. This is a very important process, can not do without. There should first carry out a preliminary layout of the tiles on the floor, basis of which, mark it. The easiest way to complete the layout to use the laser level, which will help get the job done faster. In total marking is the application of marks, and the installation guide, following which the tiles will be laid out correctly.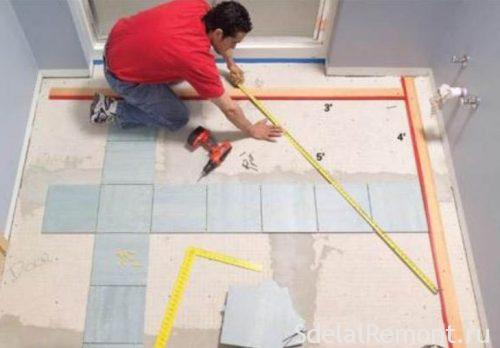
After that, as the tiling layout completed, you can start to its improvement.
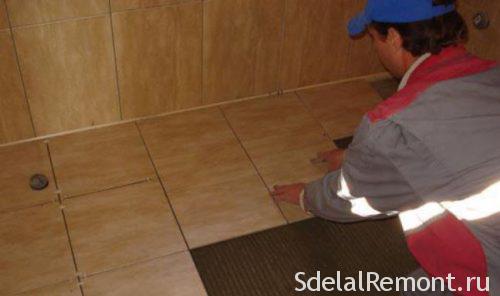
The process of laying
And it's time to begin the very process of laying tile. Consider it as a step by step guide:
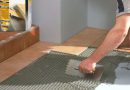
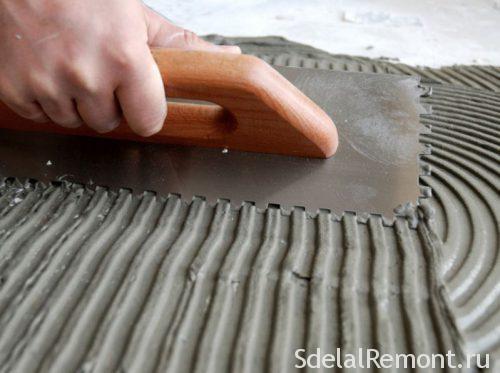
- The first thing knead glue. For its mixing it is desirable to use construction mixer.
- Further, following markup, start laying the tiles.
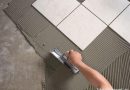
- Apply the adhesive mixture onto the floor surface, as well as the tile itself and applies to the base material, slightly pressing it.
- It is also necessary to align the tiles on level, putting it completely horizontal.
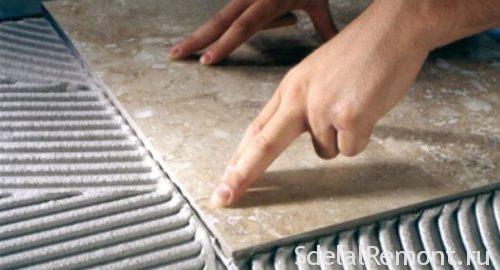
- The next step should be laid next piece, thus it is necessary tic use or SVP to form seams (seam width is also necessary to choose the right).
- Thus we assemble all the tiles one by one, keeping them horizontal and a thickness seams.

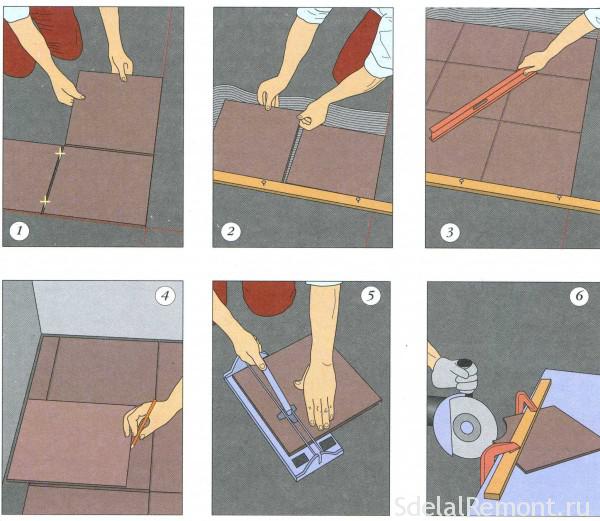
- At least a little carried laying tile, or small pieces, which are prepared after marking and measuring.
- Then it is necessary to dry the surface, that takes 2-3 day.
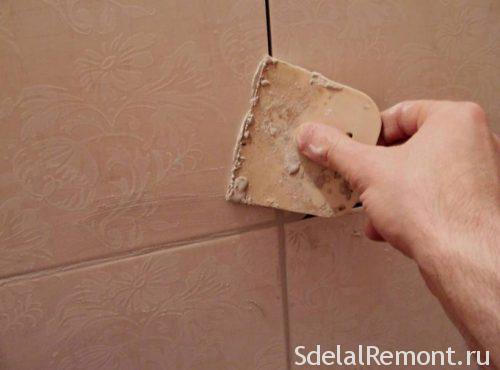
- After this time,, when the coating has dried up, must be sealed and wipe the seams (important factor is grouting choice)
- And the most recent stage is washing with a damp sponge. Calibration is done after complete drying of the adhesive and grout.
In this installation completed. Now you know, how to conduct a laying of tiles in the bathroom. Besides, it is important to know and then, for what lay tile wall, that you can find in a separate article. A fastening material for, We offer to watch a few movies, with clear instructions on how, how to lay tile.