Rather popular choice design of the ceiling becomes the installation of drywall, due to which it is possible to equip the original design. But it is necessary to properly equip the installation frame for gypsum board ceiling. During installation there are some features of the design layout, which should be taken into account during the work.
Stages of construction arrangement
First, let's consider the stages of work, which provides the framework for the installation of the ceiling drywall in the room :
- surface preparation.
- Measurements and calculation of surface material.
- marking.
- preparation of materials.
- Mounting profiles.
Each of them is important to the same degree, because when the framework for settling the ceiling plasterboard, scheme of its components still in preparation.
What type of profile needed
Before, how to proceed with the design technology of the device must be determined with the materials, namely, which profile to use.
Designation profiles and difference abbreviation:
| Profile name without abbreviations | Abbreviated name in the Russian market | Short European Title |
| overhead | PP | CD |
| ceiling guide | PN | OUT |
Depending on their purpose and design requirements profiles can be presented in different sizes.
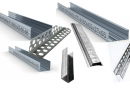
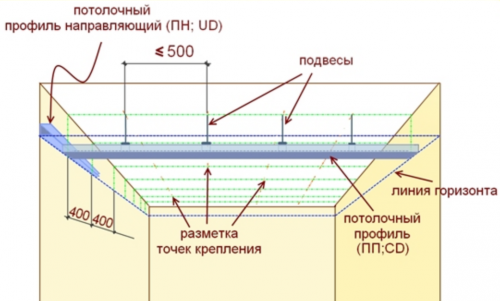
To frame the device on the ceiling under the drywall, we need two kinds of profile, namely guide (PN) and a ceiling (PP).
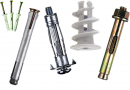
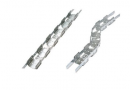
Also, do not forget about the fixtures for profile, which can also be represented by several species:
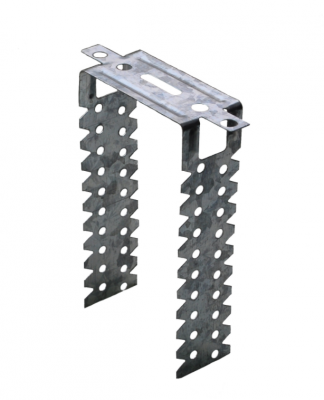
- U-shaped brackets. Easy to use, easy to bend in the bend areas, and pre-perforated over the whole area.
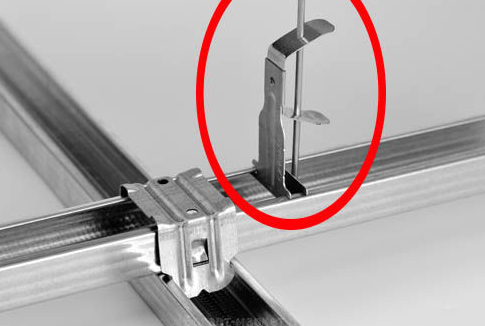
- Bystropodves. This has special type spokes with openings, help connect parts, which can not be directly connected to the suspension.
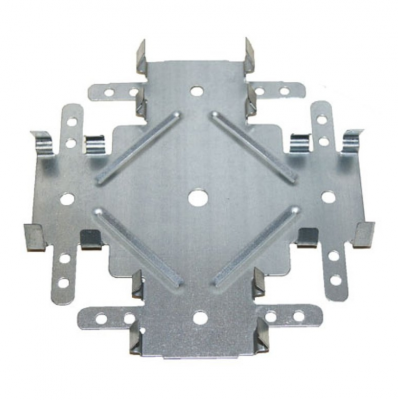
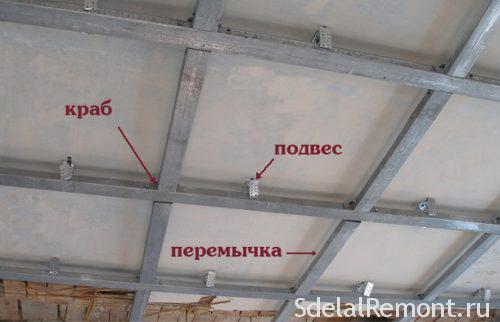
- Cross-shaped brackets (crab). Usually used as a jumper for load-bearing profiles. Allow to fasten them at the right angle.
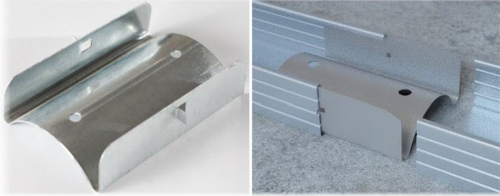
- Also, additionally, Connectors may be used, profiles for lengthening.
measurements of surface
To get started is to spend measurement of length and width of the ceiling. On the basis of these materials will be carried out calculations.
Directly material itself is calculated as follows::
- The length of the room is divided into 60 centimeters. Thus we get the number of the guide mounts.
- The width of the room will be an indicator for the length of the profiles.
- also on 60 share centimeters and width, eventually we get the number of cross bars from Profile.
- In total, in the end we have to get a grid of profiles, which is secured sheets.
- Now multiply the number of guides to the width of the room, and the amount of the transverse fasteners in length and add up the received parameters. Thus we get the total length of the profile, that we need. Proceeding from it will continue to be acquired profile itself.
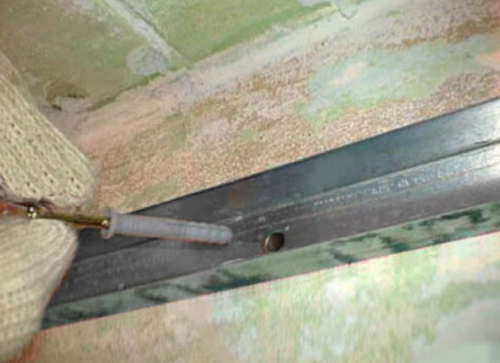
Likewise calculated and dowel nail a profile, which provides every 30-40 centimeters.
Download your installation of suspended ceilings made of plasterboard Knauf.
Https markup://sdelalremont.ru/image/Podvesnye_potolki.pdf
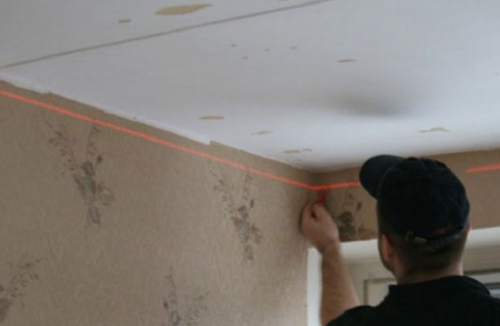
The next step is marking the ceiling under the framework of drywall. For it we need a tape measure, pencil, nails or screws, the thread and the level of.

Directly marking itself carried as follows:
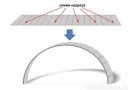
- We are primarily determined by the level of the ceiling of the future.
- After that, the level, which will be mounted to frame false ceiling plasterboard, designated, We begin to transfer his testimony on the surface of the entire ceiling.
- From each of the parties at a distance 60 centimeters hammered another nail. At the same time check, that the two marks were on the same level.
- Likewise Equips mark distance 60 centimeters from each other around the perimeter of the room.
- Now you need between each mark on the perimeter of the pull thread, which will be the primary indicator.
Further directly during installation will be required to pull the yarn between marks lying opposite one another, directly with each arrangement of profiles.
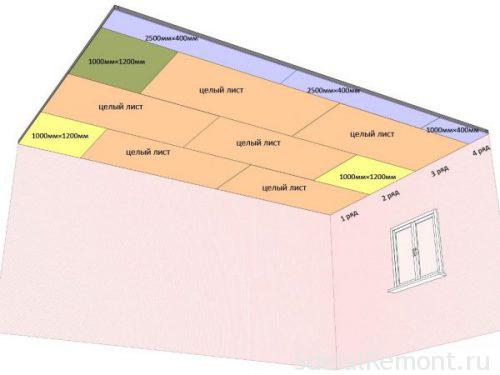
It is important to perform a layout according to the size of the GCR. This requires layout drawing sheets of drywall ceiling.
preparation of materials
Now you need to prepare materials for installation. You can trim the profile directly during that, as it will be carried out under the mounting frame plasterboard ceiling, but it would be better to prepare it in advance.
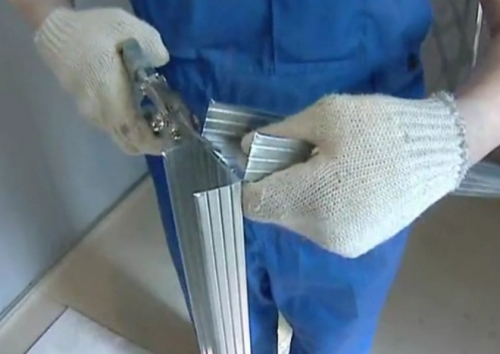
As it has become clear, Preparation involves cutting a profile in accordance with the size of the room. For work, we need a tape measure, pencil and Bulgarian (or hacksaw metal).
We need to make the frame for plasterboard in the ceiling in accordance with all the size of the room, therefore it is necessary to cut out the profile segments. Take for example the size of the room 4*6 m, and calculate the materials for it, and consider, as they prepare. Accordingly, for large areas of the frame calculation of the drywall on the ceiling will be similar.
First we need to select a profile and count the number of longitudinal profiles. They will be mounted along the length of the room. Calculated as follows:
- As already mentioned, mount will be held along the length (if the length is too large, the mount is best for the room width, calculations when it also held).
- To count the number of the longitudinal profile, divide the width of the room to the mounting step: 4,0m / 0.5 m = 8. So we found out, that we need 8 profiles, length 6 m.
- Now calculate crossbars. Step attaching them as half a meter. Divide the length of the room to move, then multiply by the number of longitudinal strips. 6/0,5*8=96. need 96 segments.
- note, that the pitch of the transverse attachments can do more, increasing it to 70-80 centimeters, to save a little material.
easier to use Online calculator for calculating the ceiling of GCR.
After that, How to calculate the necessary amount of Profile, using scissors or metal grinders Scrollsaw necessary segments.
frame fastening and assembly design
It's time mount frame to the ceiling plasterboard. The process is fairly simple, but it requires attention and concentration. And besides, frame for gypsum board from the metal sheets on the ceiling must be fixed clearly on the level.
To consolidate, we need self-tapping screws, Cordless, level. And also should prepare and profile. For work, we need the following:
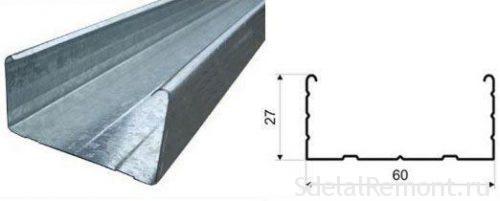
- ceiling profile (PP) 60/27.
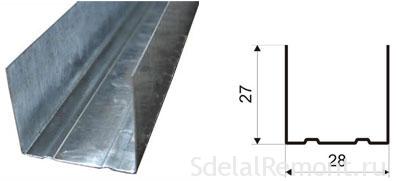
- The guide profile (PN) 28/27
so, We proceed to the analysis of the frame fastening technology for suspended ceiling plasterboard:
- In the first place once again check the level of attachment, which was marked with the marking, recall, framework should be perfectly horizontal.
- Now, marks on the frame around the perimeter of the level of anchoring the guide profile.
- Then start fastening longitudinal profiles. To do this, first we stretch the thread, between markup marks, between which would include a profile, and conferred upon it attachment to hang.
- They are a "U" shaped plate (brackets). Fix them directly on the marking thread, which shows the level of the ceiling frame Plasterboard.
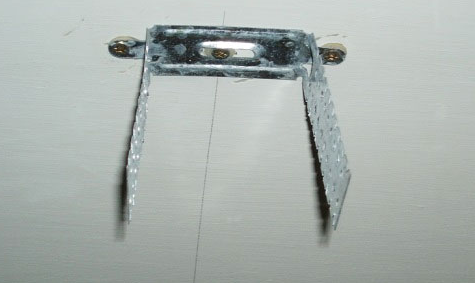
- After fixing them, you can directly equip itself profile. It is fixed to both sides of the "U-shaped" bracket. It should strictly adhere to the markup level. Thread should lightly touch the profile, but should not be stretched them, or hang out at a distance.
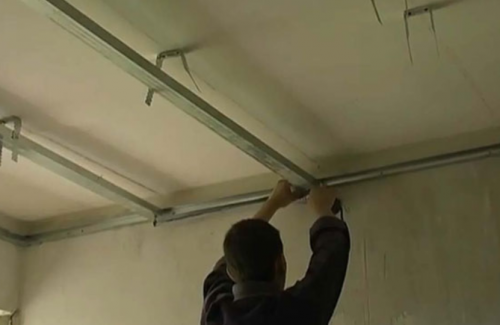
- Checked both longitudinal evenness, and transverse threads.
- Just fasten all the longitudinal profile in accordance with Marker.
- In this way, we have prepared a primary frame under the plasterboard ceiling from metal sheets.
- Now we proceed to mount the transverse profiles. They are attached directly to the longitudinal, using crabs. Fastening occurs when using screws with a drill.
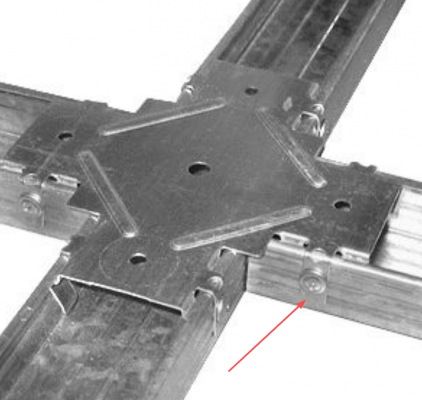
Compound profile crab with fixing screws - After fixing all profiles, We stretch the thread, between the marks, calibratable and how exactly made the frame profile by GFC ceiling. Recall, thread should barely touch, but do not stretch or sag under the profile. In addition, check the rule rovnotu.

After verification, you can say, that the frame on the ceiling under the drywall prepared. Now Learn More, how to strengthen the sheets GCR.
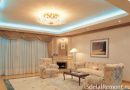
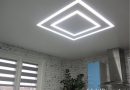
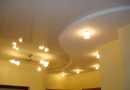
But it's about one-level, but should still review and split-level ceilings with lighting.
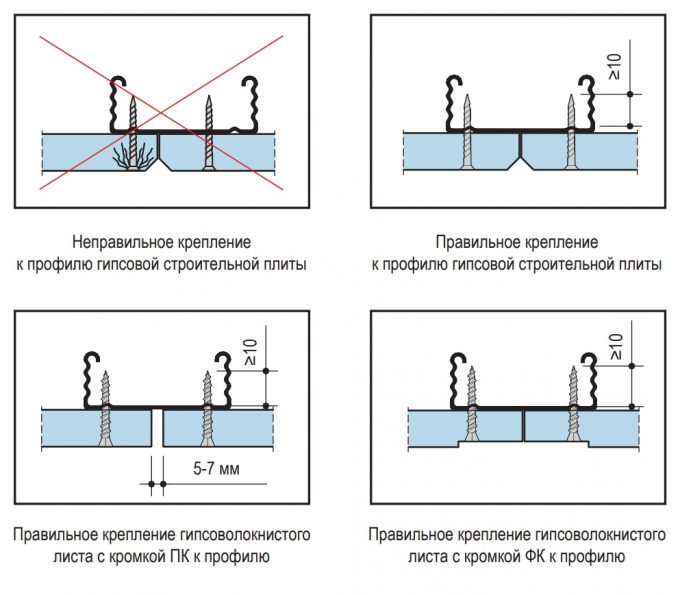
Fixing gypsum building board and gypsum sheets
Fixing gypsum building board and gypsum sheets to profiles (bars) carried, basically, transverse support section. For convenience, the following is recommended with spackling sheets, adjacent to the long side wall, pre-cut
longitudinal edge.
Install using props or telescopic lift gypsum building
gypsum boards or sheets in the design position and secure them to the frame. gypsum
building boards or gypsum sheets are fitted to each other and screwed
for frame screws, thus should be excluded from their deformation. Laying insulating
material (if necessary) performed in parallel with the mounting plating of each sheet. The thickness and density of the insulation material should be calculated and taken into account in load when selecting the type and design of a false ceiling.
Adjacent sheets for mounting false ceiling must be installed vrazbezhku offset relative to each other by at least one step bearing profile.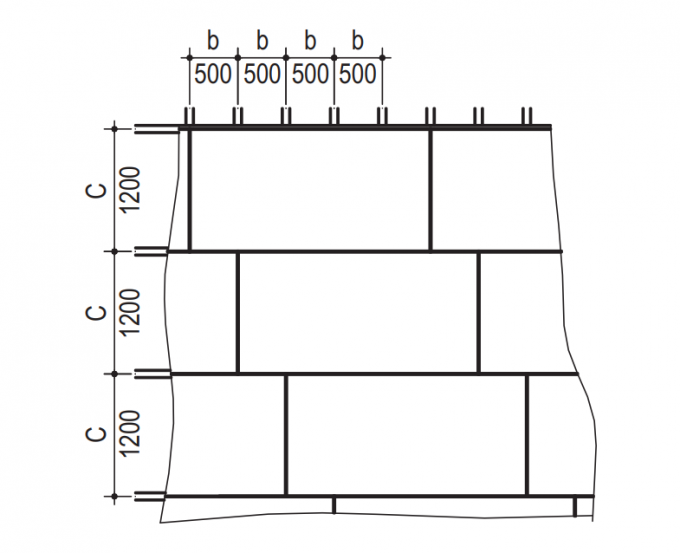
With the end edges of gypsum building boards, okleennyh not complaining, using the edge of the planer must be chamfered at a predetermined angle (22,5°) to a depth 2/3 thickness
list.
Gypsum gypsum building boards or sheets are fixed to the frame of self-tapping screws, spaced steps 150 mm vrazbezhku on adjacent sheets in the region:
• for gypsum building boards not less than 10 mm from the edge of the sheet pasted over cardboard and
less 15 mm from the cut;
• for gypsum sheets for at least 10 mm from the leaf.
In the application of gypsum sheet thickness 12,5 mm pitch screw increases
to 200 mm. For fastening of gypsum building boards to the frame used self-tapping
screw TN, and for gypsum sheets - self-tapping screw MN.
wiring device
Also on the stage rack mounting under the drywall should immediately prepare wiring for lighting. Its styling is carried out on corrugated pipes from the nearest junction box.
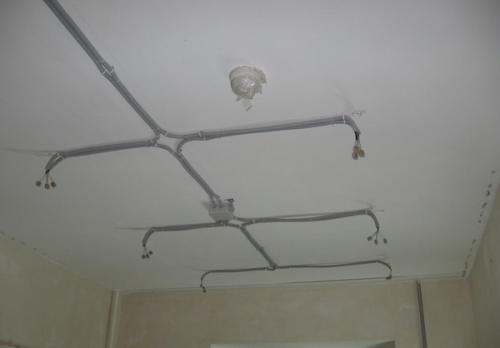
Here it is necessary to note some nuances, to consider:
- For wiring the device must acquire or profile in which holes are provided for special wiring, or in advance to arrange their own.
- Fastening corrugated tube is carried out using special clips or clamps with step 30-40 centimeters.
For more information about wiring device You can learn to separate materials.
conclusion
Now you know, how to build a framework of profiles for plasterboard ceiling and can do it yourself (of course you need an assistant). Besides, note, what is important points when dealing with plasterboard. To consolidate the material studied recommend that you get acquainted with a few videos, which clearly shows, how to make a frame for plasterboard ceiling.