- What is foam
- Product Benefits
- disadvantages insulation
- Features of the application of foam
- Wall insulation foam with your hands
- Preparing the ground for insulation
- Calculation and preparation of materials
- Installation of insulation foam from the wall
- Insulate the floor with foam
- Substrate preparation
- Self-floor insulation foam
- Thermal insulation of ceiling
- conclusion
Quite popular option increase the room temperature is insulation foam with your hands. It is worth noting, that such a material is used commonly, while both the individual building, and in the mass. But before, how to undertake to equip the insulation foam, worth knowing, what kind of material, What it has characteristics, and most importantly, how to conduct warming with it.
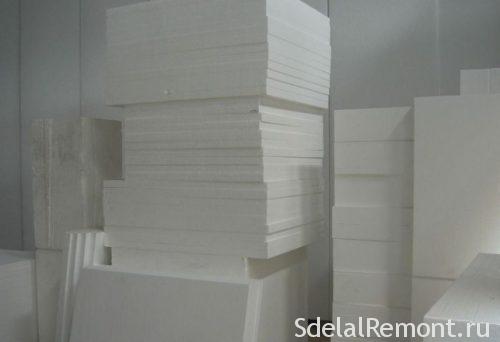
What is foam
There are lots of varieties of foam, made from different materials. In total it is a foamed mass, which further inflates, or a certain kind of gas (depending on the destination).
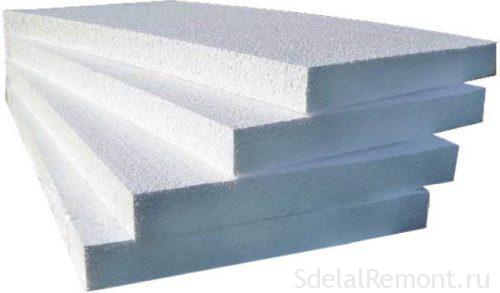
As mentioned, foam is made of various components, which in turn affect its performance. By monitoring the level of gas inside the material changes its strength and resistance to various stresses.
Product Benefits
First, let's consider all the advantages of foam, like insulation, among them are marked:
- Immunity to moisture. Along with the, that the humidity does not affect the structure of the material, and is not conducive to corrosion, foam hardly absorbs it.
- It has high thermal insulation properties.
- not subject to corrosion, occurrence of mold or mildew.
- It has a low weight.
- Easy to process, and mounting, so you can easily do with his hands warming.
- Pretty big operation period.
- Is not exposed to temperatures, In addition to easily withstand large swings and changes in climatic conditions.
- Along with thermal insulation provides good sound insulation premises.
- During the installation does not require additional stipulation waterproofing formulations.
- Using a material with high density additional protection from mechanical impact can be provided without creating the carcass.
note, it's not all the benefits of foam, like material, and the main, that the most useful for thermal insulation.
disadvantages insulation
It is also worth considering and disadvantages, including notes:
- A low level of air transmittance, that becomes contraindication for use in combination with wooden constructions. Accordingly, the wooden house they can not insulate.
- As it has limited strength and resistance to mechanical impact, additional protection from damage, which is settling after installation.
- The material is easily destroyed when subjected to nitrokrasok or other compositions based on nitro lacquer.
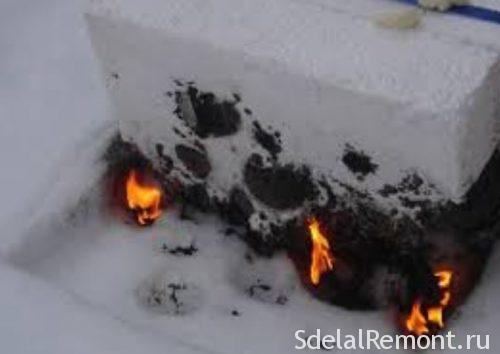
- flammable insulation, moreover when combustion emits harmful gases (phosgene, carbon monoxide).
- not recommended for internal insulation of walls (It is allowed only with the right approach, and numerous calculations).
It is worth noting, that the use of foam in the clear is not recommended in a residential area. better to use mineral wool.
Features of the application of foam
As insulation, this material found its application in the following areas:
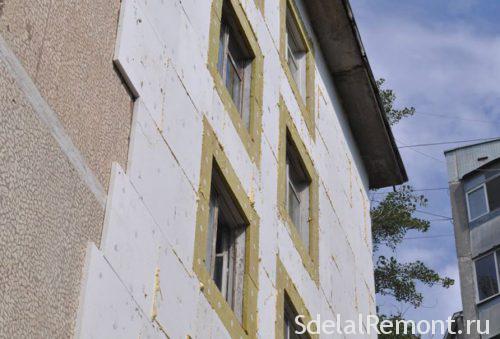
- External wall insulation.
- Internal wall insulation.
- Construction of thermal insulation of ceilings and attics.
- Thermal insulation of basements and foundations.
It should be noted immediately, that the use of the material for the insulating walls inside can assume incorrect. This is because, that the wall should be warm due to heat. In consequence of this, with internal insulation of the following occurs:
- Full insulation walls from heating, as a result, offset dewpoint.
- The offset will be caused by the change in thermal insulation qualities of the wall. It will accumulate moisture, and gradually destroy the inside wall.
- It also contributes to the appearance of mold and mildew and their further spread not only on the outer walls, but also internal.
Because of these factors, experts recommend the use of polystyrene for external thermal insulation.
It is also important to note the features of thermal insulation of basements and foundation. With his arrangement will require the establishment of additional protection, because in the winter the soil has a swelling property with frost, which creates pressure on insulation. So it's necessary to build an additional formwork or provide for brickwork.
Now it is necessary to consider the characteristics of insulation of vertical and horizontal surfaces with foam. Namely secure technology on the walls and foundation, as well as on the floor, the ceiling and the attic.
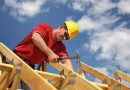
Wall insulation foam with your hands
As we have already said,, internal insulation is not desirable to carry out these pictures, so consider surface mounting technology.
The works themselves can be divided into the following stages:
- Substrate preparation.
- Calculation of materials and their purchase.
- Mounting foam.
- topcoat.
And now look at each of these steps in more detail separately.
Preparing the ground for insulation
The first stage is the preparation of the base. As part of its following steps are carried out:
- Cleaning the surface of debris. If you have a decorative coating, it must be removed.
- Check the verticality (or horizontally when dealing with sex). If there are irregularities, necessarily performed alignment.
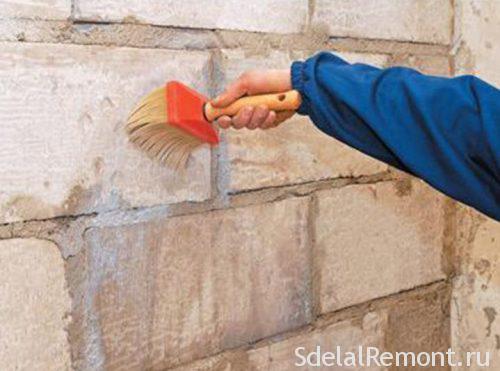
- After planarizing primed.
In this coating preparation steps are completed.
Calculation and preparation of materials
Now you need to purchase materials for work, and the first step is to calculate their, then buy and prepare.
- Before wall insulation is necessary to determine the quadrature object, calculate materials.
- The foam is best to choose 35 a density level 5 cm. thickness.
- Before pasting foam, necessary to apply primer to the base surface to improve adhesion. Primer consumption is about 200 d of 1 m2. Primers are used solely for internal work. for example, for this purpose suitable Ceresit CT-17, Siltek E-100 and t.d.
- It is also recommended to make the surface more rough, which uses a needle roller, which is run in the entire surface of the foam on both sides.
That's all, you can proceed directly to the installation of insulation.
Installation of insulation foam from the wall
We now proceed directly to the technology of installation of insulation to the wall with his hands.
It is held as follows::
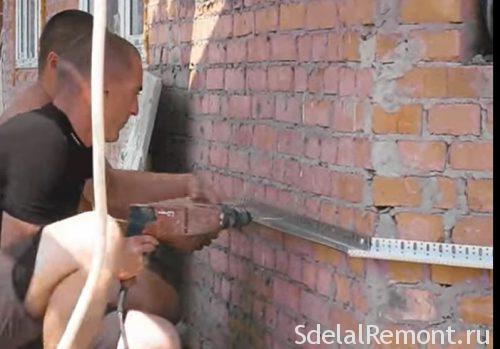
- The first thing assemble plinth profiles on the level below the insulation. To equip them with the help of dowel fastening.
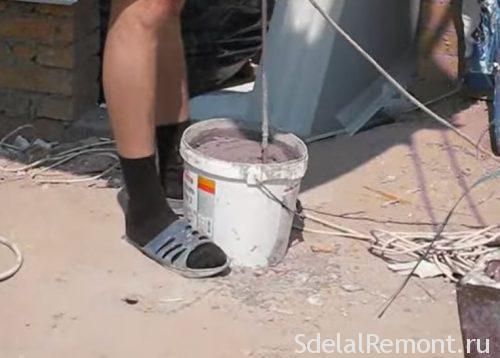
- Next, proceed to preparation of the solution. Assembling the foam made using the dry adhesive mixtures. Their consumption is equal to about 6 kg / m2. Recommended solutions for bonding foam - Ceresit CT-83 and T-85 Siltek. Knead the mixture strictly according to package directions.
- The adhesive composition is applied a continuous layer on the perimeter of the foam block, inside envisage an even distribution of solution lozenges.
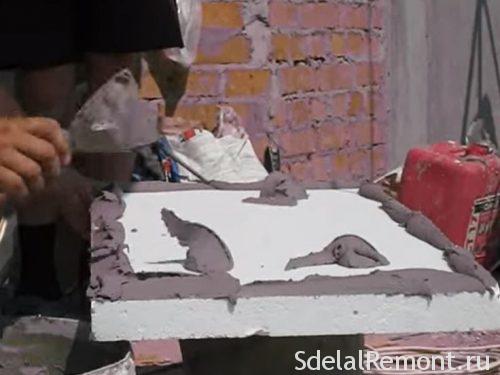
- glue the block, firmly pressing it against the surface.
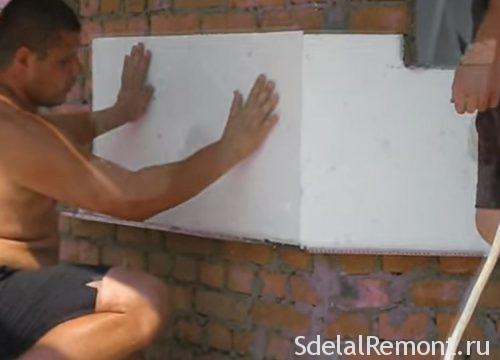
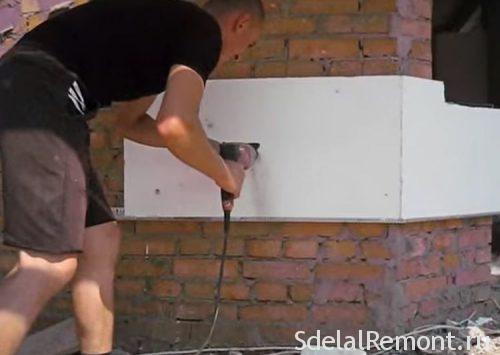
- You must use a dowel (umbrellas), good for fixing the foam on the wall. For them, making holes with a punch.
- To secure the dowel envisage with 20-30 centimeters of step. find out, as another sheet may be attached via foam or other mounting options.
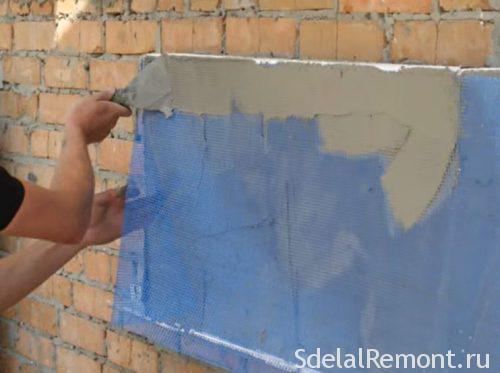
- After the foam is secured to the base, comes the heater reinforcement process. You can use the same adhesive composition, or buy a special mixture of reinforcing, and glass-fiber mesh. Recommended composition for reinforcement Ceresit ST-85 and T-87 Siltek.
- Mixture was applied to a reinforcing sheet for trowel foam. Necessarily need to create an even layer.
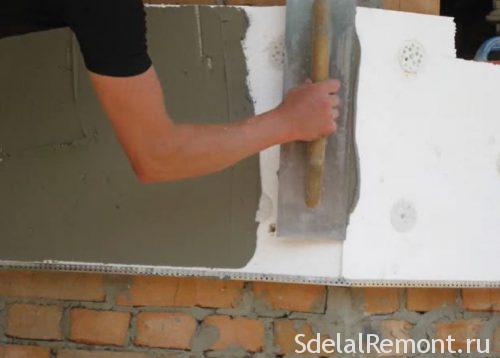
- After application on it is pressed fiberglass mesh, which erased the usual spatula.

- The next step is the application of another layer of the reinforcing structure, after which the surface is left to dry.
- After the reinforcing layer is dried, it primed.
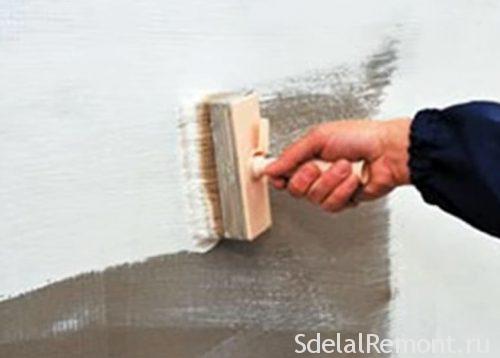
- The final stage of warming the house is the choice of the facade design. Most often performed with plaster further her painting, but it allowed a large variety of options.
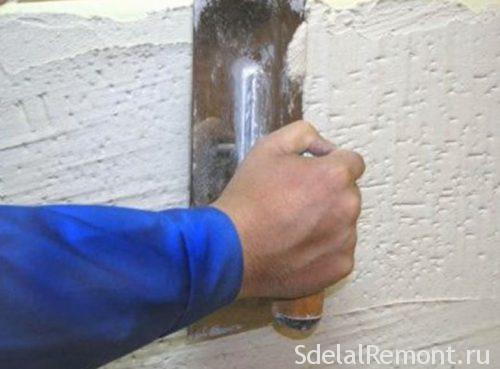
For the decoration of the facade can be used decorative plaster "bark". Its arrangement is carried out in several stages:
- Kick-off coating is treated with primer for decorative works, e.g. Ceresit CT-16.
- On primed starting layer is applied to the decorative plaster "bark", grain fraction is often selected 2,5 mm.
- After some time after application, When the plaster dries out a bit, made the formation of invoices.
- Fraction circular movements spread over the surface using a plastic spatula.
- After drying again primed, e.g. Ceresit CT-17.
- More facade painted in the color you want. The result is a high-quality and aesthetic appearance of the facade of the house, which will last for many years.
More detail about, how to perform decorative plaster with your hands can be found in a separate article on the website.
Likewise conducted insulation all vertical surfaces, namely wall, foundation, basement. The only difference in the improvement of work technology becomes additional protection against mechanical damage to the material.
Insulate the floor with foam
Enough thing to consider when performing work on warming houses, considered possible elimination of heat leakage through the floor. Since the level of heat loss in this case can reach 30%, then the floor arrangement is necessary not only to carry out its quality finish, but also take care of the proper insulation. An excellent embodiment, in a similar situation, will foam insulation floor.
floor insulation with foam is often compared with the method of warming kyeramzitobyetonom. Comparing these two methods, it becomes noticeably, that when you touch the floor, Insulated foam, It feels the heat, and in the case of lightweight aggregate - on the contrary, cool, wherein the temperature of the floor, and in the, In both cases, will have the same performance.
But go directly to the insulation arrangement. It is carried out in several stages:
- surface preparation.
- thermal protection device.
- finishing.
Each of the stages is very important, therefore it is necessary to consider them in detail.
Substrate preparation
An important factor is clean and smooth mounting base. Because training is conducted within:
- dismantling of cover.
- If necessary, the floor leveling.
- Cleaning the surface of debris and dust.
Further, it is worth considering the installation process itself.
Self-floor insulation foam
Directly the installation process is quite simple and almost completely copies the device external insulation of walls, with some unique features:
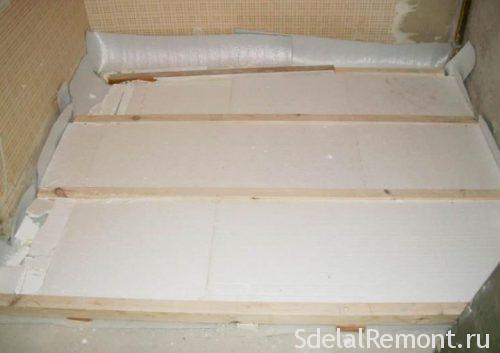
- After floor leveling envisage based waterproofing material layer.
- Further, depending on the size of sheets of expanded polystyrene Equips Cell, using wooden bars. In this way, the thickness of the timber must be equal to the thickness of insulation, and the step unit to its length and width. As the material with time does not change the size, cells are performed strictly according to the size of the foam.
- Further insulation sheets laid, fixing them special adhesive blend, and later dowels (also, as well as on the wall).
- Upon completion of the laying of all joints treated with a special adhesive composition, or blow out the foam construction.
- Subsequently, over the insulation layer provides the vapor barrier.
Further mounted on the joists or plywood sheets OSBI.
Further it is possible to arrange any floor covering, as well as to provide the device "warm floor" system, predominantly film type.
Thermal insulation of ceiling
And last, it is worth considering, It is becoming foam insulation ceiling with his hands, which is also quite simple. Directly surface preparation is carried out in the same manner, As in previous cases,, because we consider only the particular is mounting.
Fixing polystyrene ceiling can be carried out in two ways:
- framed.
- glue.
Considering the second method, fixing is carried out in the same manner, as for the floor surface. Therefore, we consider in detail the method for fixing frame.
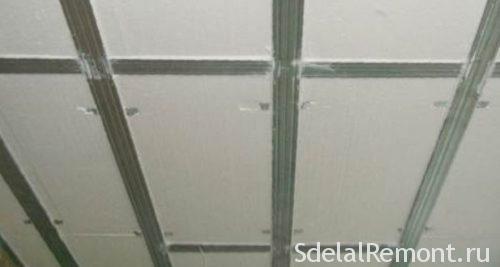
Immediately frame itself may be made of wood boards, or from metal profiles. It is recommended to use profiles. Directly the installation is carried out as follows::
- Fasten the first cross-sections, step between them is taken as half a meter.
- Next, the same step envisage longitudinal profiles.
- After the carcass device cut styrofoam squares, size 50 × 50 cm.
- Squares adhesive material applied, and they are pressed against the ceiling, then, zapenivayutsya further seams between the frame.
- Also held mount directly to the frame, using special fasteners.
- The last step is fixing the insulation on top of the vapor barrier layer, and drywall device.
Selecting decorative coating already depends directly from the owner fancy.
conclusion
In this way, considering the instructions on work, you can see, insulation foam that is fairly easy, and only requires a little time and patience. For, to see more clearly, How does this kind of work, in the article were provided by video, and besides, Below you can see a few more video instructions on arrangement of insulation using foam.