The most popular floor coverings in the bathroom is exactly tile. And that's why, laying the bathroom floor becomes whole art, It refers to which you want in all seriousness. Let's still will understand how to put the tiles on the bathroom floor, what are the features, and you need to know.
stages of packing
To begin, you should decide, What steps includes laying the floor in the bathroom. In total there are four:
- The first stage, As in most other works becomes surface preparation.
- Given the factor, the bathrooms - high humidity room, as well as frequent exposure to water, necessary to provide waterproofing.
- The next step will be followed by leveling floor screed.
- After that she spent directly tiling on the floor in the bathroom, and grouting.
Substrate preparation
As already said,, the first stage is the preparation of the surface. Calibration is done in the following sequence:
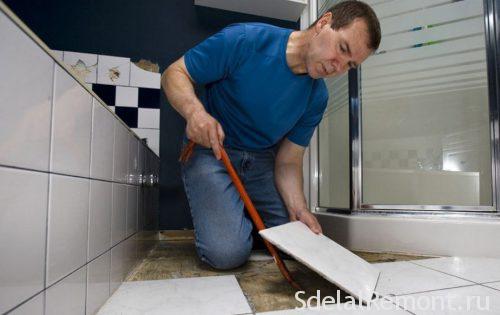
- In the presence of the old coating, It held its dismantling, that is done by a punch, or chisel with a hammer.
- We should also note that, it is necessary not only to remove old tiles, but also if necessary to completely remove the strong base screed .
- If in the process of dismantling any gaps or cracks are found, they must be sealed with adhesive for tiles.
note, that with sufficient strength old coating, it can not clean up and make laying on the old tiles. But in most cases it is necessary to, not even because of the low strength, and other factors, eg:
- The presence of voids in tile.
- damage to the coating.
- When laying a new layer of the floor level rises above the level of the nut, is unacceptable.
And this is not all the reasons, in which the old coating is best to remove.
Having dealt with the preparation of, and fully clearing the base can go to the next step.
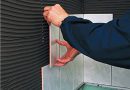
floor waterproofing under tiles
An important factor is the waterproofing of premises, without laying tiles on the bathroom floor is extremely undesirable. Do not say, that is impossible, since the laying of the possible and without waterproofing, but in case of a leak the slightest leakage of water gets to the neighbors.
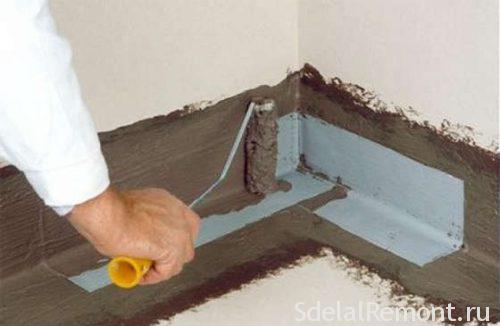
so, original order in this case becomes a waterproofing coating composition on the floor surface.
It is very important to pay attention also to the walls, which often enters the water, but in addition, in any case, the processing is carried out on 10-20 centimeters upward from the floor surface of the wall.
To accomplish this you need to choose a waterproofing material, which includes several species. In particular, repair flats and houses are three kinds:
- Obmazochnaya.
- Paint.
- pasted.
Well, just in the bathroom, when the goal is worth only protect against the ingress of water floor covering, most often the first two methods are used. Let's take a closer look at the principle of their application.
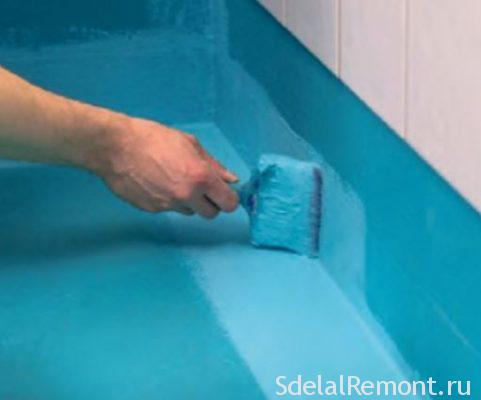
method of coating
Such a material is sold as a dry mixture, its application is as follows:
- Priority mixture was diluted with water. As a result, it should get a completely homogeneous mass, to be applied to the floor using a special brushes and rollers.
- In places the base joints (plates, boards and others.) better to use waterproof tape.
- Do not forget to apply makeup and also on the wall.
- She waterproofing is carried out in several layers, each of which dries 5-7 hours. And after the last coat must pass a day before the start of the next phase of work.
Paint layer
The following method becomes Paint. It is a kind of alternative to the previous version, but it is slightly easier to use (application). special rubber or bituminous emulsion is applied for the implementation of this type of waterproofing.
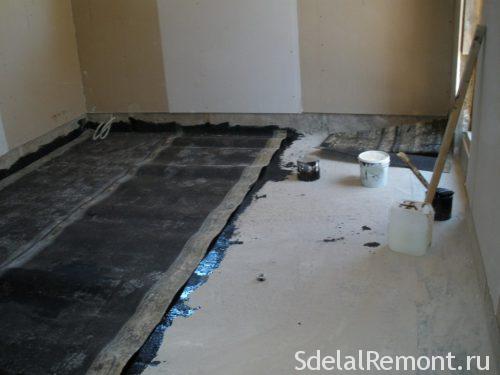
Pasted version of the waterproofing
This insulation based on bitumen- rolled materials and lubricative mastics. This option is the cheapest and most widely used in new buildings.
Leveling the floor
The next stage is a floor leveling, in particular, conducting quality ties. Only this can ensure a uniform distribution of adhesive, and the quality of the final coating, as well as its durability.
Alignment is necessary to carry out necessary, because the flat floor - the basis of all repairs.
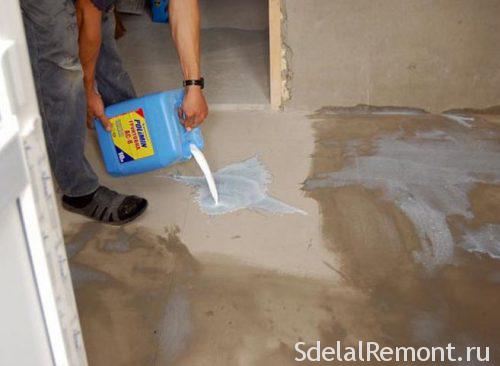
In particular, This procedure is desirable to use specialized mixture. In this case we are talking about the filling box.
Another important factor is to make flooring at a slight angle, that water does not leak into the hard to reach places. To do this, the rack beacons exhibit a small bias.
She starts pouring from the far end towards the exit from the room. It is important to distribute the solution evenly as possible over the entire area, to avoid any further surface defects.
After casting, the coating must stand for at least 3 days, then you can continue to carry out works. For more information about carrying out leveling and screed, Refer to the separate articles, as well as the video below.
Laying the tiles with their hands
And the last stage is directly laying tile on the bathroom floor. And then we will deal with a step by step sequence of actions.
But before, We answer fairly popular question about, some tiles lay on the floor in the bathroom? And the answer is quite simple, the most popular one is a ceramic tile floor. it is durable, durable and comfortable, It has a wide range of sizes and colors. The most robust flooring is considered keramogratit, but for wall tile floor quickly deteriorates and is not intended for this purpose.
But go directly to the question of whether, how to put the tiles on the bathroom floor. Must be answered in the first place, there are a number devices for alignment and tiling, which greatly facilitate the work of.
- Initially, it is necessary to prime the surface. Which is enough to be a standard low-cost primer. This approach can significantly improve the adhesion of materials. note, that such a clause is not mandatory, but at the same time, if there is a desire to get the job done on the conscience and to give maximum durability coating, then you should not neglect such.
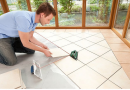
- The next step is rough layout of the tiles. This will help to measure up the room, provide need to cut tile pieces, as well as to consider the layout. It is also recommended to perform marking chalk.
- Just lay down floor tiles in the bathroom are starting from the far corner toward the door.
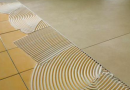
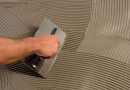
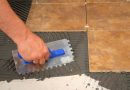
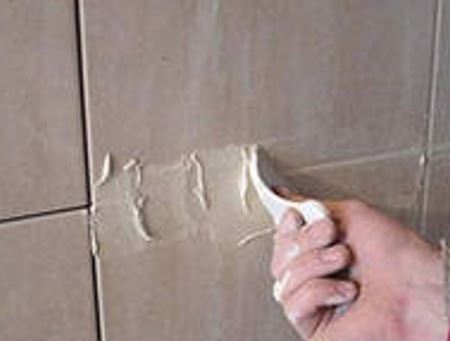
- For the actual work it is recommended to use specialized adhesives. Mixture itself directly applied to the surface and flatten using a special spatula (toothed).
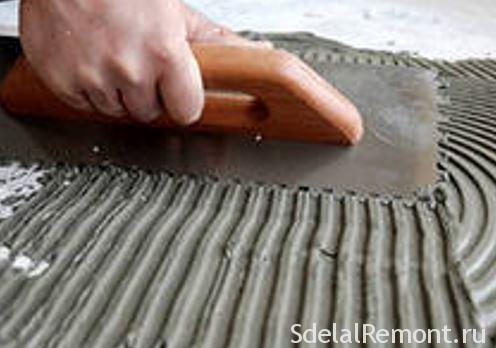
- It is important to maintain a certain adhesive layer, its thickness is compulsorily be the same for each floor section.
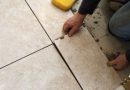
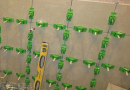
- When laying the tiles need to keep a distance between herself, ie. stitches, what special plastic crosses are used, or devices for floor leveling.
- Each tile laid on a mandatory basis should be checked using a spirit level.
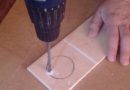
- It first laying whole tiles, then you can move on to assembling the cut lengths. If you have not cut the tiles, it is necessary to measure the necessary distance and perform the work. Cut the tiles can be grinder or hacksaw.
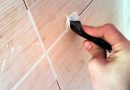
- Upon completion of the work on tiling held grouting. She later performed 2-3 day. Used to conduct a special composition.
Upon completion of the work and proper drying glue, as well as the grouting is necessary to clean the tiles, in particular, wash it with a damp sponge. Discover as needed grouting help from the calculator online.
so, we have considered, how to put the tiles on the floor bath and can now get to work. As you can understand the process of laying tile is not so complicated, and because it can cope with every. And if you can not find the full answer to the question as to put the floor tiles in the bathroom during the reading of the article, suggest you see a few videos, which graphically shows the whole process of stacking.