The first question, which occurs in self-repair in an apartment or a house, how to put the tiles in the bathroom. Even paying attention to the fact, that the area of the premises is usually negligible, a list of required to conduct work is quite extensive.
In this way, for, to spend laying the tiles in the bathroom need to thoroughly study the technology and the highest degree of responsibility to each of the stages of work.
Materials and tools for laying
The first question, which should be considered are tools used for laying the floor in the toilet, as well as the selection is required to operate plitočnogo kleI.
For a start will have to consider all the nuances of the premises. Though it is small in size. An important factor is the fact, that the toilet is separate from the bathroom, or combined with it. In this case, we consider the situation, when facilities are located separately.
Thus the humidity of the room in this situation is somewhat less, because the nuances of the work will differ from laying tiles on the bathroom floor.
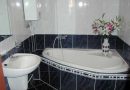
First of all it is necessary to consider when choosing a tile. In smaller rooms good option becomes bright tile, The size is better to choose medium. Also, to create an individual design can provide for the division into several zones (shades) that is done with the help of the Frisians.
It is also worth to take into account the texture of the tiles. It recommended to choose a smooth glazed tile, because the toilet is a breeding ground for bacteria and germs, and therefore it is best to choose a material, which can not be defeat and pollution.
Directly for the work you need the following materials and tools:
- In the first place the very tiles and glue.
- The following materials are becoming grout, and Silicone sealant.
- Also, for the treatment of tiles and joints after installation need special water-repellent substances and antiseptics.
- Putty and primer.
- Plasterboard, and frame members (profiles and corners).
- Builder's level and tape measure.
- drill, drill, Cordless, Tile, Bulgarian and construction mixer.
- several spatulas, normal (small and large), and a gear.
- Also for floor leveling mixture.
- brush.
- A rubber mallet and hammer.
- Also, for the application of line and pencil marks.
Prepare the surface
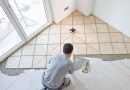
The next stage in question, how to put the tiles on the floor in the toilet, It becomes surface preparation.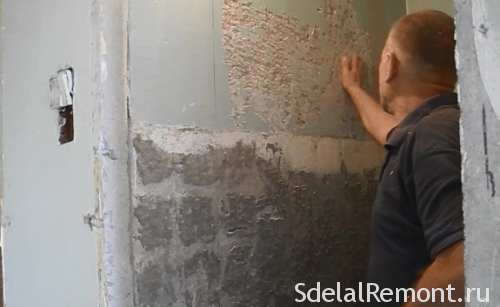
The very preparation is divided into several stages, that must be met:
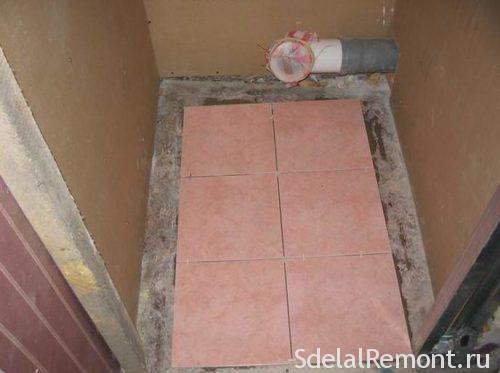
- The first stage is the dismantling of the old coating. To begin with all the plumbing removed, furniture and carried out of the room. Old tiles removed by a punch. In areas, where the communication system is recommended to arm chisel, so that nothing is damaged.
- The next stage is the cleaning of the surface, its alignment and processing protective structures. In this way, note, that put the tiles in the bathroom with their hands only on a perfectly flat floor. clean the floor, then pour concrete (it can be strainer or liquid floors). After drying gruntuem and treat with antiseptics. The walls at the same time plastered.
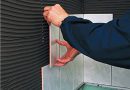
- To hide communications, mount box of drywall (necessarily moisture-resistant). To do this, create a frame made of metal elements, and then mount it on drywall and it zashpatlevat.
- The last stage is the application of markings. To do this, fully consider all styling concept, and apply the appropriate tags.
Laying on the floor
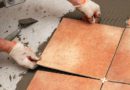
We now proceed directly to the process of the work and analyze, how to put the tiles on the floor in the toilet. Begin each row with only fragments of whole and start to work with the far corner of the room. This will require initially determined with the location of the tiles.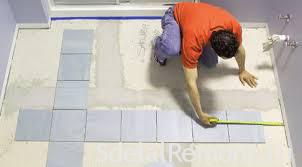
The alternative to getting to put the first tile in the corner by the door, and then continue to work inside the room. Thus the further we leave the room and return back to the end of the exit.
As mentioned, first performed whole styling fragments, then, Tile using grinder or cut pieces of desired shape and size. Also cut out the holes for pipes and plumbing. detail about the tiling on the floor.
Important! Markings shall be applied on the reverse side of the tile itself.
Stacking process itself takes place as follows::
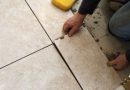
- It first solution preparation, after mixing it is necessary to infuse 10-15 minutes. The very same tiles must be briefly soaked in water.
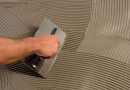
- The next step, with a notched trowel to inflict little floor mortar and distribute it on the surface layer of not more than 5-6 millimeters.
- Tile pulled from the water, excess water with its necessary coward, and wipe with a cloth on all sides.
- Now we are putting a tile adhesive to the floor to the mixture and presses. Should be uniformly compacted tile, it uses a rubber hammer or mallet.
- After that the tiles should be checked by the level of, if necessary, to align. Status Required element must be strictly horizontal.
- Next, stack the second tile, align it on the first, also we use daggers in 2-3 millimeter to form flat seams.
- Likewise occurs laying tiles remaining. It is important to each of them to check the level of.
In this issue, how to put a floor tile in the bathroom is closed, and the room should be left for the day, then you can continue to work on facing.
Installation on the wall
Now it's time to carry out laying tiles on walls. Unfortunately, Now laid tiles for a small toilet, and because a large space to carry weight design maneuvers, as well as the realization of large-scale ideas small bathrooms. because, it is recommended to buy a few tiles with patterns, and highlight them on the wall friezes.
tiling technology in this case is as follows:
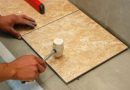
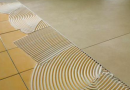
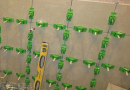
- The first step is to carry out the markup position tiles series. At the level of the second row should be fixed support rail. Laying begins from the second row, first reported to the least, after drying of the upper layers.
- As in the first case, with a notched trowel to apply adhesive to small bit area, then he smeared himself and tile is applied to the wall.
- As is the case with the floor, you first need to work with whole tiles, and at the end deal with the sharp pieces.
- Also laid tile on the box (It applies the same as for the wall).
- In some cases, in homes found a small ledge, which resembles a concrete plinth. Such a projection can be pasted using a narrow rectangular pieces.
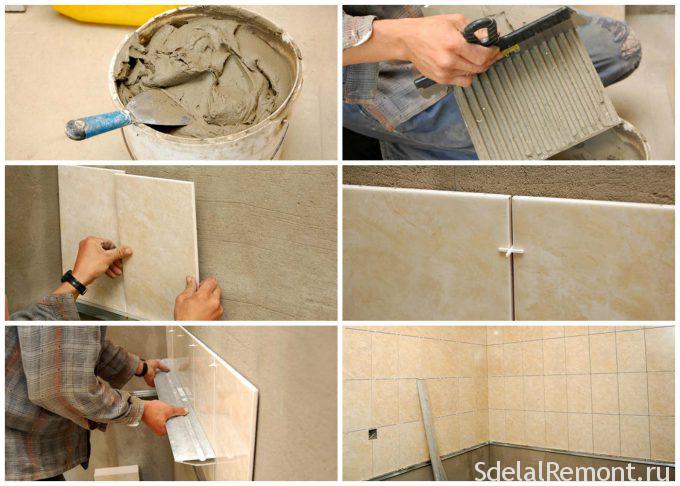
Not in any way do not rush immediately to lay all the tiles on the wall from top to bottom. It is desirable to work with small approaches, giving a solution to fasten the lower ranks.
Also, attention should be paid and doorway, its lining is performed carved details (mostly whole tiles are not placed). Typically used for cutting tile cutter or Bulgarian.
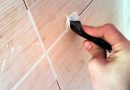
Grout and seal
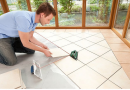
And the last stage of the work becomes grouting. This is the final stage, held, when all the tiles for the bathroom is already laid and the adhesive mixture has dried.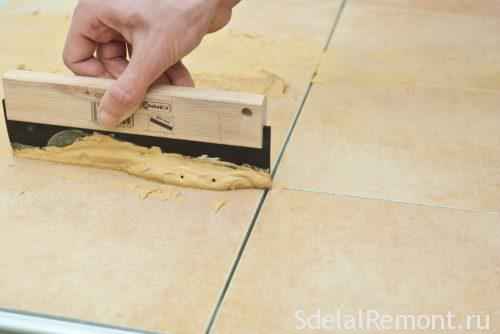
of technology is quite simple. Start with grout, depending on the type it is diluted with liquid component, in accordance with an instruction. Using a rubber spatula fills the space between the tiles. In the corners and the box door further processed hermetic seams.
Thus and held tiling in the bathroom. Now, Guided acquired knowledge you will be able to carry out repairs in your closet. It is also useful to get acquainted with the laying of tiles in the bathroom and kitchen. And finally, we offer watch a few videos on carrying out repairs in the toilet with his hands.