There are many ways of facing walls in the bathroom. The choice depends on the surface condition and the need for its alignment. This wall curvature can be used plasterboard, which will save time and money on their plaster. This multifunctional, versatile and easy to process material, which can be used in high humidity conditions.
Surface preparation for laying
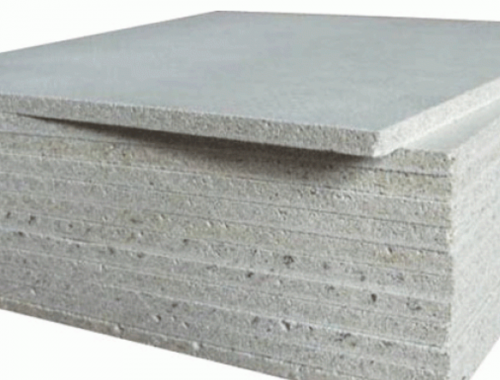
At first sight, the use of drywall in the bathroom, in a room with high humidity, doubtful. It is known, that gypsum, which is the major component of this material, afraid of water. Besides gypsum in the gypsum board includes Mashed waste paper. The combination of these elements makes it durable, fireproof, environmentally friendly material with good insulating properties.
There are two types of drywall:
- For use in rooms with normal humidity conditions. It referred to as gypsum plasterboard.
- In areas with high humidity rates - GVLV (gypsum sheet).
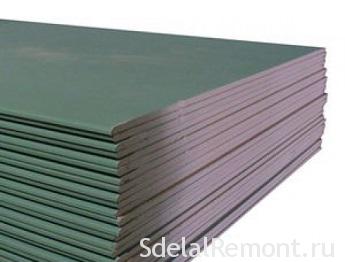
Moisture resistant gypsum board has external difference - it is painted in green color.
Treated with specially impregnated sheet, which protects it from deformation due to moisture. The very use of damp-proof material does not negate the other preparatory work in the bathroom, such as waterproofing surfaces and ventilation device.
The additional protection against moisture need the edges of drywall. Their entire length of the mastic treated vlagoottalkivayuschey or paste special waterproofing material - membrane.
Preparatory works are in several stages:
- For fast and efficient leveling wall mount a frame made of metal profile. Wooden sticks are not suitable for these purposes, since they are not suitable for use in a room with high humidity.
- Side of the square metal furring for gypsum board make the rate of not more than 40 cm. It should be durable, to withstand a load of sheet and tile.
- To strengthen the structure under the sheet of drywall plaster put mesh.
Pursue alignment of walls drywall in the bathroom under the tile There are other ways:
- for example, using a mixture of gypsum and dowel-nails. In this case, the sheets are securely fixed by all the wall, and a smooth and sturdy vertical surface tileable.
- Fasten drywall to the wall and polyurethane foam. Plus, this method is easy to install and low consumption of materials. It is important to constantly re-examine the evenness of the surface, since the foam is grasped through 20-25 minutes.
But these methods should be avoided, just plaster wall.
choose material
Before laying tiles on plasterboard, you need to pick the right material. This issue should be approached carefully, because of the tile and quality depends the quality of its styling.
The choice of tiles are guided by:
- The qualitative pattern. In substandard tiles image blurred or smeared, uneven line. In order not to spend your time and money such material should not buy.
- smooth surface. Perfectly smooth material is hard to find. Even the highest quality tile has its flaws. Therefore, experts determine the degree of flatness, putting one tile to another face. In this way, evaluated abutment density and size of the gap between them. We should also pay attention to the corners, which should be strictly straight and smooth. To determine the evenness angles tile is applied one to another by different parties. The reverse side of the tiles should have a clear picture, the name and brand of the tiles must be clearly visible.
- The hardness of the tiles. Without special equipment, this figure difficult to establish. To determine the required level of hardness is possible by indirect indicators. Perepalennaya tiles (It becomes brittle during operation) It has a brilliant reverse side. The degree of hardness of the tile as determined by the sound - when small impacts quality tile emits muffled knock.
In determining the amount of tiles more convenient to consider it piece by piece, and not the piece. or use calculator tiles.
How to choose a tile adhesive for drywall
The choice of adhesive further defines the quality of the installation of the tiles on the drywall in the bathroom.
Usually independently prepared solution on the sand-cement basis is not appropriate, because when working with drywall need more adhesive composition.
For laying ceramic tiles on plasterboard used tile adhesive, wherein improvers and contains various components. When choosing, make sure the minimum permissible thickness. This indicates, that the solution will contain correct composition. Of course, it is useful to read the manufacturer's instructions.
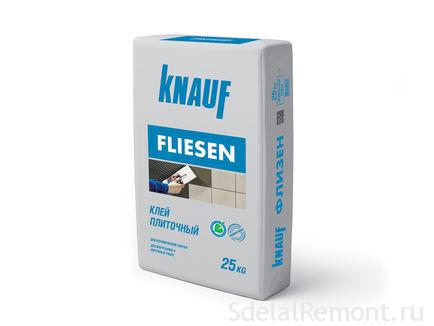
Most Reliable and popular tile adhesive based on cement KNAUF Flizen. Produced in a dry blend with special additives. It is used for interior and exterior tile work, It possesses good fixation to the sheet GCR Knauf, recommended by the manufacturer.
Among the various options it is worth noting tile adhesive Ceresit CM 11. It consists of Portland cement, fractional sand and polymeric additives. Suitable for laying tiles on the drywall in the bathroom and other smooth surfaces. It is used in high humidity conditions and is suitable for both small, and for large size tiles. 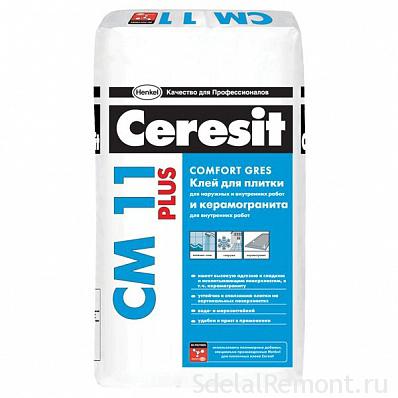
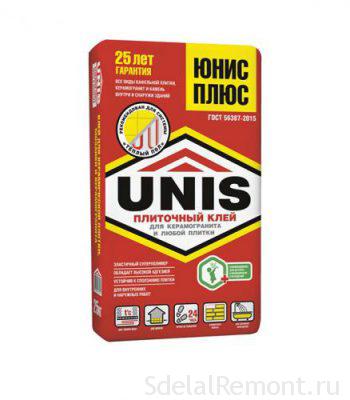
From inexpensive options, for interior and exterior use can be recommended tile adhesive Eunice Plus. Good holds the ceramic, mosaic and tile. Retains its properties and when used on the terraces and balconies. It has good ductility indices, bond strength and normally carries the temperature drops. of the minuses, the fact of its turnover.
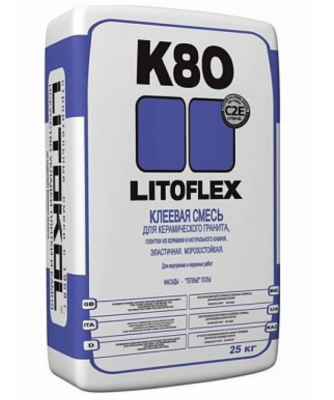
For optimum performance, recommended tile adhesive Litokol K80 (Litokol). Produced in a dry blend with special additives. It is used for interior and exterior tile work.
Find out how much tile adhesive will need to purchase, will help Online calculation calculator.
A solution is prepared and used according to package instructions. For stirring the mixture using a mixer building. Knead the adhesive in small portions, so it does not lose its properties.
detail, what firm to use tile adhesive.
Cooking tools
To perform the laying of tiles on the bathroom plasterboard is necessary to prepare such tools:
- notched trowel, For details on selecting a comb;
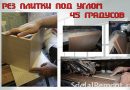
- Tile or "grinders" with diamond wheel;
- bucket for mixing glue;
- mixer or drill nozzle;
- building level and plumb;
also need noughts to mark the gaps between the tiles.

Laying tiles on plasterboard
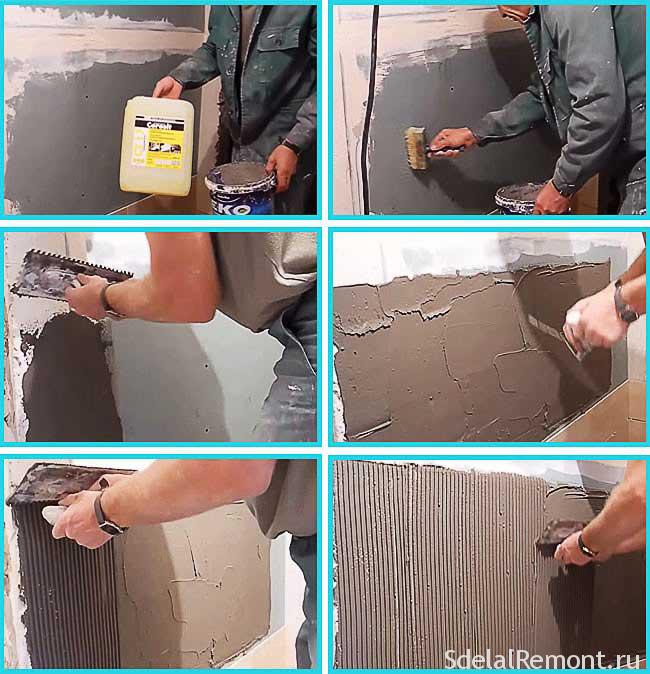
Work on laying ceramic tiles on gypsum board is easy. After mounting the sheets do not need to conduct any additional work. Given the structure of plasterboard, Be sure to treat the surface primer. Apply the composition of deep penetration with antifungal properties. It is applied in two layers roller with special care on the sutures.
It relies on technology to pass the entire surface waterproofing mastic. But, Very few people make, but constant contact with water is necessary!
initiate proceedings tiling on plasterboard with the selection of its layout scheme. It is necessary to correctly calculate the number of rows vertically and horizontally. For this:
- The number of whole tiles in a vertical row is considered, from the ceiling. Then, cut a number of get down, where it is better to hide.
- With horizontal row layout have, little tinker. First lay out the tiles along the wall on a dry surface. You then define the width of the gap after the last whole tile laying. If it is more than half the number of tiles that are starting from a corner, which is most evident. With a small gap can be used symmetrical variant. In this case, the tiles start from the center of the room to lay, moving sideways. The adjusted angles of symmetrical segments of tile pieces. It may even be inlays.
To work on tiling in the bathroom on the sheetrock is quick and easy, coated vertical and horizontal markings on the wall:
- Vertical lines make with the level and the rules, in increments of two or three tiles;
- For horizontal marking is necessary to determine first "zero level". In the first corner point point, which is then transferred to the other corners, Using a builder's level. Then a cord with dye beat off the line on the wall, and equate which ranks.
At the bottom of the wall, under the lower edge of a number of rings, attached profile PP (OUT). It will serve as a support, until the glue grabs.
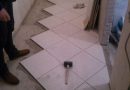
After applying the marking directly proceed to laying tiles:
- Start with a corner or from the center, depending on the selected scheme.
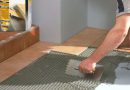
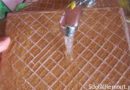
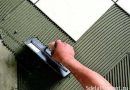
- Is applied on the tile adhesive prepared, it is spread notched trowel and set at the selected location.
- After making sure that the provisions of the tiles, it is pushed a little. Do it without effort, until the edges speaking glue.
- To control the width of the gap between the tiles using special mounting crosses made of plastic.
- After that, as a first lower row of finished, you must take a break, tile to grasp and stood a good support for the following series.
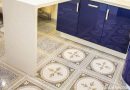
After all the work the tile is allowed to dry. After about three days kep safely seams. For this purpose, a special grout, which is applied with a rubber trowel. Excess grout clean simple sponge.
Performing work on laying tile in the bathroom on the sheetrock, must comply with certain requirements:
- apply adhesives with good adhesion to ceramic and cardboard surfaces;
- the mixture must be water-resistant, as the bathroom is a room with high humidity;
- on the surface of the walls should be applied waterproofing material;
- Be sure to use acrylic primer deep penetration with antifungal activity.
When the technology of laying tile on the surface of the drywall, this work is not complicated and can take no more 5-7 days in a standard bathroom.
Useful tips and tricks
For tiling approach not any drywall. It is desirable to use sheets gipsovolokonnyh, which denote abbreviation GVLV. If this is not possible, You can apply a standard drywall treating it with a PVA. For additional tile fixing, use the net, fixed construction staples. But this questionable economy. A better option is to process mastic waterproofing formulations.
other recommendations:
- The surface of the sheets before facing tiles primed in two layers with an interval of one hour.
- The primer is applied by brush or roller.
- A more effective method is to apply a tile adhesive notched trowel. Smooth edge is applied to its surface, and distribute the gear flat strips.
- The adhesive mixture is desirably diluted to a thick cream. In this case, increased adhesion properties of the adhesive. Too liquid mixture will flow on the wall, and thick it will be difficult to distribute on the surface.
- tile, during the installation of the surface, gently pressed his hands. For floor tiles of large size using a rubber mallet.
- The work is best done in several passes. after laying 2-3 series should take a break of one hour, for curing the adhesive. In this way, will be removed from the lower ranks of the load and be able to avoid sliding and deformation.
- Dry the surface should not be less than a day. This time is enough for thorough polymerization and fixing glue.
- On the surface of joints after grouting applied special varnish, for protection against dust and dirt.
- grouted spend two - three days after laying tile.
- Rubbing grout is best done on a diagonal, otherwise you can ruin the work result.
- After removing excess grout the tiles with a damp sponge, and then dry cloth.
The process of laying tile on drywall in the bathroom is not very different from the other facing surfaces. The result of this work is the Beautiful, smooth and durable surface with a long service life.