Many of the issues concerned, what to do at first tile. At first glance it may seem, that there is nothing difficult in it is not, but, fully considered the list of works, which is to be master, It develops a slightly different impression. But nonetheless, though quite a lot of preparatory processes, Yet they need to pay special attention, as it affects the durability of the coating.
preparation stages
In itself, the beginning of the tiling implies full training base, which, respectively, It can be divided into several stages. Among them are the following action steps:
- Preparation of materials and tools.
- Substrate preparation.
- Waterproofing and additional protective coating compositions.
- And the last stage is the markup.
But in order, to fully understand the importance of each stage, should consider them separately in more detail, that will help to understand their role in the whole process. And also, how they affect the performance of the product.
Materials and tools
The first step in the beginning of floor-laying becomes training tools and materials. Since the tile is placed in a room with high humidity and constant temperature changes, particular attention should be paid to the choice of materials is. Besides, necessarily have to carry out the primer, applying additional waterproofing and protective compounds, as we'll discuss a little later.
First of all, we note the necessary tools:
- Tile or Bulgarian.
- Roulette.
- Building level, it's desirable, laser.
- plumb.
- Tic or tile leveling system.
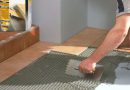
- A set of spatulas (Conventional gear and). The size depends on the type and size of tiles.
- Containers for mixing solutions.
- rubber mallet.

Considering the necessary materials, should purchase:
- the primer.
- Antiseptics and anticorrosive compositions.
- waterproofing material.
- sealant and zatirka. When using latex or epoxy grout sealer can not provide.
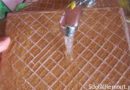
- adhesive composition.
- AND, properly, tile itself.
The list of necessary materials and tools can be considered closed, and now proceed directly to the very bottom.
Substrate Preparation for processing
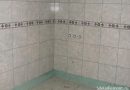
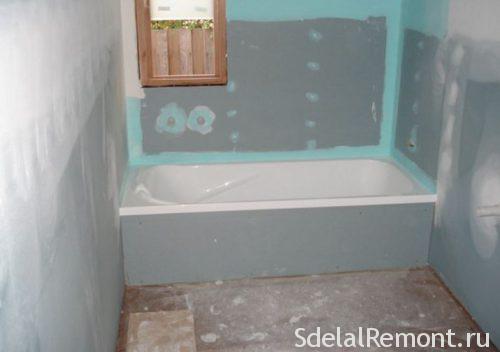
begining tiling in the bathroom It provides the first training base case. In particular, must be completely clean it.
- To begin, the room is released from furniture and sanitary ware, then it is necessary to dismantle the old coating. In the case of tiles - strays using chisels or perforator. When, If the tile is planned to keep to maintain the integrity of, it uses only a chisel, if the materials are later discarded, the use of the gun will perform the work much faster
- The next step is to issue a decision with a view of the place of installation and plumbing. In more particularized, should decide, It will be carried out first cladding or installation bathroom. This decision depends strictly on the type of plumbing and future plans. When, when the tub is mounted on the frame, and the surface beneath it will be completely closed, laying tiles under the bath can not provide. Such a move will help save money on materials.
- And the last step is the primary training base its alignment. For this purpose we hold coverage analysis, and in the presence of mounds, potholes and irregularities completely eliminate them. This step is optional, since neglecting them will not only increase Consumption adhesive mixture, but also greatly impair the quality of the finished coating.
Important! Even in the case of, when a bathroom is not carried out lining, her waterproofing and protective treatment still held. Also in cases, when it installed free-standing roll-top plumbing, the cladding should be carried everywhere.
In the case of walls, with minor defects (scratched, small potholes and so on.), held plaster surface. In cases of large deviations, must perform plaster, or plasterboard lining, necessarily moisture-resistant.
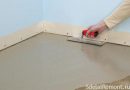
On the same floor, everything is a bit more complicated. The first step is to produce waterproofing, whereupon equalization via screed or self-leveling floor. In the second case, the mixture becomes a good option based latex, which leads to a perfect surface with a minimum layer solution.
Important! When, When you plan to install the system "warm floor», its installation is carried out in advance, before leveling, and further insulated with special film. To save money, the area under the fixtures and furnishings are not insulated.
Waterproofing and protective coatings
Proceed directly to, where to begin laying tiles in the bathroom - waterproofing coating. As known, bathroom - this is the place, where the moisture is accumulated, and the most reliable protection without covering walls or floors can be infected by the fungus. Besides, it provokes change in the base structure, in particular, decrease in the density, what, properly, and causes the mold, which may spread to the entire wall, and even in the neighboring room.
In the case of treatment with walls provided vlagoottalkivayuschey compositions or special mastic.
For floors there are several ways:
- Application of paint with latex segments, The very same ink must be oil.
- Processing bitumen or mineral mastic.
- Laying film.
- Application of web material.
- Or the application of special polymer waterproofing compounds.
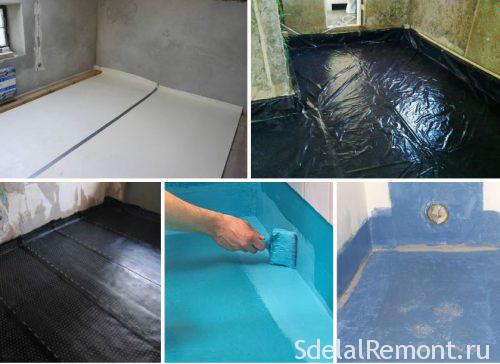
Besides, note, that the floor waterproofing is carried out with an overlap in 15-20 see on the wall.
Application of antifungal compositions
Start laying tiles on the floor involves the application of antiseptic compositions. Today construction market offers a great variety of materials. In individual cases it is necessary to consult directly with the seller.
By applying this type of composition can not completely prevent any contamination on the surface. This factor is very important, insofar as fungus spores or mold secrete substances, which are very harmful to the human body, The very same bathroom, due to its microclimate, It becomes the perfect place for their distribution.
- For proper treatment surface should be perfectly clean.
- Composition itself is applied with a brush or roller as well, as primer.
- Next, you should wait for the complete drying and can continue to work.
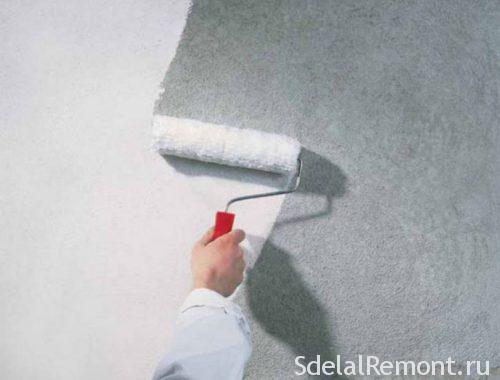
The primer base
Laying tiles on the floor and walls requires prior priming. Such a composition helps to increase the adhesion of the coating to the base. Selection of the mixture is performed individually depending on the base material. Themselves as different types of primer depth impregnation, custom properties, such as antibacterial protection, fire resistance, etc..
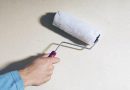
- To carry out the primer is necessary to arm itself with a mixture directly, brush or roller, as well as the special tray, or bucket.
- Process needed every centimeter of surface, itself the product is applied in 2-3 layer.
- Prior to the application of each of them is necessary to wait for the complete drying of the previous.
Marking surface
And the most recent task (immediately prior to the most styling) marking the surface becomes.
- Pre should consider layout diagram, especially important factor is laying tile in the corners, because it all begins with her. And the most important factor is that when laid diagonally.
- Taking an exemplary layout diagram, it is already possible to evaluate all the advantages and disadvantages of each option lining. Besides, performing a "markup" on paper, you can accurately calculate the required number of tiles (if the pattern to perform to scale). This eventually simplify the process of laying himself.
- Following the development of the scheme is to determine, from which angle to start laying tile. In this there is nothing difficult, important to start from the far corner of the door. If it is in the center of the wall, it is possible to start as a right, and from the left corner opposite fence. When, when the door is slightly offset from the center, and the marking begins, and laying on the farthest point from the door.
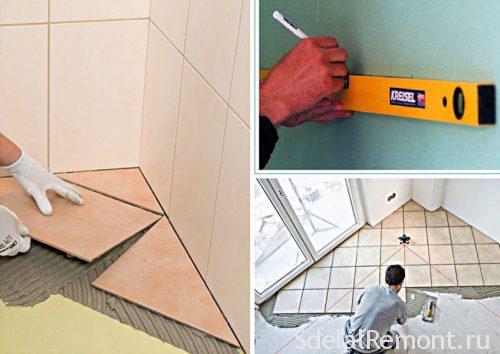
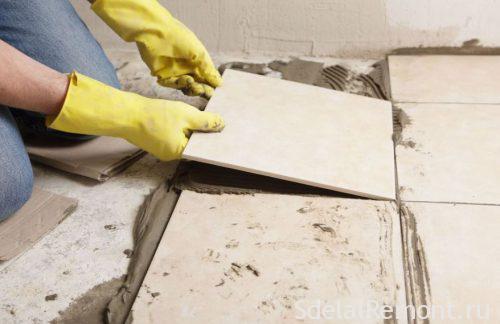
- Masonry wall height is measured in a single row and a bracket is placed for placing second (first laid out in the least). Floor marked surface level, measure differences and exhibited plumbs. After that, rough layout of the tiles, with all the seams, and outlines its position (starting from the corner).
conclusion
In this training completed, Now you can proceed directly to the laying of tiles. An important issue will also, how to put the tiles in the bathroom corners, but we'll talk about this when considering the technology of wall and floor tiles. Incidentally, very often people are interested in the time of your tiling, and note, that there is no clear deadline, it all depends on the adhesive mixture, floor space and many other factors. But anyway, if all the processes of preparation and laying-delayed timing required drying compositions, this period will be not less than 2-3 weeks (during the self-leveling leveling floors, in the case provided for greater ties).
And in the end you can appreciate some videos with tips and advice on how, to begin laying, and how to perform.