As the theater begins with a hanger, so any house or apartment starts from the hallway. Her style and the interior should not just make a good impression, but also in harmony with the rest of the room. In small spaces important to every detail, including the ceiling. Ceilings can be decorated in a classic white design, and contain several levels with different types of illumination. The development and installation of ceiling style with gipsogartona in the hallway can be charged or professionals handle the job himself.
From what we can make a ceiling in the hallway?
Modern construction industry offers a variety of solutions and environmentally friendly materials for interior decoration house or apartment. In the recent past, the ceiling can be a whitewash, painted or wallpapered. Now these traditional and low-cost methods were added and the suspension ceilings with lighting, Ceiling tiles made of modern materials, decorative elements. There are design options using plastic panels, stained glass, mirrors and metallic plates.
Particularly in demand hallway ceiling plasterboard. they are practical, reliable, durable and will allow to realize any designer ideas with minimum effort and funds. Plasterboard in the hall will be more expensive, than painting or pasting wallpaper, in front of them but has a lot of advantages. This suspension design helps hide irregularities in the ceiling of the hallway, remove from view wiring and other communications. There is no need to do anything with the old ceiling; it is completely closed overhead structures. This saves you the cost of repairs. In addition, the ceiling of plasterboard is easy to install yourself and hallway, and throughout the apartment.
It must be remembered, that the repair of the hall is best done in the last turn. First of all, all rubbish renovated apartments will have removed. Secondly, hall design can be "linked" with the design of other rooms.
Plasterboard in the hallway like a work of art
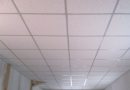
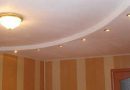
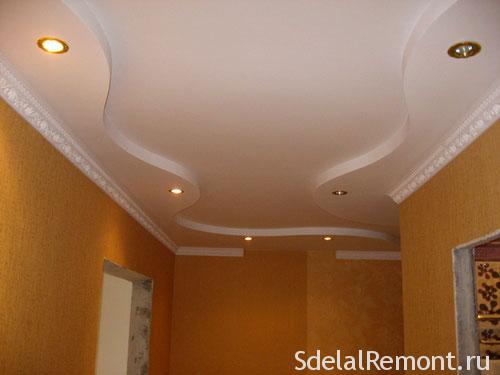
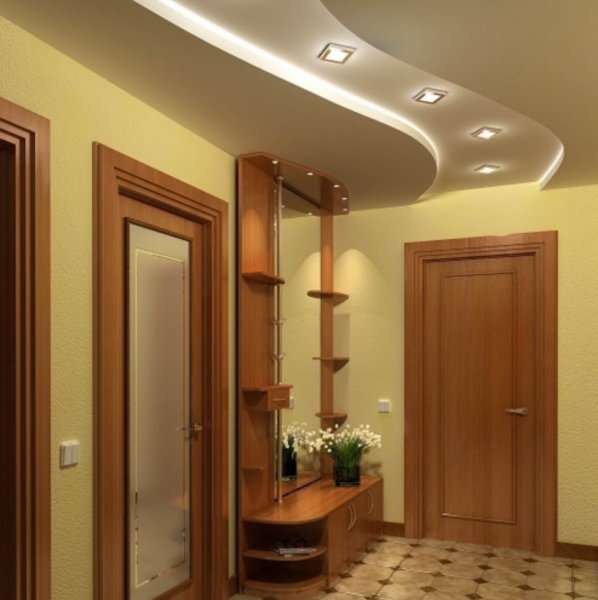
The ceiling in the hallway often small, but he can look for five-plus. Correctly picked up ceiling trim enable visually expand the boundaries of the hallway, make it brighter and more original. Sibling ceiling in the entrance hall of plasterboard with scattered areas spotlights, It will look spectacular in combination with the dark furniture and mirrored wardrobe.
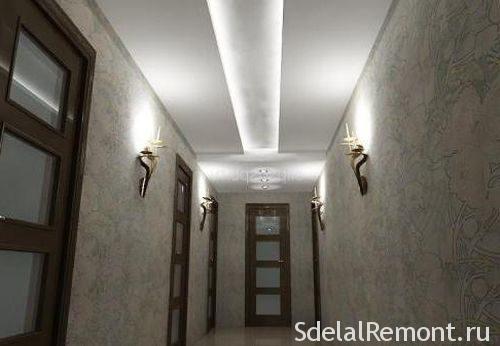
And if the ceiling height allows you two-tier structure, then your hallway will look very stylish and beautiful. To narrow corridors suitable ceiling with clear straight lines. Square or rectangle, colored in a contrasting color relative to the base, will enable visually expand the boundaries of the ceiling and the whole hall. A backlight between levels add aesthetics and mystery.
Finishing the ceiling is:
- matt;
- SLR;
- colored;
- smooth;
- wavy.
Design ceiling in the entrance hall to perform in the spirit of the style of the main buildings. It is best to make a sketch of the future of the ceiling, based on it to make a drawing, measure and dimensioning.
Beautiful ideas ceilings made of plasterboard in the photo
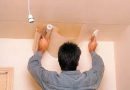
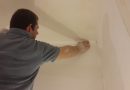
In contrast to the tension ceiling plasterboard is not difficult to make your own hands. Plasterboard has several notable advantages over other materials:
- individual design;
- environmental friendliness;
- reduction in energy consumption;
- increased sound insulation;
- good breathability;
- moisture resistance;
- the ability to install different types of built-in fixtures and hidden illumination.
In addition, the strips of plasterboard can be given a corrugated surface, which will use a variety of design solutions. Easy and stable to external influences, this material is very suitable for finishing ceilings. Sibling ceiling in the entrance hall of the drywall is not hard to do, if you have a minimum of knowledge about the technology, partner and an essential tool. Multilevel ceiling is best left to professionals.


Materials and tools
Suspended ceiling consists of a frame (lath) and skin. To take a framework galvanized steel profiles or wooden beams allowed. For a flat ceiling in the hallway suitable both options. But there are a few features, to consider. Timber for sheathing should be drying chamber with a relative humidity of not more than 15%. Before installation, it is impregnated with special ognebiozashtitoy and allowed to dry. But even with all the rules of the variant for wood, that eventually will lead timber, and on the ceiling will crack. Therefore, most professionals prefer steel profiles.
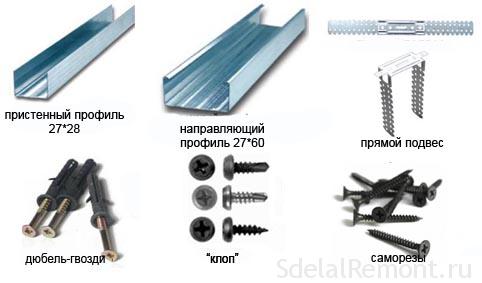
For, to make the ceiling in the hallway of plasterboard with their hands, you need to buy the necessary materials for work and tools. Sheets of drywall There are several types. Hallway is fine standard sheet (GKL) thickness 9,5 mm. also be required 2 type profiles - guides (PN) size of millimeters and 28h27 ceiling (PP) - 60h27 mm. The guide profile fixed to the wall on dowel-nails 6 mm. To increase the sound insulation, must be purchased sealing tape adhesive backed. For fixing the main shelf profile using direct suspension, anchor-wedges, connector sibling (crab), screws PN for connecting the entire structure in a monolithic structure. If the hallway is longer than three meters, required extension metal profile. To trim frame GCR needed black screws for metal 25-35 mm fine pitch, gypsum plaster for GFC seams, reinforcing tape (serpyanka), acrylic primer.
It is equally important to have a complete set of tools needed to work:
- gidrouroven or laser level;
- building level bubble (1-1,5 m);
- lead paint coloring (otbivka);
- usually aluminum, length 2-2,5 m;
- hammer;
- a knife for cutting the GCR (suitable office with replaceable blades);
- roulette 5 m;
- Scissors on metal or Bulgarian with a circle of metal;
- hammer or a drill with the function of the gun;
- shurupovёrt;
- spatulas for finishing.
After that, how it acquired all the necessary, you can begin to transform the hall ceiling.
Properly install a ceiling frame for gypsum board
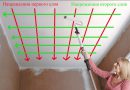
To ceiling in koredore obtain a clean, beautiful, I meet your expectations, and served for many years, mark must be carefully and correctly set the ceiling frame for gypsum board. First, mark out and set guiding profiles. Since they are located on the perimeter of the room, the total length of the perimeter should slightly exceed the length. The resulting value is divided by 3 and get the number of guides (Profile length 3 m). Minimum indent from the old ceiling should be 5-6 cm. If the future will be equipped with ceiling spotlights, this indentation is increased by another 5-6 cm.
We put on the wall mark the first marker or pencil. Laser or hydro-level to carry this height on the rest of the walls of the corridor. Then using a paint cord connecting these points in solid line. To do this we press the cord to the two marks on the wall, We pull it in the middle of the parallel ceiling, and then let go. String hits the wall and leaves a clear straight line. This is the border, by which establishes the guiding profile; there previously drilled dowel holes, nails with a length 40-50 cm apart. On the back side in the profile is glued sealing tape.
It remains to apply it to the line and mark the holes for wall mounting. Holes are drilled in the wall of the perforator, brown-equipped concrete. Profile is fastened by means of dowels, nails. Now you can proceed to more serious work.

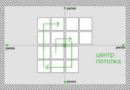
Ceiling profiles are divided into longitudinal (long) and cross (cut into pieces of certain length). To refine the location is marked on the ceiling profiles 60x50 cm rectangles., the distance between the centers of the longitudinal profiles is equal to 60 cm, the distance between the cross - 50 cm. If there is a drawing of the ceiling with such markings, it is easy to calculate the total length of all ceiling profiles and their number.
How best to arrange the longitudinal profiles - depending on the size of the hall. If the width of the room 3 m or slightly less, it makes sense to save material to arrange them in width, rather than along the length of.
The longitudinal profiles are attached to the ceiling with the help of direct suspensions. They have on the marking at a distance 45-50 cm apart. The suspension is applied to the ceiling, marking the line in this case must pass through the center. Marks the spot for mounting, then drilled holes. The suspension is attached to the ceiling using anchor-wedges.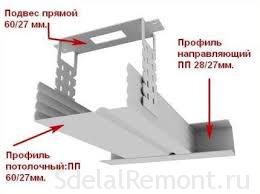
When mounting one end of the longitudinal profiles is put into the guide profile. To the ceiling level was the same everywhere, installation of longitudinal strips closely monitored. You can use aluminum rule, pressing its ends to the lower edges of the guide profiles. In this case, the longitudinal profile rests on the rule and fastened over the entire length to the suspensions screws PN. Often, instead of regulations to align the horizon stretched yarns used. Another option - use laser level.
The ends of direct suspensions, protruding below the profile level, folded up or cut with scissors, metal. Top crabs are inserted into the profile at the intersection of the transverse lines. They will be mounted transverse profile.
This final frame member under the ceiling plasterboard pieces cut using scissors or metal grinders. Its length on 1 see less, than the distance between two adjacent longitudinal profiles. These pieces are inserted into the crab and secured with screws. Additionally, direct connector is fixed with screws to the longitudinal profile. The frame under the plasterboard ceiling hallway ready. It is necessary to check the strength of the joints, trying to undermine the frame. If he moves, It does not prevent re-tighten all screws or add dozens of new. The framework must be monolithic. Detailed the secrets of working with a profile https://sdelalremont.ru/sekrety-iskusstva-pri-rabote-s-gipsokartonom-i-profilem.html
Headlining frame plasterboard
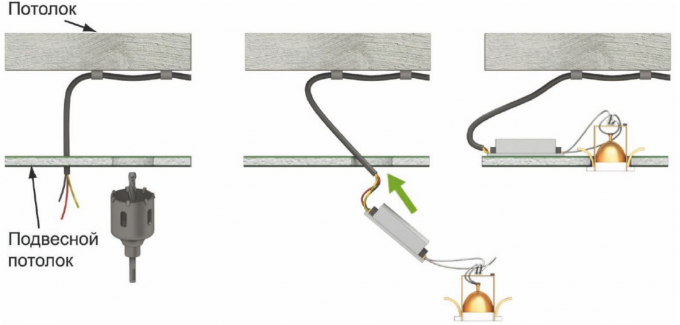
Before proceeding to the installation of drywall, should mount wiring. All wires are placed in a special corrugated tube. The wires should not be based on metal.
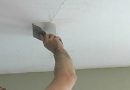
Sheets GCR attached to the frame with screws with fine pitch. The distance between the screws 15-20 cm, and before the sheet edge - at least 2 cm. heads of the screws slightly recessed into the sheet. We need to follow, to all joints sheets were in the middle of profile. If the sheet covers the entire profile, the excess part of the sheet must be cut. Plasterboard attached not close, and with a clearance 3-4 mm. After that, as the entire ceiling would be sewn up, and sheets and gaps therebetween impregnated with a special acrylic primer.
Then joints rubbing fast-drying gypsum mixture using narrow spatula. In wet putty utaplivajut reinforcement tape. Also closed up all the recesses of the screws in the middle of the sheets. When everything is dry, begin to finishing the ceiling plasterboard in the hallway. Apply finishing plaster, special spider veins removed unevenness. At the end of slotted holes fixtures or decorate LED tape.
And in conclusion
Plasterboard ceilings hallway make quite capable of any, who knows and loves to work with his hands. true, in this case can not do without an assistant. A multi-level ceilings arrangement is better left to professionals. Indeed, in each case there are a lot of nuances and secrets, unknown newcomer.
In addition, review the video to work with GCR and read how to paint the ceiling without glare.