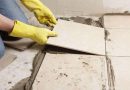
Many people think about the fact, How is laying the tiled floor with their hands. And in particular, how to do it efficiently and quickly. The process itself is not very complicated and, and therefore able to cope with it even a novice, important to strictly follow the instructions, we shall proceed to discuss.
Where to begin work
The first thing you must decide? how to carry out installation work in preparation for tiling, and in what order to organize the process. For this purpose it is necessary to fully study the stages of tiling. In total, the whole process can be divided into the following parts:
- Preparation tools and materials.
- surface preparation.
- marking.
- Laying tiles.
- Zatirka.
Here is a general list of steps, we consider them in more detail for laying tiles on the floor and walls.
Tools and materials
In this case, the first stage is the preparation of tools and material selection. Talking about the tools, required is a standard set tiler:
- A set of spatulas (normal, toothed, rubber)
- Level.
- Measuring tape and pencil.
- building mixer.
- Tile or Bulgarian.
- Containers for solution.
- Select crosses for joints.
But with the material things are a bit more complicated. The choice of adhesive and auxiliary devices will depend strongly on, some tiles lay in the bathroom. Therefore you need to clearly determine the choice of cladding material in advance (It can be done, Read our article).

And note, that at this stage many mistakes when laying tiles, has not yet begun its. In particular, it is the wrong choice, as the most tiles, and adhesive or alignment systems (SVP, noughts and pr.).
We will not greatly deviate from the topic itself stacking, but for those, who need to offer to read our articles about, how to choose crosses for tile, What is SAP and how to use them, How to choose a tile, and which adhesive and grout pick.
Facing the sexes
so, note, if the goal should find a solution to the issue, how to quickly put the tiles, then you need to start preparing it from the floor. And then look at all the stages of laying floors, and some of the secrets of the proper conduct of the work.
Preparatory work
As mentioned, their primary focus is the right choice of materials. After that you need to start preparing the surface. By itself, the training is carried out as follows::
- Old coating entirely dismantled, and the surface is cleaned of debris.
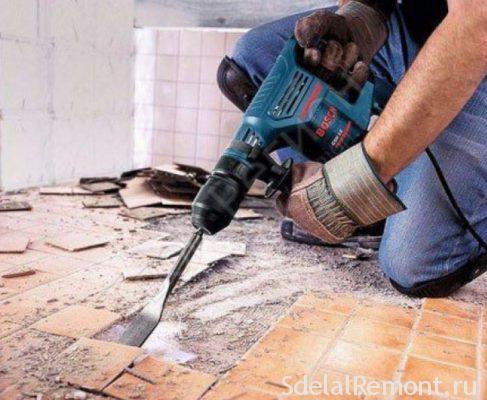
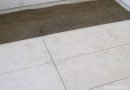
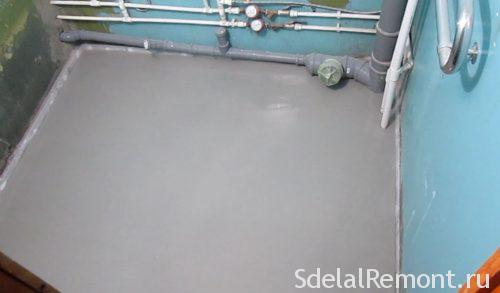
- Next, you need to check the flatness of the floor (possibly, it will need further align).
- If the floor is not flat (There are more variations of height 1 cm), it is necessary to ties holding.
- In cases, if the floor is not large deviations can move ahead and perform a preliminary layout of the tiles.
note, that many of the "masters", Absorbed desire to do everything quickly and correctly to forget about the importance of layout. In particular, forget that, that may need to trim tiles, in consequence begin laying the corner and eventually cut portions fall on the most prominent places, which completely spoils the appearance of the room.
To avoid this, you must pay attention to all the secrets of your tiling, in this case carry out a preliminary layout and accurately carry out measurements. And besides, you need to think where to put all the same tile segments, so they do not catch the eye.
Farther, respectively, you need to measure out the required lengths and cut tile, what is done with the help of Tile or grinders.
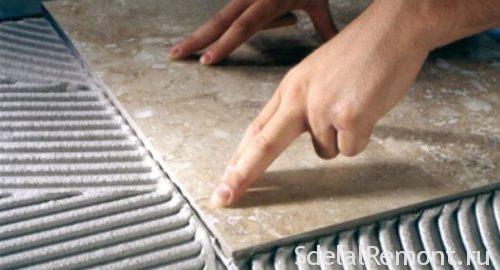
Laying tiles
You can now start to finish. And it's time to learn, independently put a tile. Naturally you want to align the surface, if necessary, primed.
Consider the whole process as a step by step guide:
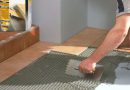
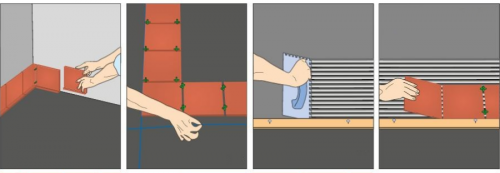
- Knead solution or adhesive mixture. It should be uniform. For this purpose, we pour water into the vessel and pour the mixture gradually while stirring it thoroughly.
- Next take toothed spatula and the mixture was applied onto a base, as well as the tile itself.
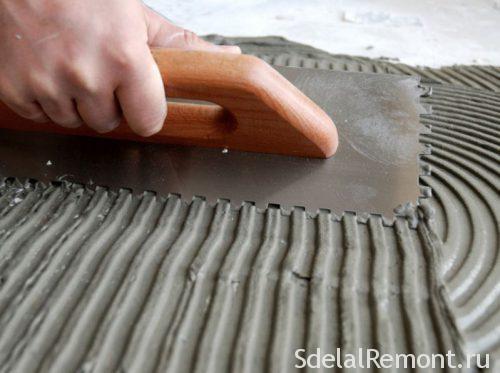
- We are putting a tile and press it slightly, to properly distribute the adhesive mixture.
- If you are more interested in, how to quickly put the tiles, everything for seams is best to use a floor leveling system. It is also possible to use the dagger, but in this case, the work will be a little longer.

- Before laying the tiles need to be determined later, some tiles on the floor to make a gap.
- Now we lay out a few tiles, then align them relative to each other. To do this, you can tap on them with a rubber mallet. But do not make too much effort, because there is a risk to break the tile, and besides it is too low to lower, in consequence of that will have to take it off and put again.
- Further, the same manipulations are carried out with the rest of the tiles.
In this way you will be able to put the tiles correctly, step by step.
Wall mounting
Now it is necessary to pay attention to some features of tile on the wall. The technology is very similar to the arrangement of the floor, but at the same time, there are a number of characteristics, namely:
- If the floor is allowed to deviation 1 cm, in the case of the wall becomes the maximum allowable 5 millimeters. Otherwise, the tiles can just float during installation. Therefore it is necessary to carefully check the verticality of the walls and the absence of bumps or depressions in it, and if necessary to plaster.
- alignment should be performed if necessary, that is done by the plaster or drywall arrangement.
- You must primed surface, and ideally hold a waterproofing of walls in the bathroom, especially if you use plaster or drywall.
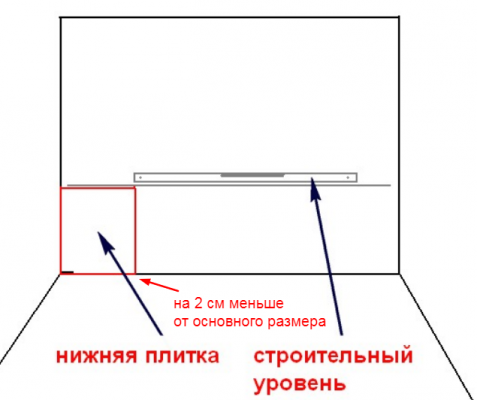
- Next, you must determine the height of the tiles and at the height of, less on 2 cm, than the height of the tiles, determine the level of. Repel the ink thread on the first row of the perimeter. Above the thread mounted strap, usually, use profile plasterboard, and on which will be laying the first row.
- The bottom row is placed in the least. It will need to be trimmed, wherein unsuccessful pruning well can be masked using the corner layouts.
For details on installing ceramic tiles on a wall and nuances of operation, visit the website.
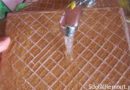
Zatirka
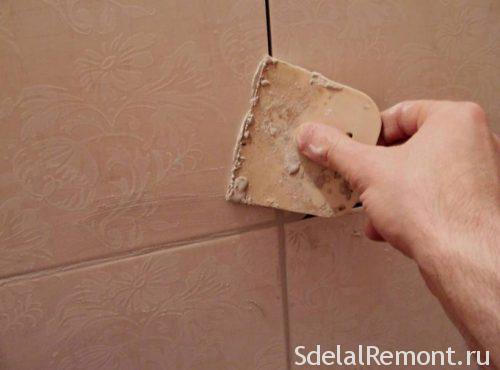
And the final stage of work becomes floating, and let's look, how to do it correctly and put the tiles. must choose the right trowel mix. After a start to work.
- Dilute the mixture is necessary in a small tank, because she quickly grasped, and if you have time to dry out a bit, it is no longer possible to use it.
- Take into service a rubber spatula, recruit him a little mix and dent it into the seam. The more effort, the more likely it is full of voids in the seams and, respectively, better sealing seams.
For more details about, how to choose a grout and how to apply can be found in our separate article.
Well, you have to be congratulated, insofar as, reading the pictures, you already know, independently put the tiles in the bathroom, and for the full consolidation of knowledge offer watch a few videos.