Proper preparation walls for painting - the most important stage of the decorative finish, providing aesthetic result. Work is in alignment and Shpatlevanie walls, and it can be done in several ways, differing in complexity and time-consuming. In all cases, the basis - is the starting layer of putty, which can be supplemented with additional reinforcement and decorative material, to achieve greater durability and smooth coating. Besides, surface must be sanded. What You Should Know, to make the painted wall ideal?
Alignment walls and preparation for Shpatlevanie
To get a perfectly smooth wall, their surface must be pre-treated with, eliminating even the smallest differences in height and all visible defects of the base. Depending on the initial state of the walls to align them in one of several ways:
- Preparation of draft coverage.
- plastered.
- Finishing gypsum sheets on the frame structure.
Grinding will be suitable for this, if pure concrete foundation or old plaster has no significant irregularities, cracks and other defects. In this case it is sufficient to remove the old coating (wallpaper, paint, decorative plaster, etc.. d.) and remove the thin upper layer of the blister plaster or concrete using the sander or bar with sandpaper. Before, as it will be done with plastered walls for painting, base should be covered by two layers of primer, antiseptic and antifungal impregnation if there was mold. As a result, measurements of elevation changes should not exceed 2 mm.
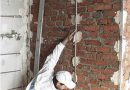
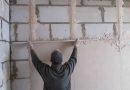
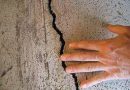
If irregularities are significant or base has significant defects, must be fully plaster walls or sheathe the walls of plasterboard. previously flaws major surface are sealed solution. Old finish must be removed completely, not just the damaged areas, even if it seems, that part of it is strong enough. Then apply a new layer of plaster or plasterboard sheets are mounted on the relevant technology.
When the preliminary alignment is complete, must be, as is the case with polishing, cover the surface primer. Embarking on further work can be 5-6 hours, so how to properly putty walls for painting only on perfectly dry - better to wait more, than putty applied to the wet wall.
types of fillers
Exists main types of fillers. choosing, the better putty painted walls, should take into account not only the advantages and disadvantages of these options, but also the characteristics of the premises.
| View putty | dignity | disadvantages |
| Gipsovaya | health safety, no shrinkage, quick drying. The presence of additional properties - heat- and soundproofing qualities, fire. Plastic, possibility of applying a thick continuous layer (to 60 mm). | Gigroskopichna, not suitable for bathrooms, pools, kitchens. Rapid solidification - to prepare the mixture immediately on the wall will not work, as it dries in about 45 minutes. The cost of gypsum above, than that of cement. |
| polymer | high strength, resistance to temperature fluctuations, no shrinkage, high elasticity, excellent adhesion to any surfaces. | High price. |
best embodiment, in this way, will be the polymer coat, since it is perfect putty walls can be in any condition. Besides, it is easiest to work. However, the choice may be limited budget.
shpatlevanija technology in stages
you need to prepare shpatlevanija:
- container volume 15-25 l;
- assembling mixer or a hammer with a nozzle-scapula;
- putty knife;
- with a suitable roller hairiness;
- grinding tools.
Floor along the walls should be closed paper or polyethylene, because I got on a decorative floor covering plaster will not be easy to remove.
Application layer kickoff
It could seem, that plaster or concrete wall itself is quite suitable for inking. However, even a perfect plaster walls is not suitable for painting, and understand that, how to prepare the wall for painting, must. This is due to the fact, that concrete and plaster are porous and hygroscopic materials - they will quickly absorb all the moisture from the paint, do not allow to put the finishing material evenly. Because of this change tint wall, stood out even small irregularities. Caulking will not be shown to all these shortcomings.
In the first place on the prepared surface of the wall plaster is applied to the starting. In its structure, it is between the plaster and putty - it is not as porous, but still it does not make a perfectly smooth wall. The composition of this material includes gypsum and lime wholemeal, that allows you to make the coating layer is quite thick - up 5 mm, and finally to hide all the irregularities. When this coat is not cracked even without reinforcement.
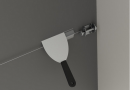
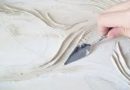
Apply a coat using a wide spatula. Without experience it can be inconvenient to use, but it is recommended because of, that the sharp corners of the tool joints and wall-treated areas form small bumps on the surface - the more they will, the more difficult it is grinding process. Narrow spatula is useful for the treatment of hard to reach areas and smoothing small imperfections cover. The tool should be kept at an angle of 20 ° -30 ° to the wall.
It is also important to take into account, How many times shpaklyuyut wall. The answer is simple - to achieve perfect flatness. Usually, it is missing two layers of 3-4 mm; the second should be applied after drying of the first, shifting joints trimmed portions. Drying must occur naturally, without the use of a hair dryer, heat gun, etc.. P.; should also avoid direct sunlight on fresh plaster. When the last layer has dried, which will take 6-8 hours, surface should be roughened, to remove all minor irregularities.
Starting already putty can be painted, but the result is not very high quality because of the grain and the porosity of the material, though these parameters it and less, than the plaster. If you need a perfect finish of the walls for painting, complicated application technology topcoat.
Finishing putties
The finish coat for painting walls has coarse inclusions, therefore, it allows for a smooth and uniform surface. Because of, that the constituent components of the mixture a very minor, hygroscopic it reduced - the paint will not be able to soak deep into the surface and will lie evenly.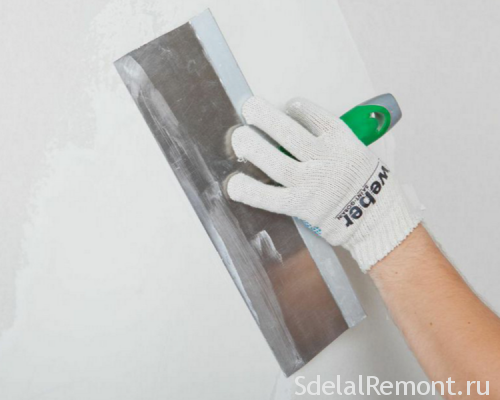
Finish application technique similar putty conventional method, the only difference in the thickness of the layer - it should not exceed 2 mm, otherwise finishing crack. Besides, with a thin layer of harder err, and on the surface do not exactly appear bumps and dents. However, shortcomings, associated with the angles and joints spatula, will also be present at the conclusion of. Therefore, after application of the putty again made less abrasive grinding with sandpaper.
The same question arises - how many times putty painted walls? If necessary, a second coat of putty finish, but usually missing and one. After sanding work, check the light - light from the lamp is directed at an obtuse angle to the wall, while all the irregularities will cast a shadow. They are easy to find and skived grinding tool.
When the wall is completely dry, it should be cleaned of fine dust with a dry cloth, broom or vacuum cleaner. Thereafter, the surface layer is applied two coats. When it dries, you are ready to paint. what better putties pick?
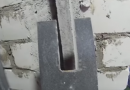
Reinforcement "cobweb"
To create high-quality painted walls it is recommended to use a cobweb will protect the wall from cracking. To prevent this, can enhance the finish - it uses gossamer wall for painting.
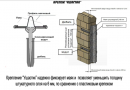
Gossamer - it fiberglass paint in the form of a fine mesh; it adheres to the layer starting putty before overcoating. Besides, should be reinforced with a starting putty, as it shrinks, which can lead to cracking.
Fiberglass is made of glass fibers, making it impervious to moisture, chemicals, temperature changes. It is durable and is ideal for strengthening the filler layer. Besides, He is very thin and has no relief, so that no irregularities are not tread on the surface of a wall decorated.
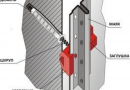
Glue is quite simple cobweb; to get a perfectly smooth wall for painting, We need to exactly follow technology:
- Wall surface smooth thin layer of adhesive applied.
- Glass fiber strips are attached to the wall. They can be of any size, most importantly - the right to determine the front and back sides of webs, otherwise the material will bond with the surface worse.
- Paint the canvas and then straightened his arms and rolled roller, to remove it from the air bubbles. It is important to see to it, to edge webs docked smoothly with the corners premises. If necessary, cut off the extra edge.
- Top spider is greased with glue, until the whole body is saturated. Clay will play the role of a primer, which will reduce the consumption of paint, and provide a better grip finish plaster reinforcing layer.
- The following bands are glued lap; it is recommended to stick them parallel to the floor.

Complete drying adhesive takes hours, then you can begin to spray the finishing putty. Besides, can be painted directly on the glass tissue - in this case an aesthetic relief appear on the surface of the walls. Good finish shpaklevkadlya walls We need only to, to obtain a perfectly smooth surface for painting.
grinding Features
The main rule is that the grinding, it is necessary to work with a perfectly dry surface, before processing it primer. The secret - is to use a wide spatula when applying putty and use of light in grinding. Details of the walls of the grinding technique.
The first thing to decide, the better the polish shpaklevki- walls after the tool selection will depend on the type of material (start or finish), as well as the type of surface. Based on the selected area of the walls of one of the following tools:
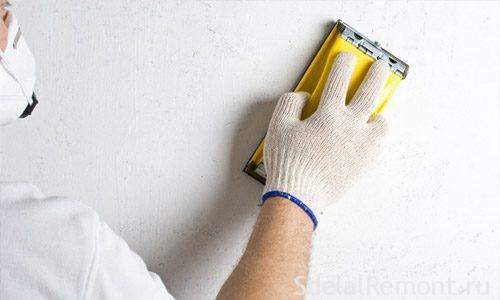
- block of wood with sandpaper - for small areas, which are easy to handle manually;
- electric sander - for large surfaces, it should be taken into account, that the joints of the walls in any case have to handle arms;
- if there are projections on the wall, bas-reliefs, and other parts with complex geometry, suitable machine with an eccentric.
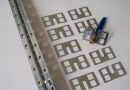
purchased tools
If a piece of wood seems too inconvenient, for manual operation, you can use a special device with a handle and clips, allows you to change worn-out sandpaper quickly. Instead of paper you can use an abrasive grid.
The grid is preferred due to the fact, what, Unlike paper, it is not clogged with dust and wear out more slowly; but it is more expensive. The price difference is offset by the amount of paper required - in order, to get the ideal wall for painting, It needs a plurality of sheets. In order to economize, do not buy cut paper - cut it yourself is easy, along with crammed scissors.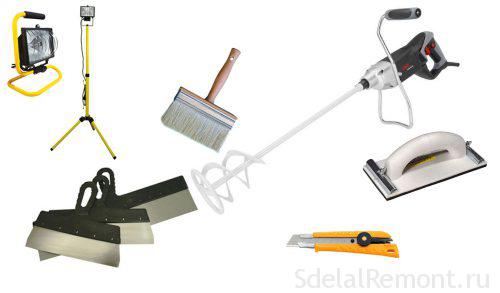
Grit grinding bar depends on the type of furnish: for starting putty suitable grid size 120, for finishing - 80 or 60. Probably, You have to try several variants of grain - to start with the rough, removing the most visible surface flaws, then use smaller and smaller, yet when covering the wall does not cease to appear the shadows.
Sanding machine easier to use and allows you to complete the repair quickly; Besides, it can help to get a really perfect surface. However, to get power tools for the treatment of a small area is not always cost-effective.
Grinding device homemade
Make the device with your hands have, if necessary sanding the walls before painting in remote, small plots, to whom do not get bulky bar. Homemade instrument made as follows:
- cut plastic profile is cut in such a way, To obtain a wide band around 70 mm;
- on the one hand to the profile of sandpaper glued using double-sided tape;
- end of the segment is cut at an angle in the form of an arrow.
If desired, can be cut and paste multiple tapes with different grit paper. We must work angle, and trim it as abrasion nazhdachki - the principle is the same, like when you sharpen a pencil.
work rules
Before you start grinding to protect the premises from dust - a film of polyethylene closed furniture, window and door openings, decorative floor covering. We must work in a protective suit, mask and always with a respirator.
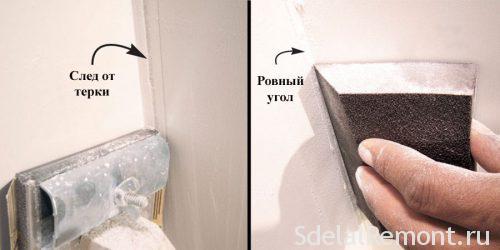
Grinding begins from the wall angle, followed by moving down, processing a strip of about one meter in width. Thus it is necessary to make movements in a spiral, gentle pressure to the tool. Too much should not push, as the ideal level walls in this case will not work - the top layer of putty simply erased.
If in the process will show some groove, should bring the work up to the end, and then seal the defect filler. All work should be done with sandpaper or mesh with a grain - it can be changed, when the whole wall will be processed.
In this way, technology puttying walls for painting is simple - the main thing, to observe all stages of the work and find the right materials. To achieve a flawless finish, it is also important to paint smooth properly prepared wall - it needs find a suitable roller hairiness. The rule is simple - the lower the surface roughness, the shorter pile. So that, if Shpatlevanie will be carried out correctly, nap require a minimum, because the wall will turn out perfectly smooth. BUT, how to paint without divorce, it is in the next article.
A selection of videos on the preparation walls for painting